Showing posts with label desserts. Show all posts

Wednesday, July 30, 2008

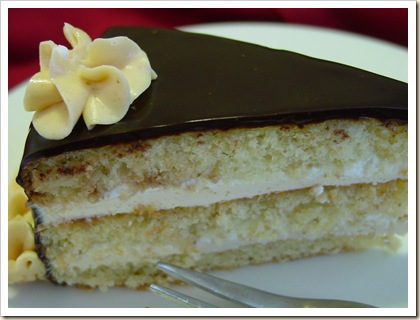
Filbert Gateau with Praline Buttercream

Kristen's Food July 2008 140

It's the end of the month and time for another Daring Baker's challenge. I have really loved being a part of the Daring Bakers and trying new recipes each month. It is fun to see how all of the other Daring Bakers interpret the same recipe.

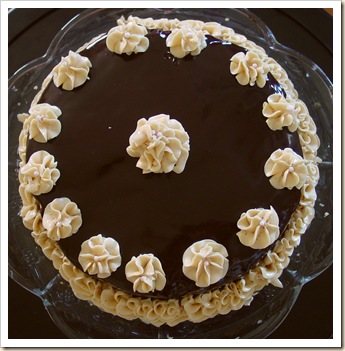
This months recipe was a hazelnut cake which was brushed with a simple syrup and layered with praline buttercream and whipped cream. The whole cake was then glazed with a dark chocolate ganache and decorated with more of the praline buttercream. Nothing in this recipe was really difficult, there were just many steps so you had to plan it out and do a few of the steps ahead. The only difficulty I had was in shelling the hazelnuts. I tried everything, toasting, blanching, steaming, toasting again. I ended up enlisting my husbands help and peeling the remaining stubborn hazelnuts one by one. Next time I would shell out the extra money for the pre-shelled hazelnuts. Apart from that little set back, everything went pretty smoothly. I didn't have a 10 inch cake pan so I went for two 9 inch cake pans. The layers turned out pretty thin but all in all it worked out perfectly. I also left out all of the alcohol and replaced it in many places with almond extract.

All in all, this was a fun challenge with delicious results. I loved the cake with it's slightly chewy nutty texture and the praline buttercream was light and smooth with a nutty caramely tang. The bittersweet chocolate just brought the whole thing together with it's velvety rich flavor. I would love to make this again with almonds or pistachios for a change in flavor and texture. Give this a try but don't forget to pace yourself. This isn't something that you can finish in a matter of hours. If you do your prep it comes together as simple as can be.

Check out what all of the other amazing Daring Bakers made. There are so many amazing cakes out there. Thanks to Chris from Mele Cotte for this fun challenge. I can't wait to see what we'll be doing next month!

***If you live near me (you know who you are) and are reading this, leave me a comment and I'll bring you a slice of this cake. ( I just don't want to eat the whole thing myself!)***

Filbert Gateau with Praline Buttercream
From Great Cakes by Carol Walter
Kristen's Food July 2008 099

1 Filbert Genoise
1 recipe sugar syrup, flavored with dark rum
1 recipe Praline Buttercream
½ cup heavy cream, whipped to soft peaks
1 recipe Apricot Glaze
1 recipe Ganache Glaze, prepared just before using
3 tablespoons filberts, toasted and coarsely chopped

Filbert Genoise
Because of the amount of nuts in the recipe, this preparation is different from a classic genoise.
1 ½ cups hazelnuts, toasted/skinned
2/3 cup cake flour, unsifted
2 Tbsp. cornstarch
7 large egg yolks
1 cup sugar, divided ¼ & ¾ cups
1 tsp. vanilla extract
½ tsp. grated lemon rind
5 lg. egg whites
¼ cup warm, clarified butter (100 – 110 degrees)

1. Position rack in the lower 3rd of the oven and preheat to 350 degrees. Grease and flour a 10” X 2” inch round cake pan.
Using a food processor, process nuts, cake flour, and cornstarch for about 30 seconds. Then, pulse the mixture about 10 times to get a fine, powdery mixture. You’ll know the nuts are ready when they begin to gather together around the sides of the bowl. While you want to make sure there aren’t any large pieces, don’t over-process. Set aside.

2. Put the yolks in the bowl of an electric mixer, with the whisk attachment, and beat until thick and light in color, about 3-4 minutes on med-high speed. Slowly, add ¾ cup of sugar. It is best to do so by adding a tablespoon at a time, taking about 3 minutes for this step. When finished, the mixture should be ribbony. Blend in the vanilla and grated lemon rind. Remove and set aside.
Place egg whites in a large, clean bowl of the electric mixer with the whisk attachment and beat on medium speed, until soft peaks. Increase to med-high speed and slowly add the remaining ¼ cup of sugar, over 15-20 seconds or so. Continue to beat for another ½ minute.

3. Add the yolk mixture to the whites and whisk for 1 minute.
Pour the warm butter in a liquid measure cup (or a spouted container). * It must be a deep bottom bowl and work must be fast.* Put the nut meal in a mesh strainer (or use your hand – working quickly) and sprinkle it in about 2 tablespoons at a time – folding it carefully for about 40 folds. Be sure to exclude any large chunks/pieces of nuts. Again, work quickly and carefully as to not deflate the mixture. When all but about 2 Tbsp. of nut meal remain, quickly and steadily pour the warm butter over the batter. Then, with the remaining nut meal, fold the batter to incorporate, about 13 or so folds.

4. With a rubber spatula, transfer the batter into the prepared pan, smoothing the surface with the spatula or back of a spoon.

**If collected butter remains at the bottom of the bowl, do not add it to the batter! It will impede the cake rising while baking.
Tap the pan on the counter to remove air bubbles and bake in the preheated oven for 30-35 minutes. You’ll know the cake is done when it is springy to the touch and it separates itself from the side of the pan. Remove from oven and allow to stand for 5 minutes. Invert onto a cake rack sprayed with nonstick coating, removing the pan. Cool the cake completely.

*If not using the cake right away, wrap thoroughly in plastic wrap, then in a plastic bag, then in the refrigerator for up to 3 days. If freezing, wrap in foil, then the bag and use within 2-3 months.

Sugar Syrup
Makes 1 cup, good for one 10-inch cake – split into 3 layers
1 cup water
¼ cup sugar
2 Tbsp. dark rum or orange flavored liqueur

1. In a small, yet heavy saucepan, bring the water and sugar to a boil and simmer for 5 minutes. Remove from heat, add the liqueur. Cool slightly before using on the cake. *Can be made in advance.

Praline Buttercream

1 recipe Swiss Buttercream
1/3 cup praline paste
1 ½ - 2 Tbsp. Jamaican rum (optional)
Blend ½ cup buttercream into the paste, then add to the remaining buttercream. Whip briefly on med-low speed to combine. Blend in rum.

Swiss Buttercream
4 lg. egg whites
¾ cup sugar
1 ½ cups (3 sticks) unsalted butter, slightly firm
1 ½ -2 Tbsp. Grand Marnier or liqueur of your choice
1 tsp. vanilla

1. Place the egg whites in a lg/ bowl of a elevtric mixer and beat with the whisk attachment until the whites are foamy and they begin to thicken (just before the soft peak stage). Set the bowl over a saucepan filled with about 2 inches of simmering water, making sure the bowl is not touching the water. Then, whisk in the sugar by adding 1-2 tablespoon of sugar at a time over a minutes time. Continue beating 2-3 minutes or until the whites are warm (about 120 degrees) and the sugar is dissolved. The mixture should look thick and like whipped marshmallows.

2. Remove from pan and with either the paddle or whisk attachment, beat the egg whites and sugar on med-high until its a thick, cool meringue – about 5-7 minutes. *Do not overbeat*. Set aside.

3. Place the butter in a separate clean mixing bowl and, using the paddle attachment, cream the butter at medium speed for 40-60 seconds, or until smooth and creamy. *Do not overbeat or the butter will become toooooo soft.*

4. On med-low speed, blend the meringue into the butter, about 1-2 Tbsp. at a time, over 1 minute. Add the liqueur and vanilla and mix for 30-45 seconds longer, until thick and creamy.
Refrigerate 10-15 minutes before using.

Wait! My buttercream won’t come together! Reheat the buttercream briefly over simmering water for about 5 seconds, stirring with a wooden spoon. Be careful and do not overbeat. The mixture will look broken with some liquid at the bottom of the bowl. Return the bowl to the mixer and whip on medium speed just until the cream comes back together.

Wait! My buttercream is too soft! Chill the buttercream in the refrigerator for about 10 minutes and rewhip. If that doesn’t work, cream an additional 2-4 Tbsp. of butter in a small bowl– making sure the butter is not as soft as the original amount, so make sure is cool and smooth. On low speed, quickly add the creamed butter to the buttercream, 1 Tbsp. at a time.
Refrigerate in an airtight container for up to 5 days, or can be frozen for up to 6 months. If freezing, store in 2 16-oz. plastic containers and thaw in the refrigerator overnight or at room temperature for several hours.

Praline Paste
1 cup (4 ½ oz.) Hazelnuts, toasted/skinless
2/3 cup Sugar

1. Line a jelly roll pan with parchment and lightly butter.
Put the sugar in a heavy 10-inch skillet. Heat on low flame for about 10-20 min until the sugar melts around the edges. Do not stir the sugar. Swirl the pan if necessary to prevent the melted sugar from burning. Brush the sides of the pan with water to remove sugar crystals. If the sugar in the center does not melt, stir briefly. When the sugar is completely melted and caramel in color, remove from heat. Stir in the nuts with a wooden spoon and separate the clusters. Return to low heat and stir to coat the nuts on all sides. Cook until the mixture starts to bubble. **Remember – extremely hot mixture.** Then onto the parchment lined sheet and spread as evenly as possible. As it cools, it will harden into brittle. Break the candied nuts into pieces and place them in the food processor. Pulse into a medium-fine crunch or process until the brittle turns into a powder. To make paste, process for several minutes. Store in an airtight container and store in a cook dry place. Do not refrigerate.

Apricot Glaze
Good for one 10-inch cake
2/3 cup thick apricot preserves
1 Tbsp. water
In a small, yet heavy saucepan, bring the water and preserves to a slow boil and simmer for 2-3 minutes. If the mixture begins to stick to the bottom of the saucepan, add water as needed.
Remove from heat and, using a strainer, press the mixture through the mesh and discard any remnants. With a pastry brush, apply the glaze onto the cake while the cake is still warm. If the glaze is too thick, thin to a preferred consistency with drops of water.

Ganache Glaze
Makes about 1 cup, enough to cover the top and sides of a 9 or 10 inch layer or tube cake
**Ganache can take on many forms. While warm – great fudge sauce. While cool or lukewarm – semisweet glaze. Slightly chilled – can be whipped into a filling/frosting. Cold & solid – the base of candied chocolate truffles.
6 oz. (good) semisweet or bittersweet chocolate, like Lindt
6 oz. (¾ cup heavy cream
1 tbsp. light corn syrup
1 Tbsp. Grand Marnier, Cointreay, or dark Jamaican rum (optional)
¾ tsp. vanilla
½ - 1 tsp. hot water, if needed

1. Blend vanilla and liqueur/rum together and set aside.
Break the chocolate into 1-inch pieces and place in the basket of a food processor and pulse until finely chopped. Transfer into a medium sized bowl and set aside.
Heat the cream and corn syrup in a saucepan, on low, until it reached a gentle boil. Once to the gently boil, immediately and carefully pour over the chocolate. Leave it alone for one minute, then slowly stir and mix the chocolate and cream together until the chocolate is melted and incorporated into the cream. Carefully blend in vanilla mixture. If the surface seems oily, add ½ - 1 tsp hot water. The glaze will thicken, but should still be pourable. If it doesn’t thicken, refrigerate for about 5 minutes, but make sure it doesn’t get too cold!

Assembling Cake
Cut a cardboard disk slightly smaller than the cake. Divide the cake into 3 layers and place the first layer top-side down on the disk. Using a pastry brush, moisten the layer with 3-4 Tbsp. of warm sugar syrup. Measure out 1 cup of praline buttercream and set aside.

Spread the bottom layer with a ¼-inch thickness of the remaining buttercream. Cover with ½ of the whipped cream, leaving ¼-inch border around the edge of the cake. Place the middle layer over the first, brush with sugar syrup, spreading with buttercream. Cover with the remaining whipped cream.
Moisten the cut side of the third layer with additional sugar syrup and place cut side down on the cake. Gently, press the sides of the cake to align the layers. Refrigerate to chill for at least 30 minutes.

Lift the cake by sliding your palm under the cardboard. Holding a serrated or very sharp night with an 8-ich blade held parallel to the sides of the cake, trim the sides so that they are perfectly straight. Cut a slight bevel at the top to help the glaze drip over the edge. Brush the top and sides of the cake with warm apricot glaze, sealing the cut areas completely. Chill while you prepare the ganache.

Place a rack over a large shallow pan to catch the ganache drippings. Remove the gateau from the refrigerator and put it the rack. With a metal spatula in hand, and holding the saucepan about 10 inches above the cake, pour the ganache onto the cake’s center. Move the spatula over the top of the ganache about 4 times to get a smooth and mirror-like appearance. The ganache should cover the top and run down the sides of the cake. When the ganache has been poured and is coating the cake, lift one side of the rack and bang it once on the counter to help spread the ganache evenly and break any air bubbles. (Work fast before setting starts.) Patch any bare spots on the sides with a smaller spatula, but do not touch the top after the “bang”. Let the cake stand at least 15 minutes to set after glazing.

Sunday, June 29, 2008

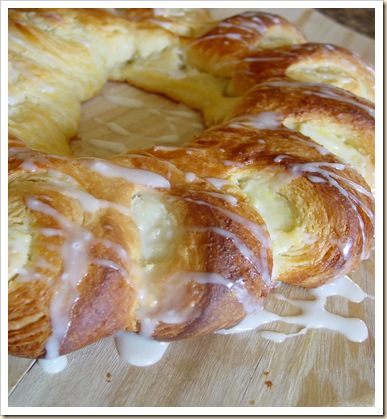
The Daring Bakers take on Danish Pastry

Kristen's Food June 2008 080

Yep, it's that time of the month again. Time for another Daring Baker's challenge. When I looked at the challenge this month, I was so excited. I had never made a laminate dough before but had been wanting to for awhile. Leave it up to the Daring Baker's to make it happen sooner rather than later. This months challenge was Danish pastry.

The Danish pastry dough is a mix between a yeasty sweet dough and a puff pastry. The sweet yeast dough is rolled out and spread with a mixture of butter and flour. Then it is folded into thirds and refrigerated. The rolling and folding is repeated 3 more times and then the dough must rest in the refrigerator for several hours. This process creates thin layers of butter all throughout the dough which result in that deliciously light and flaky pastry. The dough usually contains cardamom and orange both of which I left out. I substituted extra milk for the orange juice and added some almond extract to the dough for extra flavor.

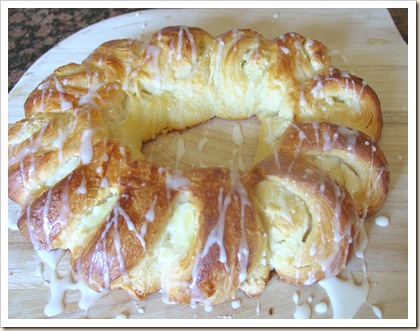
We were given a choice of fillings and it was so hard to pick. First I made a ring shaped pastry filled with a mixture of homemade almond paste, cream cheese and powdered sugar. I then topped the ring with a lemony powdered sugar glaze. This one was so delicious. The pastry was flaky just as I had hoped it would be and the filling was absolutely delicious. I really liked the tang that the lemon and powdered sugar glaze gave, it really helped to balance all of the other sweet flavors.

Kristen's Food June 2008 084

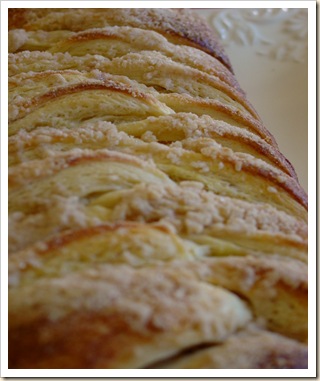
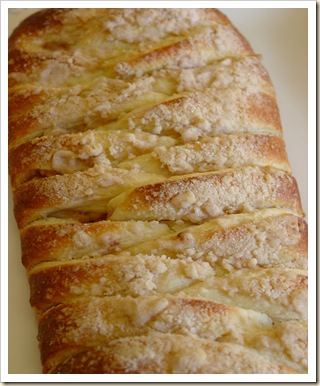
For my second pastry I made the traditional braid shape and filled it with a light layer of the almond and cream cheese mixture followed by some cinnamon apples. I then topped the braid with a crumb topping. The smell as it baked was heavenly, you could smell the yeast dough with hints of cinnamon. If the smell was good, the taste was even better. The almond mixture puffed up slightly and mixed with the cinnamon apples and the dough was perfectly flaky and buttery. I can't believe that I've never made this before. It was surprisingly easy and may only be thought as difficult due to the time involved in making it, most of which is the dough resting.

Kristen's Food June 2008 103

If you want to be daring too, give this on a try, it was delicious. Check out what all of the other Daring Bakers have made. A big thanks to Kelly of Sass & Veracity and Ben from What's Cookin'? for hosting this wonderful challenge. It was a lot of fun and delicious to boot.

DANISH DOUGH

Kristen's Food June 2008 105
Makes 2-1/2 pounds dough
Ingredients
For the dough (Detrempe)
1 ounce fresh yeast or 1 tablespoon active dry yeast
1/2 cup whole milk
1/3 cup sugar
Zest of 1 orange, finely grated
3/4 teaspoon ground cardamom
1-1/2 teaspoons vanilla extract
1/2 vanilla bean, split and scraped
2 large eggs, chilled
1/4 cup fresh orange juice
3-1/4 cups all-purpose flour
1 teaspoon salt
For the butter block (Beurrage)
1/2 pound (2 sticks) cold unsalted butter
1/4 cup all-purpose flour

DOUGH
Combine yeast and milk in the bowl of a mixer fitted with the paddle attachment and mix on low speed. Slowly add sugar, orange zest, cardamom, vanilla extract, vanilla seeds, eggs, and orange juice. Mix well. Change to the dough hook and add the salt with the flour, 1 cup at a time, increasing speed to medium as the flour is incorporated. Knead the dough for about 5 minutes, or until smooth. You may need to add a little more flour if it is sticky. Transfer dough to a lightly floured baking sheet and cover with plastic wrap. Refrigerate for 30 minutes.
Without a standing mixer: Combine yeast and milk in a bowl with a hand mixer on low speed or a whisk. Add sugar, orange zest, cardamom, vanilla extract, vanilla seeds, eggs, and orange juice and mix well. Sift flour and salt on your working surface and make a fountain. Make sure that the “walls” of your fountain are thick and even. Pour the liquid in the middle of the fountain. With your fingertips, mix the liquid and the flour starting from the middle of the fountain, slowly working towards the edges. When the ingredients have been incorporated start kneading the dough with the heel of your hands until it becomes smooth and easy to work with, around 5 to 7 minutes. You might need to add more flour if the dough is sticky.
BUTTER BLOCK
1. Combine butter and flour in the bowl of a mixer fitted with a paddle attachment and beat on medium speed for 1 minute. Scrape down the sides of the bowl and the paddle and then beat for 1 minute more, or until smooth and lump free. Set aside at room temperature.
2. After the detrempe has chilled 30 minutes, turn it out onto a lightly floured surface. Roll the dough into a rectangle approximately 18 x 13 inches and ¼ inch thick. The dough may be sticky, so keep dusting it lightly with flour. Spread the butter evenly over the center and right thirds of the dough. Fold the left edge of the detrempe to the right, covering half of the butter. Fold the right third of the rectangle over the center third. The first turn has now been completed. Mark the dough by poking it with your finger to keep track of your turns, or use a sticky and keep a tally. Place the dough on a baking sheet, wrap it in plastic wrap, and refrigerate for 30 minutes.
3. Place the dough lengthwise on a floured work surface. The open ends should be to your right and left. Roll the dough into another approximately 13 x 18 inch, ¼-inch-thick rectangle. Again, fold the left third of the rectangle over the center third and the right third over the center third. No additional butter will be added as it is already in the dough. The second turn has now been completed. Refrigerate the dough for 30 minutes.
4. Roll out, turn, and refrigerate the dough two more times, for a total of four single turns. Make sure you are keeping track of your turns. Refrigerate the dough after the final turn for at least 5 hours or overnight. The Danish dough is now ready to be used. If you will not be using the dough within 24 hours, freeze it. To do this, roll the dough out to about 1 inch in thickness, wrap tightly in plastic wrap, and freeze. Defrost the dough slowly in the refrigerator for easiest handling. Danish dough will keep in the freezer for up to 1 month.

APPLE FILLING
Makes enough for two braids
Ingredients
4 Fuji or other apples, peeled, cored, and cut into ¼-inch pieces
1/2 cup sugar
1 tsp. ground cinnamon
1/2 vanilla bean, split and scraped
1/4 cup fresh lemon juice
4 tablespoons unsalted butter
Toss all ingredients except butter in a large bowl. Melt the butter in a sauté pan over medium heat until slightly nutty in color, about 6 - 8 minutes. Then add the apple mixture and sauté until apples are softened and caramelized, 10 to 15 minutes. If you’ve chosen Fujis, the apples will be caramelized, but have still retained their shape. Pour the cooked apples onto a baking sheet to cool completely before forming the braid. (If making ahead, cool to room temperature, seal, and refrigerate.) They will cool faster when spread in a thin layer over the surface of the sheet. After they have cooled, the filling can be stored in the refrigerator for up to 3 days. Left over filling can be used as an ice cream topping, for muffins, cheesecake, or other pastries.

DANISH BRAID
Makes enough for 2 large braids
Ingredients
1 recipe Danish Dough (see below)
2 cups apple filling, jam, or preserves (see below)
For the egg wash: 1 large egg, plus 1 large egg yolk
1. Line a baking sheet with a silicone mat or parchment paper. On a lightly floured surface, roll the Danish Dough into a 15 x 20-inch rectangle, ¼ inch thick. If the dough seems elastic and shrinks back when rolled, let it rest for a few minutes, then roll again. Place the dough on the baking sheet.
2. Along one long side of the pastry make parallel, 5-inch-long cuts with a knife or rolling pastry wheel, each about 1 inch apart. Repeat on the opposite side, making sure to line up the cuts with those you’ve already made.
3. Spoon the filling you’ve chosen to fill your braid down the center of the rectangle. Starting with the top and bottom “flaps”, fold the top flap down over the filling to cover. Next, fold the bottom “flap” up to cover filling. This helps keep the braid neat and helps to hold in the filling. Now begin folding the cut side strips of dough over the filling, alternating first left, then right, left, right, until finished. Trim any excess dough and tuck in the ends.
Egg Wash
Whisk together the whole egg and yolk in a bowl and with a pastry brush, lightly coat the braid.
Proofing and Baking
1. Spray cooking oil (Pam…) onto a piece of plastic wrap, and place over the braid. Proof at room temperature or, if possible, in a controlled 90 degree F environment for about 2 hours, or until doubled in volume and light to the touch.
2. Near the end of proofing, preheat oven to 400 degrees F. Position a rack in the center of the oven.
3. Bake for 10 minutes, then rotate the pan so that the side of the braid previously in the back of the oven is now in the front. Lower the oven temperature to 350 degrees F, and bake about 15-20 minutes more, or until golden brown. Cool and serve the braid either still warm from the oven or at room temperature. The cooled braid can be wrapped airtight and stored in the refrigerator for up to 2 days, or freeze for 1 month.

Homemade Almond Paste

5 oz. blanched almonds

5 oz. powdered sugar

2 1/2 oz. granulated sugar

2 TBS. corn syrup

1/2 cup water

1/4 tsp almond extract

1. In a small sauce pan combine the granulated sugar, the corn syrup, the extract and the water. Bring the mixture to a boil and simmer for a few minutes to make sure all of the sugar is dissolved. Let cool slightly.

2. In the bowl of a food processor mix together the almonds and the powdered sugar until the mixture is ground into a semi-fine powder. With the machine running, slowly add the syrup and mix until it forms a paste.

3. Almond paste can be kept at room temperature for a day or two but if it will be longer refrigerate or freeze.

Makes about 13 oz. of almond paste

Almond Cream Cheese Filling

7 oz. almond paste

4 oz. cream cheese

1/2 cup powdered sugar

1. In the bowl of mixer fitted with the paddle attachment, mix all of the ingredients together until well mixed.

Saturday, June 28, 2008

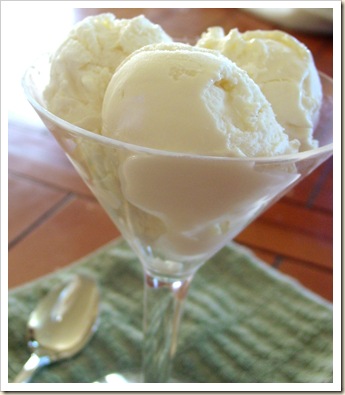
Honey and Vanilla Frozen Yogurt

Kristen's Food June 2008 027 #2

It has been quite awhile since I have posted but I have been so busy. I just got back from taking 12 girls ages 12-18 camping for 4 days. It was a lot fun and a lot of hormones. They sure kept me busy; I am still so young and I already feel like I don't have the energy I once had. Now that I've showered and washed several loads of clothes and blankets it's time to begin cooking or in this case freezing something

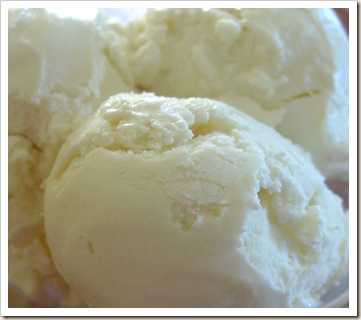
It has finally started to get hot here and it kind of hit us all of a sudden. We were never really able to enjoy the temperate weather that late spring and early summer usually brings. We went right from cold to screaming hot in a matter of days. So jumping into summer with both feet forward, I decided to make some tangy frozen yogurt. It is so easy to make and lends itself well to many flavors. The batch that I made I consider my base, it can be eaten alone or made into a variety of flavors. Make strawberry frozen yogurt by adding pureed strawberries or any other fruit that you'd like.

This recipe is adapted from David Lebowitz's book The Perfect Scoop. If you love ice cream and particularly making your own, then this is the book for you. There are so many pictures of the delicious ice cream that it's hard to decide which to try first. You really won't be disappointed with this recipe. It is so easy and you won't believe how creamy it is even though it's frozen yogurt.

Honey and Vanilla Frozen Yogurt

Kristen's Food June 2008 026

2 (32 oz) container of plain yogurt, preferably not low fat or nonfat

about 3/4 cup of honey

3/4 tsp vanilla extract

1. Line a colander with a few layer of cheese clothe and place over a bowl. Pour both containers of the yogurt onto the cheesecloth. Pull the edges up to cover. Refrigerate and allow to drain for 8 hours or overnight.

2. Stir together the thickened yogurt and a 1/2 cup of the honey. Check for sweetness and add more until desired sweetness (I like mine a little tart so I only used a little more than 1/2 cup). Stir in the vanilla.

3. Pour into an ice cream maker and freeze according to the instructions included with your ice cream maker.

Variations: Add 1 cup of pureed and strained strawberries or other fruits for delicious fruity frozen yogurt.

Tuesday, June 17, 2008

Brownies 3 Ways

Kristen's Food June 2008 075 #2

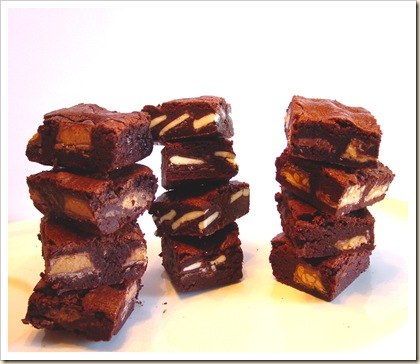
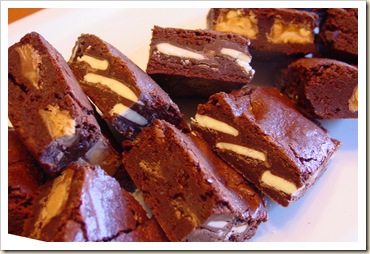
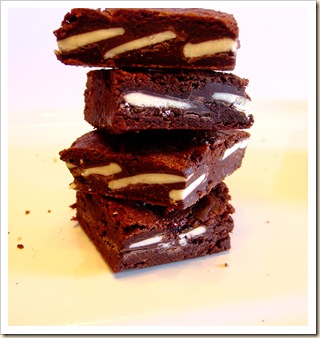
I hope that everyone had a good Father's Day. I had a great weekend spending time with family and friends. On Saturday we had a big pre-Father's Day BBQ and pool party and then on Sunday we were able to just spend time together as a family. My girls loved making breakfast for their daddy in the morning and taking care of him all day. For dinner we had a big "meaty" meal and when I asked my husband if he had eaten any of the vegetables that I had made he said, "It's Father's Day, I should at least get one day off". I thought that it was so cute that I didn't even say another word. I guess that he can have a day off once a year if he wants. To put the icing on the cake, so to speak, here is a great dessert for that father in your life. Who doesn't love a rich fudgy brownie with a candy bar inside?

When you look at the amounts of the ingredients in this recipe don't freak out. It is enough to bake in a cookie sheet and can accommodate all three kinds into one pan. This is great if you have a big family get together or party to bring them to. The recipe makes about 40 good sized brownies and they are so rich and fudgy that you could probably cut them in half and still be satisfied. If you want to make less, you can halve the recipe and bake it in a 9 x13 or use 1/3 of the recipe for an 8 x 8.


Kristen's Food June 2008 065.#2 jpg

I used three different candy bars, Snickers minis, the miniature Reeses Peanut Butter Cups and the small York Peppermint patties. These were all so good I am not sure that I could pick a favorite but my husbands favorite definitely was the Reeses, which is his favorite candy bar. I am sure that you could make these with any of your favorite candy bars. As a word of advise, these need to cool for a long period of time and it is best if they sit in the refrigerator before cutting. This will help you get that crisp clean cut. I brought some of them to a lunch at the park today and unfortunately they hadn't cooled all the way before I cut them and the hot weather outside didn't help much either so they looked like a mess and were quite melted (sorry ladies!!!). These are best served right out of the refrigerator which consequently is also the best place to store them. So if you have a hankering for a great fudgy snack, whip up a batch of these and you won't be disappointed.

Candy Bar Brownies

(Adapted form a Martha Stewart recipe)

Kristen's Food June 2008 070

3 sticks of unsalted butter(1 1/2 cups)

3 cups all-purpose flour

3/4 cups cocoa powder

1 1/2 tsp baking powder

1 1/2 tsp salt

24 ounces chocolate chips (2 bags, I use the 60% cocoa ones)

1 Tbs. Vanilla

3 3/4 cups sugar

9 large eggs

about 40 each of York peppermint patties, Snickers minis and miniature Reeses Peanut butter cups (have them unwrapped and ready to use)

1. Preheat the oven to 350°. Line a cookie sheet with foil and spray with nonstick cooking spray. In a bowl mix together the dry ingredients and whisk to combine; Set aside.

2. Place the butter and chocolate chips in a large bowl set over a pan of simmering water (make sure the bowl in not touching the water). Heat stirring occasionally until the butter and the chocolate chips are melted. Remove from heat and add in the sugar and vanilla. Stir until combined. Add in the eggs a few at a time mixing well after each addition. Add the flour mixture 1/3 at a time stirring until just combined. Do not over mix.

3. Spread about half of the batter onto the bottom of the pan using an offset spatula to spread evenly ( it helps to warm the spatula by running it under hot water). Using three different sections make rows of the candy bars. Over lap just the peppermint patties (like shingles on a roof). Leave a little border around the edges of the pan and between the different sections. (I made 3 rows of 12 of each the peppermint patties and the snickers and 4 rows of the Reeses). Carefully spread the remaining batter over the top of the candy bars using the offset spatula. Tap the pan on the counter to help even the batter and remove any air bubbles.

4. Bake for about 40-45 minutes or until the brownies are set and the edges are crisp. Cool in the pan for several hours and then move to the fridge to cool and set completely. Slice them with a sharp damp knife, rinsing between cuts. Store in the refrigerator.

Friday, June 13, 2008

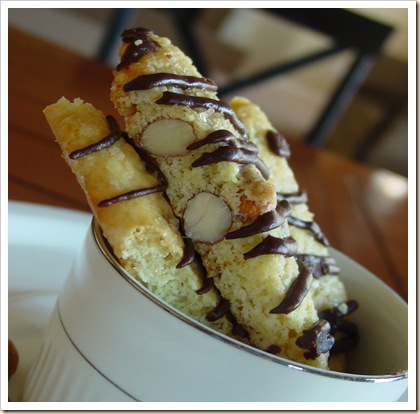
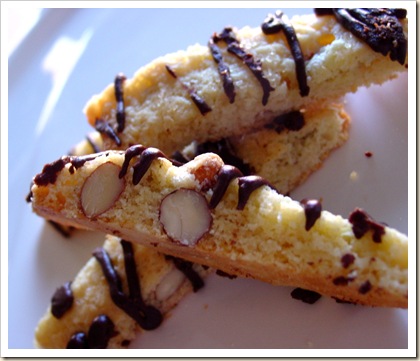
Ginger Almond Biscotti

Kristen's Food June 2008 056 #2

I know that I have been gone for a little while. I had to have a colonoscopy at the beginning of this week thus inhibiting me to eat for a few days. Why am I telling you this? I am hoping to get a little more awareness out there for colon cancer and colon cancer screenings. My dad was diagnosed at39 with 2 large tumors in his colon. It was so far advanced that he died 2 years later. Colon cancer has a really high survival rate, like 90%, if detected early through regular screenings. I was supposed to have a colonoscopy several years ago but I kept putting it off. You know, it doesn't sound too fun and, after all, I am pretty young. Finally after a little coercion from my doctor I scheduled one. How grateful I am too. The doctor found one precancerous polyp and because of my early screening, I was able to have it removed. In all honesty, the colonoscopy wasn't so bad and the alternative would have been much worse. So, if you are over the age of 50 or know someone who is, urge them to get their colonoscopy. If you have a family history of colon cancer you need to get checked earlier and possibly more frequently. Ok, now that my 2 cents on the matter is through, I will get back to the food!

I was looking through my pantry yesterday trying to come up with something to make. I found a small bag of almond meal that I had left over from the opera cakes and also a large bag of almonds. As soon as I saw the almonds my mind drifted back to my college days when I would grab a hot chocolate and an almond biscotti almost daily from the coffee shop on campus. I loved biting into the crunchy cookie and getting a bite of the toasty almonds inside. Normally I like to use almond extract in my biscotti to bring out the almond flavor but a check in my pantry and I was all out. I searched through my spices thinking maybe about anise, but I was all out of it too. So now it was off to my fridge where I discovered a small piece of ginger leftover from the previous nights dinner. This was it, I love that little hint of flavor that ginger brings to desserts. It's a very subtle taste when used in small amounts and makes others wonder what it is that you put in there. When using ginger in desserts I like to grate it over a microplane to insure that there are no large pieces. As mentioned before, I had some almond meal (ground blanched almonds) leftover that I wanted to use up so I threw that in too for a little change in the texture. If you don't have this you can just substitute an equal amount of flour.

Almond Ginger Biscotti

Kristen's Food June 2008 058

1 1/4 cups whole unblanched almonds

7 Tbs. cold butter, cut into small pieces

3/4 granulated sugar

1 1/ cups all purpose flour

1 tsp. baking powder

1 1/2 tsp. grated fresh ginger

1 1/2 tsp vanilla extract

2 eggs

1 egg white , lightly beaten, for brushing

turbinado sugar

!/2 cup chocolate chips

1 Tbs. heavy cream to thin chocolate if needed

1. Preheat the oven to 300 degrees F. Spread the almonds onto a baking sheet and toast for about 10 minutes, stirring as necessary, until fragrant. Remove from the oven and spread almonds onto a plate to cool. Adjust oven temperature to 350 and line the baking sheet with parchment paper.

2. Place the remaining ingredients into the bowl of a mixer fitted with the paddle attachment. Mix ingredients until a soft dough forms. Place dough onto a lightly floured surface and shape into 3 pieces. Place in the refrigerator for to chill for about 30 minutes or until no longer sticky. Taking one piece at a time, roll the dough into thin ropes. They should be as long as the baking sheet and only about 1/2 inch thick (they will spread considerably). Bake only 2 at a time as they spread. Brush with the egg white and sprinkle with the sugar. Bake for about 22-27 minutes or until golden brown.

3. Remove parchment paper from pan and while still warm, slice the biscotti on the diagonal with a serrated knife. Do not use a sawing motion as this will cause the biscotti to crumble, instead cut straight down. The biscotti will harden as they cool but if you would like them crisper lower oven to 300 degrees and bake for another 10 minutes. repeat with the remaining piece of dough, or store in the freezer for up to 2 weeks.

4. Melt the chocolate in the microwave stirring every 10 seconds, until melted. Add the cream to thin out if desired. Place the chocolate into a Ziploc bag and snip off the corners. Drizzle over the cooled biscotti and let sit until chocolate is set.

Thursday, June 5, 2008

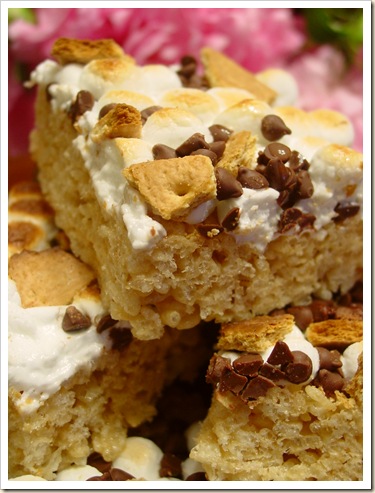
Rice Crispy Treats Meets Smores

Kristen's Food June 2008 027

Well, it's been another busy day. I always think that I'll have time to get things done and then all of a sudden the day is over. I had plans to make some mint chocolate brownies that I saw on Martha Stewart this weekend but never made it to the store, so those will have to wait for later this week.

I am in charge of some of the youth at my church and for an activity tonight we went letterboxing. If you have never heard of this you should check it out. Basically people all over the country have hidden boxes and they leave clues online at the above website. Usually the boxes contain a stamp, sometimes homemade, and a little book. When you find the box you stamp their stamp into your journal or book and then stamp your stamp into their little book. It's a fun family activity and it is free.

So I needed a quick treat for the activity with what I had on hand. I have had a lot of camping on my mind as I am also in charge of the camp for the youth in a couple of weeks so I guess that's why I thought of smores. I needed a smore that was portable though and what a better way to eat it than on top of a rice crispy treat! These are so quick and easy, I made them in less than 15 minutes, so if you're short on time and need a dressed up snack, give these a try.

Rice Crispy Treat Smores

Kristen's Food June 2008 028 #2

3/4 cup butter (1 1/2 sticks)

2 bags (16 oz. each) miniature marshmallows ( half of a bag reserved for topping)

1 tsp vanilla

about 20 cups of rice crispies ( I never actually measured)

8 oz. chocolate chips ( I used miniature chocolate chips)

4 Graham Crackers, broken into bite size pieces

1. Preheat the broiler. Spray a cookie sheet with nonstick cooking spray and set aside.

2. Melt butter and marshmallows and vanilla in a large pot over medium heat, stirring constantly. Turn off the heat and add enough of the rice crispies to coat them evenly and lightly with the marshmallows. Spread on to the cookies sheet. (If you wet your hands then you can press the rice crispy treat into the pan evenly without them sticking to your hands).

3. Cover the treats evenly with the reserved marshmallows and then sprinkle evenly with the chocolate chips. Place the pan under the broiler for 1-2 minutes or until the marshmallows are nice and toasty. Watch carefully as they go from toasted to burnt in a matter of seconds. Remove from the oven and sprinkle evenly with the graham cracker crumbs. Set aside and let them cool for about 2 hours. This allows the marshmallows to set back up and makes them easier to cut. Cut the rice crispy treats into squares using a slightly damp knife as this will keep the marshmallows from sticking. Dampen slightly between each cut.

Wednesday, June 4, 2008

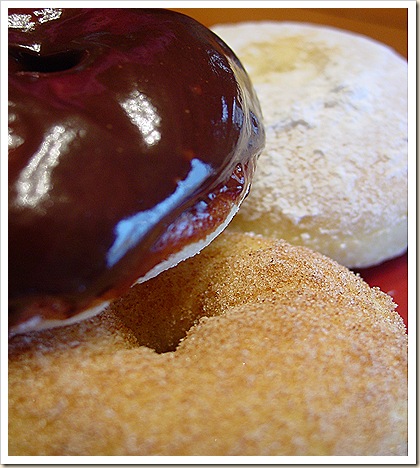
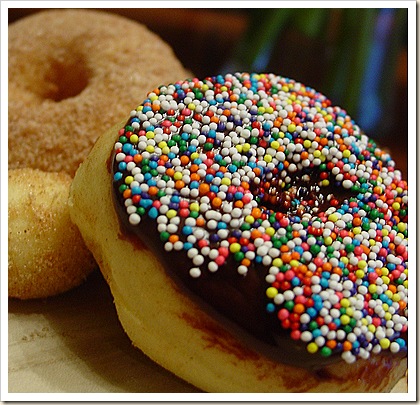
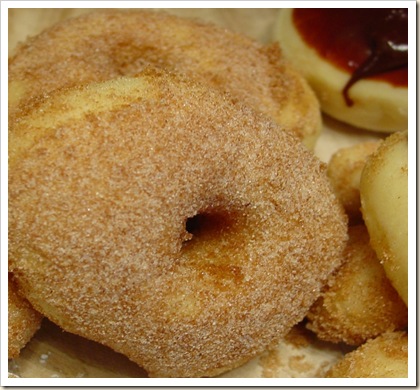
Delicious Baked Doughnuts

Kristen's Food June 2008 016

I know that I have been gone for awhile; I just haven't had much time in the kitchen lately. I always think that once the kids are out of school for the summer that I'll have more time, on the contrary I have been busier than ever. We had a good weekend and accomplished a lot. On Saturday we planted 25 bushes/plants and 2 trees, I was even sore that night. Then on Sunday I was sicker than a dog. I spent most of the day sleeping. I don't think I have slept that much since I had kids. Luckily enough it was a weekend and my husband was able to take care of the kids so that I could just rest. Then on Monday we had two unplanned on guests for dinner so I was busy preparing that. Today was the first day that I felt like I could do something that I wanted to do.

I actually have a list of things that I want to make and every once in awhile I'll look at it and actually make one of them. Today was one of those days. I have been eyeing this recipe for quite sometime and have kept telling myself that I needed to find a reason to make it. But really, who needs a reason to make doughnuts, and baked ones at that?! These were so simple that I can't wait to make them again. It's just as easy as making rolls but a lot more delicious. Once these little gems came out of the oven and were covered with their sugary coating they were consumed still piping hot. They almost melted in your mouth.

Kristen's Food June 2008 004

I chose to make three different toppings for the doughnuts; sugar and cinnamon, powdered sugar (my favorite), and chocolate ganache with and without sprinkles. I have to tell you that I found the chocolate ones to be a little dry as I didn't coat them with the butter first. If I was to make those ones again, I would coat them with some butter and let them sit a minute or two for it to absorb and then coat with the chocolate. I'm not sure how well these will keep as we consumed the whole batch while still hot, but I am sure that you could store them in an airtight container and then heat for a few seconds in the microwave.

Baked Doughnuts Recipe

This recipe comes from one of my all time favorite food blogs 101 Cookbooks. Whenever I search Heidi's blog, I am inspired to go and cook and usually it's something delicious and healthy. You have got to go and check her out, she takes gorgeous photos and makes amazing food.

Kristen's Food June 2008 009 #2

Don't over bake these, if anything, under bake them a bit - they will continue baking outside the oven for a few minutes. You want an interior that is moist and tender - not dry. Also, be sure to cut big enough holes in the center of your doughnuts - too small and they will bake entirely shut. Remember they rise, and they rise even more when they are baking. These really need to be made-to-order, but you can make and shape the dough the night before if you want to serve them for brunch. Instructions: after shaping, place doughnuts on baking sheet, cover and place in the refrigerator overnight. Pull them out an hour before baking, and let rise in a warm place before baking.

1 1/3 cups warm milk, 95 to 105 degrees (divided)
1 packet active dry yeast (2 1/4 teaspoons)
2 tablespoons butter
2/3 cup sugar
2 eggs
5 cups all-purpose flour
A pinch or two of nutmeg, freshly grated(I used a few shakes of pumpkin pie spice)
1 teaspoon fine grain sea salt

1/2 cup unsalted butter, melted
1 1/2 cups sugar
1 tablespoon cinnamon

Place 1/3 cup of the warm milk in the bowl of an electric mixer. Stir in the yeast and set aside for five minutes or so. Be sure your milk isn't too hot or it will kill the yeast. Stir the butter and sugar into the remaining cup of warm milk and add it to the yeast mixture. With a fork, stir in the eggs, flour, nutmeg, and salt - just until the flour is incorporated. With the dough hook attachment of your mixer beat the dough for a few minutes at medium speed. This is where you are going to need to make adjustments - if your dough is overly sticky, add flour a few tablespoons at a time. Too dry? Add more milk a bit at a time. You want the dough to pull away from the sides of the mixing bowl and eventually become supple and smooth. Turn it out onto a floured counter-top, knead a few times (the dough should be barely sticky), and shape into a ball.

Transfer the dough to a buttered (or oiled) bowl, cover, put in a warm place (I turn on the oven at this point and set the bowl on top), and let rise for an hour or until the dough has roughly doubled in size.

Punch down the dough and roll it out 1/2-inch thick on your floured countertop. Most people (like myself) don't have a doughnut cutter, instead I use a 2-3 inch cookie cutter to stamp out circles. Transfer the circles to a parchment-lined baking sheet and stamp out the smaller inner circles using a smaller cutter. If you cut the inner holes out any earlier, they become distorted when you attempt to move them. Cover with a clean cloth and let rise for another 45 minutes.

Bake in a 375 degree oven until the bottoms are just golden, 8 to 10 minutes - start checking around 8. While the doughnuts are baking, place the butter in a medium bowl. Place the sugar and cinnamon in a separate bowl.

Remove the doughnuts from the oven and let cool for just a minute or two. Dip each one in the melted butter and a quick toss in the sugar bowl. Eat immediately if not sooner.

Makes 1 1/2 - 2 dozen medium doughnuts.

Wednesday, May 28, 2008

The Daring Bakers go to the Opera

Kristens Food May 2008 058

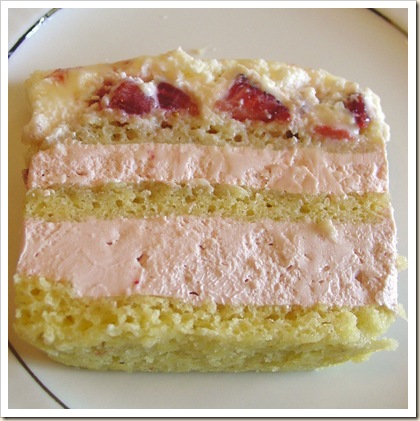
Well, it's the end of the month and time yet again for another Daring Bakers challenge. This months recipe was hosted by four lovely ladies, Ivonne of Cream Puffs in Venice, Lis of La Mia Cucina, Fran from Apples Peaches Pumpkin Pie and Shea from Whiskful. The challenge this month was to make Opera Cake. Now, I had never heard of opera cake before this challenge but I learned quickly all about it. Basically it's an almond sponge cake called, joconde ,brushed with a flavored simple syrup. Then it is layered with buttercream and then a chocolate mousse and then a gannache glaze. (Whew, how did I fit that all into one sentence!) Traditionally, Opera cakes are made with dark chocolate or coffee flavors. For this challenge were were asked to use only light colors and white chocolate. I have to tell you that I really don't like white chocolate. It is always way too sweet for me and I just can't stand it. I used it in this recipe as directed and to my dismay, I still didn't like it, it was just too darn sweet. I ended up with 7 miniature Opera Cakes that I couldn't eat and didn't really want to pass out to people. I brought them over to my mother-in-laws where there are always tons of people in hopes that they would get eaten up and luckily they did.

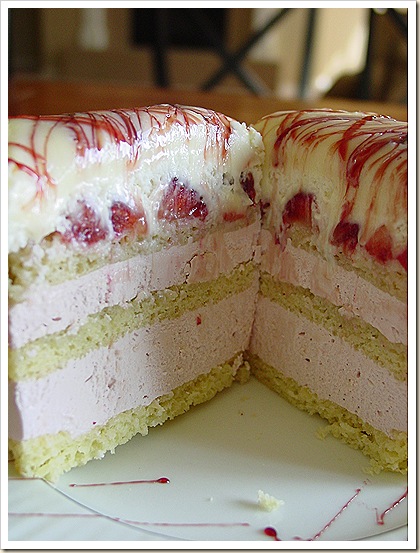
I left the cake the same and brushed it with an almond flavored simple syrup. I flavored the buttercream with a pomegranate reduction. This was by far my favorite part. The pomegranate helped a little with the sweetness and just tasted amazing. In fact, I had some of the pomegranate reduction left so I added it to some softened butter to make a pomegranate butter, let me just say, delicious. I kept searching for more things to put it on. It was great on waffles and toast and I have a few more things I'd like try it on. I also was able to make a pomegranate poppy seed salad dressing which was delicious. Anyhoo, back to the opera cake. I made the mousse just as it was written in the recipe with the white chocolate and the heavy cream. I added a layer of strawberries before adding the mousse. Then on to the glaze. I also made it per the recipe only drizzling it with the pomegranate reduction so that the two could set and firm up together. All in all the cake was a success, but I just wasn't happy with the white chocolate with it's cloyingly sweet taste. I think that I would have liked one made with bittersweet chocolate and maybe a salted caramel buttercream. So, maybe I'll try it again with that combo if I get bored one day...

Kristens Food May 2008 061 #2

Check out all over the other Daring Baker's creations to see some amazing Opera Cakes. Kristens Food May 2008 054 #2

For the joconde
(Note: The joconde can be made up to 1 day in advance and kept wrapped at room temperate)
What you’ll need:
•2 12½ x 15½-inch (31 x 39-cm) jelly-roll pans (Note: If you do not have jelly-roll pans this size, do not fear! You can use different-sized jelly-roll pans like 10 x 15-inches.)
•a few tablespoons of melted butter (in addition to what’s called for in the ingredients’ list) and a brush (to grease the pans)
•parchment paper
•a whisk and a paddle attachment for a stand mixer or for a handheld mixer
•two mixing bowls (you can make do with one but it’s preferable to have two)
Ingredients:
6 large egg whites, at room temperature
2 tbsp. (30 grams) granulated sugar
2 cups (225 grams) ground blanched almonds (Note: If you do not want to use almond meal, you can use another nut meal like hazelnut. You can buy almond meal in bulk food stores or health food stores, or you can make it at home by grinding almonds in the food processor with a tablespoon or two of the flour that you would use in the cake. The reason you need the flour is to prevent the almonds from turning oily or pasty in the processor. You will need about 2 cups of blanched almonds to create enough almond meal for this cake.)
2 cups icing sugar, sifted
6 large eggs
½ cup (70 grams) all-purpose flour
3 tbsp. (1½ ounces; 45 grams) unsalted butter, melted and cooled
1.Divide the oven into thirds by positioning a rack in the upper third of the oven and the lower third of the oven.
2.Preheat the oven to 425◦F. (220◦C).
3.Line two 12½ x 15½- inch (31 x 39-cm) jelly-roll pans with parchment paper and brush with melted butter.
4.In the bowl of a stand mixer fitted with the whisk attachment (or using a handheld mixer), beat the egg whites until they form soft peaks. Add the granulated sugar and beat until the peaks are stiff and glossy. If you do not have another mixer bowl, gently scrape the meringue into another bowl and set aside.
5.If you only have one bowl, wash it after removing the egg whites or if you have a second bowl, use that one. Attach the paddle attachment to the stand mixer (or using a handheld mixer again) and beat the almonds, icing sugar and eggs on medium speed until light and voluminous, about 3 minutes.
6.Add the flour and beat on low speed until the flour is just combined (be very careful not to overmix here!!!).
7.Using a rubber spatula, gently fold the meringue into the almond mixture and then fold in the melted butter. Divide the batter between the pans and spread it evenly to cover the entire surface of each pan.
8.Bake the cake layers until they are lightly browned and just springy to the touch. This could take anywhere from 5 to 9 minutes depending on your oven. Place one jelly-roll pan in the middle of the oven and the second jelly-roll pan in the bottom third of the oven.
9.Put the pans on a heatproof counter and run a sharp knife along the edges of the cake to loosen it from the pan. Cover each with a sheet of parchment or wax paper, turn the pans over, and unmold.
10.Carefully peel away the parchment, then turn the parchment over and use it to cover the cakes. Let the cakes cool to room temperature.
For the syrup
(Note: The syrup can be made up to 1 week in advance and kept covered in the refrigerator.)
What you’ll need:
•a small saucepan
Ingredients:
½ cup (125 grams) water
⅓ cup (65 grams) granulated sugar
1 to 2 tbsp. of the flavouring of your choice (i.e., vanilla extract, almond extract, cognac, limoncello, coconut cream, honey etc.)
1.Stir all the syrup ingredients together in the saucepan and bring to a boil.
2.Remove from the heat and let cool to room temperature.
For the buttercream
(Note: The buttercream can be made up to 1 month in advance and packed in an airtight container. If made way in advance, you can freeze the buttercream. Alternatively you can refrigerate it for up to 4 days after making it. To use the buttercream simply bring it to room temperature and then beat it briefly to restore its consistency.)
(Update Note: The recipe for the buttercream that is listed below was originally based on the original but we had some typos. It's all very confusing (we're good at confusing ourselves) but here is the short of it: When testing the buttercream, we tested a modified version (we're crazy like that!!!) that had 2 cups sugar, ½ cup water and 1¾ cups butter. Yes. That's right. 1¾ cups of butter. The eggs remained the same. We ended up with a very creamy buttercream. VERY. CREAMY. But we don’t want anyone to be afraid of our modified version so you have the option of using the original version listed below or the quantities we’ve listed here in this note. If you are still confused and want to cry, then please e-mail us and we will comfort you!!! We promise!!!)
What you’ll need:
•a small saucepan
•a candy or instant-read thermometer
•a stand mixer or handheld mixer
•a bowl and a whisk attachment
•rubber spatula
Ingredients:
1 cup (100 grams) granulated sugar
¼ cup (60 grams) water
seeds of one vanilla bean (split a vanilla bean down the middle and scrape out the seeds) or 1 tbsp. pure vanilla extract (Note: If you are flavouring your buttercream and do not want to use the vanilla, you do not have to. Vanilla will often enhance other flavours but if you want an intense, one-flavoured buttercream, then by all means leave it out!)
1 large egg
1 large egg yolk
1¾ sticks (7 ounces; 200 grams) unsalted butter, at room temperature
flavouring of your choice (a tablespoon of an extract, a few tablespoons of melted white chocolate, citrus zest, etc.)
1.Combine the sugar, water and vanilla bean seeds or extract in a small saucepan and warm over medium heat just until the sugar dissolves.
2.Continue to cook, without stirring, until the syrup reaches 225◦F (107◦C) [*Note: Original recipe indicates a temperature of 255◦F (124◦C), however, when testing the recipe I found that this was too high so we heated to 225◦F and it worked fine] on a candy or instant-read thermometer. Once it reaches that temperature, remove the syrup from the heat.
3.While the syrup is heating, begin whisking the egg and egg yolk at high speed in the bowl of your mixer using the whisk attachment. Whisk them until they are pale and foamy.
4.When the sugar syrup reaches the correct temperature and you remove it from the heat, reduce the mixer speed to low speed and begin slowly (very slowly) pouring the syrup down the side of the bowl being very careful not to splatter the syrup into the path of the whisk attachment. Some of the syrup will spin onto the sides of the bowl but don’t worry about this and don’t try to stir it into the mixture as it will harden!
5.Raise the speed to medium-high and continue beating until the eggs are thick and satiny and the mixture is cool to the touch (about 5 minutes or so).
6.While the egg mixture is beating, place the softened butter in a bowl and mash it with a spatula until you have a soft creamy mass.
7.With the mixer on medium speed, begin adding in two-tablespoon chunks. When all the butter has been incorporated, raise the mixer speed to high and beat until the buttercream is thick and shiny.
8.At this point add in your flavouring and beat for an additional minute or so.
9.Refrigerate the buttercream, stirring it often, until it’s set enough (firm enough) to spread when topped with a layer of cake (about 20 minutes).
For the white chocolate ganache/mousse

(Note: The mousse can be made ahead and refrigerated until you’re ready to use it.)
What you’ll need:
•a small saucepan
•a mixer or handheld mixer
Ingredients:
7 ounces white chocolate
1 cup plus 3 tbsp. heavy cream (35% cream)
1 tbsp. liquer of your choice (Bailey’s, Amaretto, etc.)
1.Melt the white chocolate and the 3 tbsp. of heavy cream in a small saucepan.
2.Stir to ensure that it’s smooth and that the chocolate is melted. Add the tablespoon of liqueur to the chocolate and stir. Set aside to cool completely.
3.In the bowl of a stand mixer, whip the remaining 1 cup of heavy cream until soft peaks form.
4.Gently fold the whipped cream into the cooled chocolate to form a mousse.
5.If it’s too thin, refrigerate it for a bit until it’s spreadable.
6.If you’re not going to use it right away, refrigerate until you’re ready to use.
For the glaze
(Note: It’s best to make the glaze right when you’re ready to finish the cake.)
What you’ll need:
•a small saucepan or double boiler
Ingredients:
14 ounces white chocolate, coarsely chopped
½ cup heavy cream (35% cream)
1.Melt the white chocolate with the heavy cream. Whisk the mixture gently until smooth.
2.Let cool for 10 minutes and then pour over the chilled cake. Using a long metal cake spatula, smooth out into an even layer.
3.Place the cake into the refrigerator for 30 minutes to set.
Assembling the Opéra Cake
(Note: The finished cake should be served slightly chilled. It can be kept in the refrigerator for up to 1 day).
Line a baking sheet with parchment or wax paper.
Working with one sheet of cake at a time, cut and trim each sheet so that you have two pieces (from each cake so you’ll have four pieces in total): one 10-inch (25-cm) square and one 10 x 5-inch (25 x 12½-cm) rectangle.
Step A (if using buttercream only and not making the ganache/mousse):
Place one square of cake on the baking sheet and moisten it gently with the flavoured syrup.
Spread about one-third of the buttercream over this layer.
Top with the two rectangular pieces of cake, placing them side by side to form a square. Moisten these pieces with the flavoured syrup.
Spread another third of the buttercream on the cake and then top with the third square of joconde. Use the remaining syrup to wet the joconde. Spread the remaining buttercream on top of the final layer of joconde and then refrigerate until very firm (at least half an hour).
Make the glaze and after it has cooled, pour/spread it over the top of the chilled cake. Refrigerate the cake again to set the glaze.
Serve the cake slightly chilled. This recipe will yield approximately 20 servings.
Step B (if making the ganache/mousse):
Place one square of cake on the baking sheet and moisten it gently with the flavoured syrup.
Spread about three-quarters of the buttercream over this layer.
Top with the two rectangular pieces of cake, placing them side by side to form a square. Moisten these pieces with the flavoured syrup.
Spread the remaining buttercream on the cake and then top with the third square of joconde. Use the remaining syrup to wet the joconde and then refrigerate until very firm (at least half an hour).
Prepare the ganache/mousse (if you haven’t already) and then spread it on the top of the last layer of the joconde. Refrigerate for at least two to three hours to give the ganache/mousse the opportunity to firm up.
Make the glaze and after it has cooled, pour/spread it over the top of the chilled cake. Refrigerate the cake again to set the glaze.
Serve the cake slightly chilled. This recipe will yield approximately 20 servings.

del.icio.us Tags:

Monday, May 19, 2008

Lemon Cream Cake

Kristens Food May 2008 037 #2 When Helen of Tartlette announced that she was hosting this months Sugar High Friday and that the theme was citrus, I knew I was in. I love desserts that are light and citrusy but what to make? I have a few lemon standbys that I always go for but this time I wanted to try something a little different. My mother-in-law has been talking about Olive Garden's Lemon Cream Cake a lot lately, so this post is dedicated to her and my attempt to recreate it. I think it turned out pretty darn close and boy was it delicious.

I decided to use the cake form Dorie Greenspan's party cake recipe since it had a nice crumb and was light. The filling I just kind of improvised as I went along, it's kind of a lemon and cream cheese mousse. The topping is just a crumb topping with powdered sugar, flour, butter and vanilla. Altogether delicious!

Lemon Cream CakeKristens Food May 2008 038 #3

Cake

2 1/4 cups cake flour
1 tablespoon baking powder
½ teaspoon salt
1 ¼ cups buttermilk
4 large egg whites (save the yolks for the lemon curd)
1 ½ cups sugar
2 teaspoons grated lemon zest
1 stick (8 tablespoons) unsalted butter, at room temperature
1 tsp. vanilla

To Make the Cake
Sift together the flour, baking powder and salt.
Whisk together the milk and egg whites in a medium bowl.
Put the sugar and lemon zest in a mixer bowl or another large bowl and rub them together with your fingers until the sugar is moist and fragrant.
Add the butter and working with the paddle or whisk attachment, or with a hand mixer, beat at medium speed for a full 3 minutes, until the butter and sugar are very light.
Beat in the extract, then add one third of the flour mixture, still beating on medium speed.
Beat in half of the milk-egg mixture, then beat in half of the remaining dry ingredients until incorporated.
Add the rest of the milk and eggs beating until the batter is homogeneous, then add the last of the dry ingredients.
Finally, give the batter a good 2- minute beating to ensure that it is thoroughly mixed and well aerated.
Divide the batter between the two pans and smooth the tops with a rubber spatula.
Bake for 30-35 minutes, or until the cakes are well risen and springy to the touch – a thin knife inserted into the centers should come out clean
Transfer the cakes to cooling racks and cool for about 5 minutes, then run a knife around the sides of the cakes, unfold them and peel off the paper liners.
Invert and cool to room temperature, right side up (the cooled cake layers can be wrapped airtight and stored at room temperature overnight or frozen for up to two months).

Filling

1/3 cup simple syrup (you will need more simple syrup to brush on the cake)
1 package unflavored powdered gelatin
1 batch of lemon curd (recipe follows)
1 pkg. (8oz) cream cheese, softened
3/4 cup whipping cream

1. Bloom the gelatin in a few Tbs. of water for about 5 minutes. Heat the simple syrup over medium heat and add the gelatin, bring the mixture to a simmer, stirring constantly, until the gelatin is completely dissolved. Set aside to cool.

2. In a chilled mixing bowl, beat the whipping cream until it forms stiff peaks. Transfer to another bowl and set aside.

3. In the mixing bowl, beat the cream cheese and the lemon curd until it is well mixed. Slowly drizzle in the cooled simple syrup, scraping down sides as needed. Add the whipping cream and beat with the whisk attachment until incorporated.

4. Chill the mixture until slightly thickened.

Lemon Curd

2 large lemons
4 large egg yolks
2/3 cup sugar
4 tablespoons butter, cold

1. Zest the lemons and set aside. Juice the zested lemons and strain the juice. In a small mixing bowl, whisk the egg yolks and sugar until smooth. Stir in the zest and lemon juice.

2. Pour the mixture into a non-reactive saucepan. Over medium heat, bring to a simmer. Reduce the heat to low and continue to cook, stirring constantly with a wooden spoon, until the mixture thickens and coats the back of a spoon. Remove from the heat and pour through a strainer into a glass bowl. Stir in the butter, 1 tablespoon at a time. Cool to room temperature then press a piece of plastic wrap onto the surface and chill in the fridge until completely chilled and set.

Vanilla Crumb Topping

1/2 cup flour

1/2 cup plus 2 Tbs. powdered sugar

5 Tbs. chilled butter cut into small pieces

1 tsp. vanilla

1. In a bowl mix the flour and powdered sugar. Cut in the chilled butter until small pea sized balls form. Drizzle the vanilla over and mix to combine. Chill the mixture until needed.

Assembling the cake.

When the cake cooled, slice in half horizontally. Brush the cut sides of the cake with the remaining simple syrup. Spread 2/3 of the filling on the bottom half of the cake. Top with the other layer of cake. Frost the top and the outside of the cake with the remaining filling and then press the crumb mixture onto the sides and top of the cake. Dust with powdered sugar. Chill for several hours or freeze to firm up the filling. Dust extra with powdered sugar before serving.
del.icio.us Tags: ,,

Friday, May 16, 2008

Easy Chocolate Oreo Truffles

Kristens Food May 2008 002 32

I know that I have been gone for awhile but I have a good reason. There are two things that I absolutely love doing one of course being cooking/baking the other is reading. The new Stephenie Meyer book called The Host came out last week and I couldn't put it down. So, as you can see, my cooking/baking passion took the back burner for a week. Now that I am done though, I plan on redeeming myself with several things this week. The first being super easy chocolate Oreo truffles. I can't take credit for this idea as I saw them on Bakearella's blog last year and have had them in my mind ever since. As promised, they were easy and delicious.
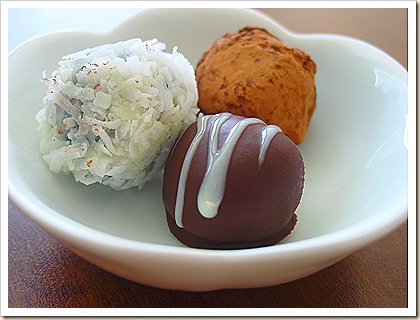
The inside is a combination of Oreos and cream cheese, then a coating of white or dark chocolate and an assortment of toppings, yumm...! I used dark chocolate with cocoa powder, white chocolate with coconut and then just plain dark chocolate with a drizzle of white chocolate.

Kristens Food May 2008 006Kristens Food May 2008 007 #2

Chocolate Oreo Truffles

Kristens Food May 2008 015 #2

1 package of Oreos

1 pkg. (8 0z) cream cheese, softened

dark chocolate

white chocolate

heavy cream (optional)

assorted toppings (nuts, coconut, cocoa powder, etc..)

1. In a food processor, grind the Oreos into crumb.

2. Mix the Oreo crumbs and the softened cream cheese together either by hand or in a food processor.

3. Scoop the mixture into balls and freeze or refrigerate until firm.

4. Melt the chocolate and add a little heavy cream to thin out if desired. Dip the truffles in the chocolate and roll in desired toppings. Chill until the chocolate is set.

del.icio.us Tags: ,

Thursday, May 8, 2008

Mini Berry Clafoutis Muffins

Strawberry clafoutis 082

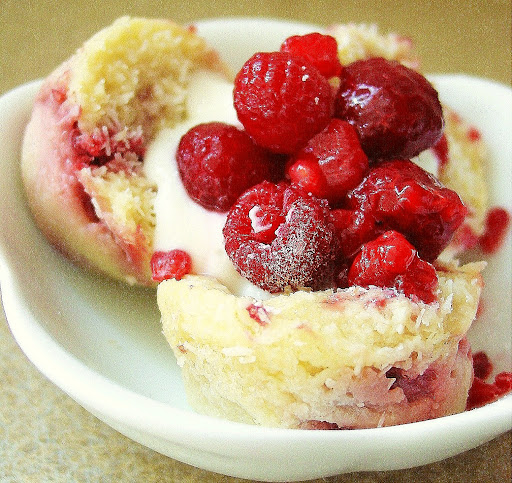
What, you’ve never heard of clafoutis (pronounced kla-foo-TEE)? If only you grew up in France where many a household have their own family recipe for the delicious breakfast and/or dessert. Clafoutis is a custard-like baked French dessert or breakfast that is typically made by baking fresh fruit, (traditionally cherries,) and a sweet batter similar to a crepe or German pancake batter. It is so delicious that I could eat it every day. In fact, I made it twice yesterday and had to forgo eating lunch to make up for all the delicious clafoutis that I ate. As I am writing this I am wondering why I haven’t made any today?! I’ll be right back…

Really, you have to try this, it is so easy and delicious you’ll wonder why you have never had it before. (Curse me and my typical American upbringing of processed boxed foods!) I mean, all we ever had in my house for breakfast growing up was boxed cereal, and not even the sweet sugar kind either. I can’t believe that this passes as a breakfast. I guess it does contain fresh fruit, eggs and milk so it can’t be too bad right? My problem is that I eat the whole thing, I can’t stop at one bite or a few little muffins.

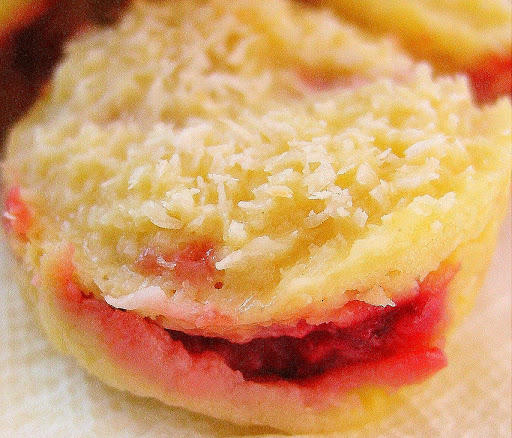
I tried several recipes and I really liked the one that my food blog idol Helen had on her blog. I made a few changes, and baked them in a mini muffin tin for an easy finger food and voilà, they are delicious. I know that the typical clafoutis recipe doesn’t contain cream cheese, but I just love cream cheese and berries so I had to throw some in there. Although I call these muffins, don’t be expecting what you and I would call a muffin, clafoutis has a custard like texture that is creamy and soft but it sets up enough when cool that you can remove them from the muffin tins and they hold their shape. This recipe can also be doubled and baked in several individual gratin dishes or one 8 or 9 inch round pan.

Mini Berry Clafoutis Muffins

Strawberry clafoutis 091

Strawberry clafoutis 086

Strawberry clafoutis 063

1 cup diced fruit, I used a mixture of strawberries and raspberries

1 ½ oz. flour, about 1/3 cup plus 2 tsp.

½ oz cornstarch, about 2 Tbs.

1 oz. brown sugar, about 3 Tbs. packed

1 oz. granulated sugar, about 2 heaping Tbs.

¾ cup milk

1 egg

½ oz. butter melted (1 TBS.)

1 oz cream cheese softened

1 tsp. vanilla

Coconut for the top, I use unsweetened


1. Preheat the oven to 350 degrees. Grease a mini muffin pan and divide the fruit between 20-21 of the spaces.

2. In a bowl, mix together the flour, cornstarch and sugars. Set aside.

3. In a blender, mix together the milk, egg, butter, cream cheese and vanilla. Blend for a few seconds until well mixed. Add the dry ingredients and mix until combined and no lumps remain. Do not mix too long.

4. Pour the mixture over the berries and top with the shredded coconut. Bake for about 24 minutes or until puffed and set. The clafoutis will puff up in the oven but will sink back down once cooled.

5. Let them cool in the pan to firm up and make removal easier. They are delicious hot, at room temperature and even cold right out of the fridge. If you remove them too soon form the pans they will fall apart but will still taste delicious. (I always eat a few while they are still piping hot because they are so good and I am so impatient!)

del.icio.us Tags: ,,

Sunday, April 27, 2008

Cheesecake pops with the Daring Bakers

food April 2008 081 #2

Here it is, the end of the month already and time for another installment of the Daring Bakers. This months challenge was hosted by Deborah from Taste and Tell and Elle from Feeding My Enthusiasms. I have to say that I was so excited when I found out that the challenge was Cheesecake pops. Cheesecake is one of my all time favorite desserts and I knew that I would have no problem making and eating this delectable treat.

pink_db

The recipe was pretty straight forward. Bake a crustless cheesecake in a water bath, chill and scoop into balls. Freeze the balls with a lollipop stick in them and then dunk in tempered chocolate and coat with various toppings. The only thing that I found wrong with the recipe was the baking time. The recipe called to bake the cheesecake for 35-45 minutes and mine took about 60. That is a pretty huge discrepancy, but it seems that many of the Daring Bakers had the same problem. It makes me wonder if the recipe was written wrong in the cookbook as I have never baked so large a cheesecake in less than 50-60 minutes. Luckily having baked several cheesecakes before, I knew not to take it out so early.

The recipe turned out a silky smooth cheesecake that was extremely delicious. I will admit that I only made half of the recipe into the pops (which still gave me 30-40 pops). The rest I ate bite by bite throughout the day gaining me 5 extra pounds that week, but oh was it worth it! (I just can't resist cheesecake!!!)

I treated the cheesecake pops like caramel apples. I dressed part of the batch in dark chocolate and sprinkles, another part of the batch with dark chocolate, walnuts and chewy caramel. The last part of the batch I dipped directly into the hot chewy caramel and then into walnuts and then drizzled them with dark chocolate. I did have a bit of trouble dipping them into the caramel as it needed to be at a higher temperature to be thin enough to dip. This caused the cheesecake to start to melt a little and 2 or three of the bites fell off of the sticks. No matter they still tasted delicious with their chewy outer shell and their velvety centers. All in all it was a great challenge and one that I am likely to repeat.

food April 2008 067#2

Cheesecake Pops

food April 2008 064 #3

adapted from Sticky, Chewy, Messy, Gooey by Jill O’Connor
Makes 30 – 40 Pops (or more if you make them small like I did)

5 8-oz. packages cream cheese at room temperature
2 cups sugar
¼ cup all-purpose flour
¼ teaspoon salt
5 large eggs (I used 3 eggs when I baked half the recipe without a problem)
2 egg yolks
1 vanilla bean, seeded
¼ cup heavy cream
Thirty to forty 8-inch lollipop sticks
1 pound chocolate, chopped or in chips
2 tablespoons vegetable shortening
(Note: White chocolate is harder to use this way, but not impossible)
Assorted decorations such as chopped nuts, colored jimmies, crushed peppermints, mini chocolate chips, sanding sugars, dragees) I also used cut chocolate transfer sheets.
Position oven rack in the middle of the oven and preheat to 325 degrees F. Set some water to boil.
In a large bowl, beat together the cream cheese, sugar, flour, and salt until smooth. If using a mixer, mix on low speed. Add the whole eggs and the egg yolks, one at a time, beating well (but still at low speed) after each addition. Beat in the vanilla and cream.
Grease a 10-inch cake pan (not a springform pan), and pour the batter into the cake pan. Place the pan in a larger roasting pan. Fill the roasting pan with the boiling water until it reaches halfway up the sides of the cake pan. Bake until the cheesecake is firm and slightly golden on top, 35 to 45 minutes. (Mine took 55-60 minutes)
Remove the cheesecake from the water bath and cool to room temperature. Cover the cheesecake with plastic wrap and refrigerate until very cold, at least 3 hours or up to overnight.
When the cheesecake is cold and very firm, scoop the cheesecake and place on a parchment paper-lined baking sheet. Carefully insert a lollipop stick into each cheesecake ball. Freeze the cheesecake pops, uncovered, until very hard, at least 1 to 2 hours.
When the cheesecake pops are frozen and ready for dipping, prepare the chocolate. In the top of a double boiler, set over simmering water, or in a heatproof bowl set over a pot of simmering water, heat half the chocolate and half the shortening, stirring often, until chocolate is melted and chocolate and shortening are combined. Stir until completely smooth. Do not heat the chocolate too much or your chocolate will lose it’s shine after it has dried. Save the rest of the chocolate and shortening for later dipping, or use another type of chocolate for variety.
Alternately, you can microwave the same amount of chocolate coating pieces on high at 30 second intervals, stirring until smooth.
Quickly dip a frozen cheesecake pop in the melted chocolate, swirling quickly to coat it completely. Shake off any excess into the melted chocolate. If you like, you can now roll the pops quickly in optional decorations. You can also drizzle them with a contrasting color of melted chocolate (dark chocolate drizzled over milk chocolate or white chocolate over dark chocolate, etc.) Place the pop on a clean parchment paper lined baking sheet to set. Repeat with remaining pops, melting more chocolate and shortening (or confectionary chocolate pieces) as needed.
Refrigerate the pops for up to 24 hours, until ready to serve.

The Best Ever Caramel

(adapted from a Bon Appetit recipe for caramel apples)

1 1-pound box dark brown sugar
1 cup (2 sticks) unsalted butter, room temperature
1 14-ounce can sweetened condensed milk
1 cup dark corn syrup
1/2 teaspoons vanilla extract
1/4 teaspoon salt
Whipping cream (if necessary)

Combine all ingredients except for the whipping cream in heavy 2 1/2-quart saucepan (about 3 inches deep). Stir with wooden spatula or spoon over medium-low heat until sugar dissolves (no crystals are felt when caramel is rubbed between fingers), occasionally brushing down sides of pan with wet pastry brush, about 15 minutes.

Attach clip-on candy thermometer to side of pan. Increase heat to medium-high; cook caramel at rolling boil until thermometer registers 236°F, stirring constantly but slowly with clean wooden spatula and occasionally brushing down sides of pan with wet pastry brush, about 12 minutes. Pour caramel into metal bowl (do not scrape pan). Submerge thermometer bulb in caramel; cool, without stirring, to 200°F, about 20 minutes.

If caramel becomes too thick to dip into, add 1 to 2 tablespoons whipping cream and briefly whisk caramel in bowl over low heat to thin.

del.icio.us Tags: ,

Tuesday, April 22, 2008

Honey ginger and lemon almonds

food April 2008 082 #2

Whenever I go to games or events at the stadium the smell of roasted sugared almonds fills the entire building. I am almost always tempted to shell out the $3-$4 for the small little bags of candied nuts. Not anymore. Today, I made the best candied almonds. They were so delicious that my husband and I, (ok, it was mostly me), finished off the whole batch. My husband, who is not much of an almond fan couldn't put them down.

Don't be put off by the ginger and lemon, you can leave them out if you want but I found that they gave the nuts that little hint of flavor that you couldn't quite put your finger on. You can also play around with the flavors substituting cinnamon or a little cayenne pepper. These are so delicious, they will be a staple snack and party treat for years to come.

Honey ginger and lemon almonds

food April 2008 088 #2

2 cups whole almonds

1/4 cup honey

2 Tbs. butter

1/4 tsp. fresh grated ginger

1/2 tsp grated lemon zest

1/4 tsp. salt

1/2 tsp. vanilla

1/2 cup turbinado sugar (raw sugar)

1. Preheat the oven to 350 degrees. Spread the almonds onto an ungreased cookie sheet and bake for 12-15 minutes tossing occasionally until toasted and fragrant.

2. In a medium saucepan, combine the honey, butter ginger, lemon zest, salt and vanilla. Bring to a boil over medium heat. Reduce heat and simmer for 2 minutes. Add the almonds and simmer for 2 more minutes. Spread almonds onto a cookies sheet that has been lines with foil and sprayed with nonstick cooking spray. Separate any nuts that are stuck together. Cool slightly (do not cool too long or the sugar won't stick).

3. Place the turbinado sugar into a large bowl and toss with the warm almonds making sure that all of the nuts are evenly coated.

del.icio.us Tags:

Friday, April 11, 2008

Ooey, gooey, caramel and chocolate

Kristen's Food April 2008 015

Sorry that I have been gone for a while, my main computer crashed and it is the one that has my food pictures on it. But here I am with some more goodies for you.

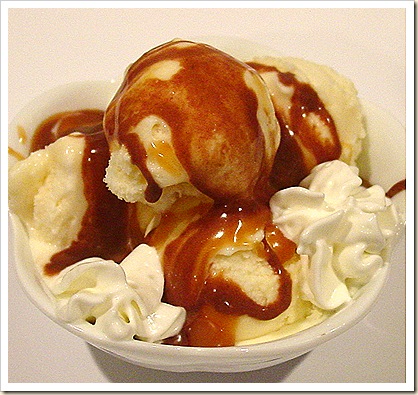
This week while lying in bed, I began to think of ice cream sundaes and yummy, ooey, gooey caramel sauce. So what do I do, I flip through my recipes and find one that I haven't tried before. This caramel sauce comes from one of my favorite chefs, Ina Garten. Her recipe is so easy and basically foolproof and makes the most perfect ice cream topping. It is so easy and quick that it doesn't even make sense to buy it, this is so much better.

Ina Garten's Caramel Sauce

Kristen's Food April 2008 036

1 1/2 cups sugar

1/3 cup water

1 1/4 cup heavy cream

1/2 tsp. vanilla

Mix the sugar and the water in a medium heavy-bottomed saucepan. Cook without stirring, over low heat for 5-10 minutes, until the sugar dissolves. Increase the heat to medium and boil uncovered until the sugar turns a warm chestnut brown (about 350 degrees on a candy thermometer), about 5-7 minutes, gently swirling the pan to stir mixture. Watch the mixture constantly at the end as it will go from caramel to burnt very quickly. Turn off the heat. Slowly add the cream and vanilla. The cream will bubble up and the caramel will solidify: don't worry. Simmer over low heat, stirring constantly until the caramel dissolves and the sauce is smooth, about 2 minutes. Allow to cool at room temperature for about 4 hours. it will thicken as it sits.

I also made a delicious homemade chocolate sauce that was just as good as the caramel. I looked through several recipes for homemade chocolate sauce but I was unhappy with many of the recipes as they contained corn syrup and other things that I just don't want in my food. So, I decided that my favorite chocolate sauce is ganache. I knew if I just thinned it out with by adding more cream than usual that it would be a perfect chocolate sauce. This is easier than the caramel and it is delicious!

Chocolate Sauce

Kristen's Food April 2008 028

1 1/4 cup heavy cream

8 oz of bittersweet of semi-sweet chocolate, chopped

1/2 tsp. vanilla

Place the chocolate in a large bowl. Bring the cream to a boil and pour over the chocolate, add the vanilla. Let sit without stirring for 5 minutes. Stir until smooth. The sauce will be thin, but will thicken as it sits. you can cool it quicker in the fridge. If the sauce gets to thick you can heat it up or add more cream.

del.icio.us Tags: ,