Showing posts with label chocolate. Show all posts

Saturday, February 28, 2009

The Daring Bakers make Chocolate Valentino Cake

Kristen's Food February 2009 058 #2

It's the end of another month and time once again for another Daring Baker's challenge.  Being the month of love it was fitting that chocolate be the star of this months challenge.

The February 2009 challenge is hosted by Wendy of WMPE's blog and Dharm of Dad ~ Baker & Chef.  We have chosen a Chocolate Valentino cake by Chef Wan; a Vanilla Ice Cream recipe from Dharm and a Vanilla Ice Cream recipe from Wendy as the challenge.

We have had so many sweets around here that I chose to halve the recipe for the valentino cake and bake them in my muffin tin.  For the ice cream I decided to go my own way and make up my own recipe.  I ended up with a deliciously creamy coconut ice cream, which is definitely for coconut lovers only.  Since the valentino recipe wasn't all that challenging I also decided to make these little chocolate cups which was a first for me.  I was so excited with how they came out.  They looked so fancy that I really didn't want to eat them.

  I put one of the small valentino cakes in the bottom of the chocolate cup and then topped it with the creamy coconut ice cream and then added another sliver of the cake as an accent and to let you know what was inside.   All in all a fun and delicious challenge.

My sentiment on the cake is that it was very similar to my rich chocolate brownies with a little silkier texture,  like a mix between an deeply chocolaty brownie and a silky smooth mouse.  A little of this cake definitely goes a long way.

Chocolate Valentino
Preparation Time:  20 minutes

Kristen's Food February 2009 060

16 ounces (1 pound) (454 grams) of semisweet chocolate, roughly chopped
½ cup (1 stick) plus 2 tablespoons (146 grams total) of unsalted butter
5 large eggs separated


1. Put chocolate and butter in a heatproof bowl and set over a pan of simmering water (the bottom of the bowl should not touch the water) and melt, stirring often.

2. While your chocolate butter mixture is cooling. Butter your pan and line with a parchment circle then butter the parchment.

3. Separate the egg yolks from the egg whites and put into two medium/large bowls.

4. Whip the egg whites in a medium/large grease free bowl until stiff peaks are formed (do not over-whip or the cake will be dry).

5. With the same beater beat the egg yolks together.

6. Add the egg yolks to the cooled chocolate.

7. Fold in 1/3 of the egg whites into the chocolate mixture and follow with remaining 2/3rds. Fold until no white remains without deflating the batter. {link of folding demonstration}

8. Pour batter into prepared pan, the batter should fill the pan 3/4 of the way full, and bake at 375F/190C

9. Bake for 25 minutes until an instant read thermometer reads 140F/60C.

Note – If you do not have an instant read thermometer, the top of the cake will look similar to a brownie and a cake tester will appear wet.

10. Cool cake on a rack for 10 minutes then unmold.

Coconut Ice Cream

1 can coconut milk

1/3 cup heavy cream

1 cup milk

5 egg yolks

3/4 cup sugar

1 tsp. coconut extract

1.  Heat the coconut milk, cream and milk until it just begins to from bubbles around the edges.

2.  Meanwhile, in the bowl of a mixer with the whisk attachment, beat the egg yolks and sugar together until light and pale and the mixture falls back on itself and forms ribbons.

3.  With the mixer on low,  slowly drizzle in a ladle full of the warm milk mixture.  Continue adding the milk mixture in ladle-fulls until you've add about 1/2 of the milk mixture.  Then pour the egg yolk  mixture back into the pan with the rest of the milk mixture.

4.  Put the mixture back over medium-low to medium heat and heat stirring constantly until the mixture begins to thicken and coats the back of a spoon.  Do not let it boil.

5.  Pour the thickened mixture through a sieve into a medium bowl.  Stir in the extract and let the mixture sit out to cool.  Once cooled, cover and refrigerate until well chilled preferably overnight.

6.  Freeze in ice cream maker according to the manufacturers instructions.

Tuesday, February 10, 2009

Brownie Truffle Bites

Kristen's Food February 2009 029

This is a super easy recipe that would be great for your sweetie this Valentines day.  All you need is a pan of brownies, some white chocolate or almond bark and some red or pink candy melts.

I made a pan of my peanut butter brownies for this one but any brownie would work, even a mix.  Using a small scoop, make balls out of the brownies.  Chill or freeze until firm.  Melt some almond bark or white chocolate (almond bark will cover the chocolate better).  Dip the brownie balls into the chocolate and lay on a parchment lined tray to set.  Drizzle with some melted red or pink candy melts and viola.  East peasy lemon squeezy.

You could also roll the ball into powdered sugar, cocoa powder or coconut for an even easier little treat.  These are so easy that you've gotta try them.

Monday, February 2, 2009

Mini Chocolate Cream Pies


Kristen's Food January 2009 459

Today my kids and I wanted to make a desert for family night but were running low on supplies.  No chocolate chips for cookies, very little brown sugar or nuts.  What we did find on the other hand was some leftover pie dough in the freezer, a package of chocolate pudding (yes a mix), and some whipping cream.

We could have made  regular chocolate cream pie, but I love small treats.  I think that's because I don't feel so guilty eating them.  These were great because they were so easy that the kids could help out but they look so cute too.  After finishing these, my kids were covered with chocolate pudding and whipped cream, it was even in their hair.  It was pretty cute!

Mini Chocolate Cream Pie

Kristen's Food January 2009 457

3 cups flour

1/2 tsp. salt

3  Tbs. Sugar

1/2 cup cold butter, cut in to pieces

1/2 cup shortening

about 1/2 cup ice water

1 large pkg. (2.1 oz) Chocolate pudding

1 1/2 cups cold milk

1 cup cold whipping cream

Grated Chocolate for garnish (optional)

1.  In a large bowl, mix together the flour salt and sugar.  Cut in the butter an d shortening until the fat has irregular pieces about the size of peas.

2.  Slowly add a tablespoon of water at a time carefully mixing the water into the dough.  Add enough water so that the dough forms  a ball when pressed together.  Do not overmix.  Form the dough into two discs and wrap in plastic wrap and chill for at least one hour to let the gluten relax.

3.  Preheat the oven to 350°.  Grease a mini muffin tin.  Place a tablespoon of dough into each cup.  Using a mini tart shaper press the dough to form a mini pie shell.  Bake for about 15 minutes or until baked through.  Remove baked shells from pan and cool.

4.  Meanwhile, in a large mixing bowl, whip the cream until it forms stiff peaks.  Put the whipped cream into another bowl.  Empty the pudding mix and milk into the mixing bowl, whip together until thickened and well mixed.  Fold in 2/3 of the whipped cream in small batches into the pudding.  Be sure to fold and not mix as you don't want to deflate the whipped cream.

4.  Place the pudding mixture into a ziploc bag and snip the corner.  Pipe the pudding into the premade cooled shells.  Place the remaining whipped cream into another ziploc bag and pie the cream on top of the pies.  Garnish with some grated chocolate if desired.  Store the pies in the fridge to set.

Wednesday, December 31, 2008

Caramel, Cashew and Chocolate coated Pretzels

Kristen's Food December 2008 081

I hope that everyone had a great Christmas.  My husband made it back from his trip on Christmas Eve despite the crazy weather so I was very glad that we were all able to spend Christmas together.  I can't believe that it is all over and that we are starting a new year.  Where does the time go?  Remember when you were a kid and it seemed like time went so slow.  It always took so long to get to your birthday and to Christmas.  Now you turn around and another year has passed.

Enough of that, I should get on to the food.  I have been baking up a storm this season but unfortunately I didn't take pictures of most of it.  I know, what was I thinking?  A friend of mine paid me to make her holiday treats so I made 150 mint chocolate brownies covered with a mint chocolate ganache.  Absolutely delicious, but I only took one measly picture.  They were delicious though and it was really nice to have someone pay me to bake.  

Kristen's Food December 2008 067

While I was making the brownies, I got a call from my mother-in-law who asked me to make her 160 cookies for some treat bags that she was putting together.  My mother-in-law is an amazing cook and baker so it was an honor for her to ask me to bake for her.  She had run out of time and needed them the next day so I had to put together those quickly.  Yet again, one measly picture.

Kristen's Food December 2008 062

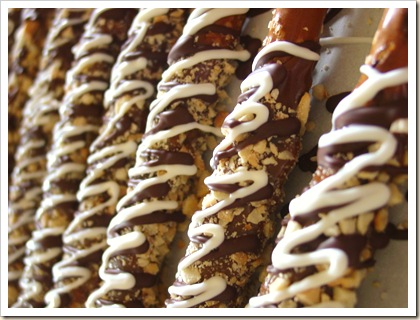
After all that baking, I still needed to put together my treats.  I decided to make these delicious pretzels that I dipped in chewy caramel, rolled in chopped cashews and then drizzled them with dark and white chocolate.  Can I say if these were a drug, I would be an addict.  I love the combination of salty and sweet and this one worked perfectly.  The sweet, creamy, chewy caramel and the salty nuts and pretzel were amazing.  Can you believe that after making these that I took not one picture?!    I think that I was just tired or something.  But, luckily, I needed to make some more today because I didn't get around to everyone before Christmas.  It's never to late for treats though, right?!

Kristen's Food December 2008 076

Caramel Cashew and Chocolate Covered Pretzels

40 pretzel rods

One batch caramel (recipe follows)

1 ½ pounds chopped cashews

10 oz dark chocolate

10 oz white chocolate

1. Dip the pretzel rods into the slightly cooled caramel and then roll into the cashews. Place on a cookie sheet lined with parchment paper and allow to set up. After a few minutes, turn the pretzels over and reshape the caramel that has pooled on the bottom. Allow to cool completely.

2. Melt the dark chocolate over a double broiler, stirring frequently. Remove from heat when it is almost all melted. Stir until completely melted. Pour into a Ziploc freezer bag and clip a small hole in the corner. Drizzle the pretzels with the dark chocolate. Repeat with the white chocolate. Allow the chocolate to set up.

Caramel

1-pound box dark brown sugar
1 cup (2 sticks) unsalted butter, room temperature
1 14-ounce can sweetened condensed milk
1 cup dark corn syrup
1/2 teaspoons vanilla extract
1/4 teaspoon salt
Whipping cream (if necessary)

Combine all ingredients except for the whipping cream in heavy 2 1/2-quart saucepan (about 3 inches deep). Stir with wooden spatula or spoon over medium-low heat until sugar dissolves (no crystals are felt when caramel is rubbed between fingers), occasionally brushing down sides of pan with wet pastry brush, about 15 minutes.
Attach clip-on candy thermometer to side of pan. Increase heat to medium-high; cook caramel at rolling boil until thermometer registers 236°F, stirring constantly but slowly with clean wooden spatula and occasionally brushing down sides of pan with wet pastry brush, about 12 minutes. Pour caramel into glass bowl (do not scrape pan).

If caramel becomes too thick to dip into, add 1 to 2 tablespoons whipping cream and briefly whisk caramel in bowl over low heat to thin.

Wednesday, October 8, 2008

Chewy Chocolate Chip Cookies

Kristen's Food October 2008 016

My husband has been begging me forever to just make some chocolate chip cookies. So, when he was gone on Saturday night, I rounded up the kids and we threw together a batch of these chewy chocolaty cookies as a surprise for when he got home. I love these because they are chewy due to the ground up oatmeal and the corn syrup (yes corn syrup, but you only use a little). I love to use mini chocolate chips and if my husband isn't looking a handful of finely chopped walnuts.

Kristen's Food October 2008 003

I usually will make a batch of these and only bake up a dozen. the other 3 dozen I roll into balls, place them on a baking sheet and freeze. Once frozen, I move them to a plastic bag. I then have little cookie balls that I can pull out and bake whenever someone drops by or when I need a quick treat to bring somewhere. They can be baked frozen and only take a minute or two longer.

These cookies are pretty flat but they stay soft and chewy. Be sure to remove them from the oven once the edges are just beginning to turn golden brown and when the tops have little cracks on them. They will look a little doughy but will firm up once they cool off.

Chewy Chocolate Chip Cookies

Kristen's Food October 2008 023

1 cup (2 sticks) butter, softened

1 cup granulated sugar

1 cup packed brown sugar

1 1/2 Tbs. corn syrup (I used dark but light would also work)

2 eggs

1 tsp. vanilla

3 cups of oatmeal, ground into a flour

1 cup flour

1/2 tsp salt

1 tsp. baking powder

1 tsp. baking soda

12 oz. chocolate chips, (I like mini)

1 cup walnuts, chopped (optional)

1. Preheat oven to 350°. In the bowl of a mixer with the paddle attachment, cream together the butter and sugars until light and fluffy, about 5 min.

2. In a separate bowl, combine the oatmeal, flour, salt, baking soda, and baking powder. Mix with a whisk to combine all of the ingredients.

3. In the mixer bowl with the butter, add the vanilla and corn syrup and mix to combine. With the mixer still running, add the eggs, one at a time, mixing until well combined.

4. With the mixer on low, slowly add the flour mixture a little at a time, mixing only until combined, do not over mix. Add the chocolate chips and nuts, if using ,and mix just until they are evenly mixed into the dough.

5. Using a scoop, scoop cookie dough into balls and place on baking sheet leaving 2 inches of space between each cookie. Bake at 350° for 9-11 minutes, or until the edges start to turn golden brown and the tops have little crack in them. the cookies will look a little doughy but they will set up as they cool off. Let them cool for a few minutes on the cookie sheet before removing them to a cooling rack.

Sunday, August 31, 2008

Eclairs anyone?

DSC04125

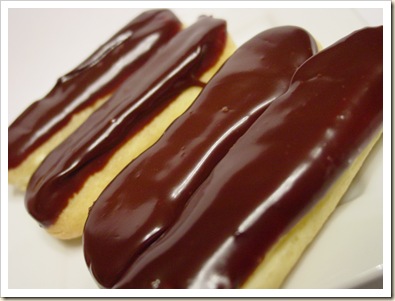
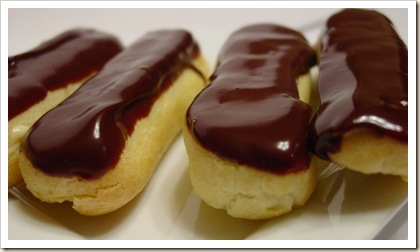
It's the end of the month and time for another Daring Baker's Challenge. I have been a huge procrastinator lately and so of course I didn't even start this challenge until last night. Luckily it was a pretty straight forward and quick one so I wasn't worried about getting it done. This month's recipe was eclairs by Pierre Herme, an amazing french pastry chef.

The recipe called for a basic pate choux dough, a chocolate pastry cream filling and a chocolate glaze. We were allowed to have a little creative leeway. The only rules were that we had to use Pierre Herme's choux dough recipe and we had to use at least one chocolate component. I decided to make the filling a vanilla cream cheese pastry cream and to stick with a chocolate ganache for the glaze. Pretty straight forward and not too creative but that's what you get when you put the challenge off until the last minute. Although not my most creative endeavor, the eclairs were still absolutely delicious, especially as a midnight snack!

Anyone who knows my family knows that they are all huge Simpson's fans. So, when my husband heard that this months challenge was eclairs he had to retrieve this clip from an episode where Homer was a food critic. It's pretty hilarious.


Pierre Hermé’s Chocolate Éclairs
Recipe from Chocolate Desserts by Pierre Hermé
(makes 20-24 Éclairs)
DSC04118


• Cream Puff Dough (see below for recipe), fresh and still warm

1) Preheat your oven to 375 degrees F (190 degrees C). Divide the oven into thirds by
positioning the racks in the upper and lower half of the oven. Line two baking sheets with
waxed or parchment paper.

2) Fill a large pastry bag fitted with a 2/3 (2cm) plain tip nozzle with the warm cream puff dough.
Pipe the dough onto the baking sheets in long, 4 to 41/2 inches (about 11 cm) chubby fingers.
Leave about 2 inches (5 cm) space in between each dough strip to allow them room to puff.
The dough should give you enough to pipe 20-24 éclairs.

3) Slide both the baking sheets into the oven and bake for 7 minutes. After the 7 minutes, slip the
handle of a wooden spoon into the door to keep in ajar. When the éclairs have been in the
oven for a total of 12 minutes, rotate the sheets top to bottom and front to back. Continue
baking for a further 8 minutes or until the éclairs are puffed, golden and firm. The total baking
time should be approximately 20 minutes.

Notes:
1) The éclairs can be kept in a cool, dry place for several hours before filling.

Assembling the éclairs:
• Chocolate glaze (see below for recipe)
• Chocolate pastry cream (see below for recipe)

1) Slice the éclairs horizontally, using a serrated knife and a gently sawing motion. Set aside the
bottoms and place the tops on a rack over a piece of parchment paper.

2) The glaze should be barely warm to the touch (between 95 – 104 degrees F or 35 – 40
degrees C, as measured on an instant read thermometer). Spread the glaze over the tops of
the éclairs using a metal icing spatula. Allow the tops to set and in the meantime fill the
bottoms with the pastry cream.

3) Pipe or spoon the pastry cream into the bottoms of the éclairs. Make sure you fill the bottoms
with enough cream to mound above the pastry. Place the glazed tops onto the pastry cream
and wriggle gently to settle them.

Notes:
1) If you have chilled your chocolate glaze, reheat by placing it in a bowl over simmering water,
stirring it gently with a wooden spoon. Do not stir too vigorously as you do not want to create
bubbles.

2) The éclairs should be served as soon as they have been filled.

Pierre Hermé’s Cream Puff Dough
Recipe from Chocolate Desserts by Pierre Hermé
(makes 20-24 Éclairs)


• ½ cup (125g) whole milk
• ½ cup (125g) water
• 1 stick (4 ounces; 115g) unsalted butter, cut into 8 pieces
• ¼ teaspoon sugar
• ¼ teaspoon salt
• 1 cup (140g) all-purpose flour
• 5 large eggs, at room temperature

1) In a heavy bottomed medium saucepan, bring the milk, water, butter, sugar and salt to the
boil.

2) Once the mixture is at a rolling boil, add all of the flour at once, reduce the heat to medium
and start to stir the mixture vigorously with a wooden spoon. The dough comes together very
quickly. Do not worry if a slight crust forms at the bottom of the pan, it’s supposed to. You
need to carry on stirring for a further 2-3 minutes to dry the dough. After this time the dough
will be very soft and smooth.

3) Transfer the dough into a bowl of a mixer fitted with the paddle attachment, or using your
handmixer or if you still have the energy, continue by hand. Add the eggs one at a time,
beating after each egg has been added to incorporate it into the dough.
You will notice that after you have added the first egg, the dough will separate, once again do
not worry. As you keep working the dough, it will come back all together again by the time you
have added the third egg. In the end the dough should be thick and shiny and when lifted it
should fall back into the bowl in a ribbon.

4) The dough should be still warm. It is now ready to be used for the éclairs as directed above.

Notes:
1) Once the dough is made you need to shape it immediately.
2) You can pipe the dough and the freeze it. Simply pipe the dough onto parchment-lined baking
sheets and slide the sheets into the freezer. Once the dough is completely frozen, transfer the
piped shapes into freezer bags. They can be kept in the freezer for up to a month.

Chocolate Pastry Cream
Recipe from Chocolate Desserts by PierreHermé
• 2 cups (500g) whole milk
• 4 large egg yolks
• 6 tbsp (75g) sugar
• 3 tablespoons cornstarch, sifted
• 7 oz (200g) bittersweet chocolate, preferably Velrhona Guanaja, melted
• 2½ tbsp (1¼ oz: 40g) unsalted butter, at room temperature
1) In a small saucepan, bring the milk to a boil. In the meantime, combine the yolks, sugar and cornstarch together and whisk in a heavy‐bottomed saucepan.
2) Once the milk has reached a boil, temper the yolks by whisking a couple spoonfuls of the hot milk into the yolk mixture.Continue whisking and slowly pour the rest of the milk into the tempered yolk mixture.
3) Strain the mixture back into the saucepan to remove any egg that may have scrambled. Place the pan over medium heat and whisk vigorously (without stop) until the mixture returns to a boil. Keep whisking vigorously for 1 to 2 more minutes (still over medium heat).Stir in the melted chocolate and then remove the pan from the heat.
4) Scrape the pastry cream into a small bowl and set it in an ice‐water bath to stop the cooking process. Make sure to continue stirring the mixture at this point so that it remains smooth.
5) Once the cream has reached a temperature of 140 F remove from the ice‐water bath and stir in the butter in three or four installments. Return the cream to the ice‐water bath to continue cooling, stirring occasionally, until it has completely cooled. The cream is now ready to use or store in the fridge.

Notes

1) The pastry cream can be made 2‐3 days in advance and stored in the refrigerator.
2) In order to avoid a skin forming on the pastry cream, cover with plastic wrap pressed onto the cream.
3) Tempering the eggs raises the temperature of the eggs slowly so that they do not scramble.
Chocolate Glaze
Recipe from Chocolate Desserts by Pierre Hermé
(makes 1 cup or 300g)
• 1/3 cup (80g) heavy cream
• 3½ oz (100g) bittersweet chocolate, finely chopped
• 4 tsp (20 g) unsalted butter, cut into 4 pieces, at room temperature
• 7 tbsp (110 g) Chocolate Sauce (recipe below), warm or at room temperature
1)In a small saucepan, bring the heavy cream to a boil. Remove from the heat and slowly begin to add the chocolate, stirring with a wooden spoon or spatula.
2) Stirring gently, stir in the butter, piece by piece followed by the chocolate sauce.

Notes:
1) If the chocolate glaze is too cool (i.e. not liquid enough) you may heat it briefly in the microwave or over a double boiler. A double boiler is basically a bowl sitting over (not touching) simmering water.
2) It is best to glaze the eclairs after the glaze is made, but if you are pressed for time, you can make the glaze a couple days ahead of time, store it in the fridge and bring it up to the proper temperature (95 to 104 F) when ready to glaze.

Chocolate Sauce
Recipe from Chocolate Desserts by Pierre Hermé
(makes 1½ cups or 525 g)


• 4½ oz (130 g) bittersweet chocolate, finely chopped
• 1 cup (250 g) water
• ½ cup (125 g) crème fraîche, or heavy cream
• 1/3 cup (70 g) sugar
1) Place all the ingredients into a heavy‐bottomed saucepan and bring to a boil, making sure to stir constantly. Then reduce the heat to low and continue stirring with a wooden spoon until the sauce thickens.
2) It may take 10‐15 minutes for the sauce to thicken, but you will know when it is done when it coats the back of your spoon.

Monday, August 25, 2008

Chocolate Peanut Butter Cookies

Kristen's Food August 2008 030 

Well,  school started back up last week and my house has quieted down significantly.  I didn't really realize how crazy it had gotten during the summer until now when we are back on a regular schedule.  While it's hard to have my kids in school it has also allowed me to get more things done around the house.  I actually haven't baked anything for awhile but I have made a few ice creams that I hope to post soon.  I plan on having more time to bake now that school is in.

When I was a kid, I always had to go to daycare right after school and then when I finally got old enough I was a latch-key kid.  Because of that I always envied the kids whose parents were at home waiting for them with freshly baked cookies or an after school snack.  I think because of that, I am so grateful that I am able to stay home with my kids.  I also overcompensate by having something freshly baked nearly everyday.  I am trying to come up with some healthy recipes so that I don't inadvertently make my kids unhealthy with all of my mothering.  There really isn't anything more comforting after a long day at school then a freshly baked treat.

Today's treat, that miraculously came out of the oven just as the kids were getting off the bus, was not really a healthy one but one that I made with what I had on hand (I really need to go to the grocery store!).   I had some peanut butter and a little bit of chocolate so I flipped through my favorite baking book (Dorie Greenspan's, Baking From my Home to Yours) and looked through the peanut butter section in the index.  I noticed the chocolate peanut butter cookies and thought that they would be a great hit in my house.  I was right, they were pretty darn good.  Although, I think that they'd be better sandwiched with some of the fresh vanilla ice cream I made a few weeks ago, too bad it was gone in one night!

Chocolate Peanut Butter Crisscrosses

Kristen's Food August 2008 033

2 cups flour

1/2 cup cocoa powder

1 tsp. baking soda

1/2 tsp. baking powder

1/4 tsp. salt

1 tsp. cinnamon (optional)

2 sticks (1 cup) butter, softened

1 cup peanut butter

1 cup packed light brown sugar

3/4 cup sugar

1/2 tsp vanilla

2 large eggs

1/3 cup chopped bittersweet chocolate

about 1/2 cup sugar, for rolling

1.  Preheat the oven to 350°.   In a large bowl, combine the flour, cocoa powder, salt, baking powder, baking soda, and cinnamon (if using) and whisk to combine.

2.  In the bowl of a mixer fitted with the paddle attachment, cream the butter for 1-2 minutes or until smooth.  Add the peanut butter and beat for another minute.  Add both of the sugars and beat for about 3 minutes until light and fluffy.  With the mixer running add the eggs, one at a time mixing until each is combined, then add the vanilla.

3.  With the mixer on low, slowly add the flour mixture a little at a time.   Mix until just combined.  Add the chopped chocolate and mix to combine.

4.  In a shallow bowl add the 1/2 cup flour.  Scoop the cookie dough (which will be soft) into heaping tablespoons and roll into a ball.  Drop the rolled balls into the sugar and roll to coat all sides.  Place on cookie sheets leaving about 2 inches of space between each cookie.  Dip the tines of a fork into the sugar and make the crisscross pattern into each cookie.  Bake the cookies for about 11-12 minutes.  the cookies will be soft but will firm up as they sit out.  Remove the cookies to a cooling rack.

Saturday, July 5, 2008

Dark Chocolate Pound Cake

Kristen's Food June 2008 131
 

I hope that everyone had a wonderful 4th of July.  We had a great time eating, swimming lighting off fireworks and of course eating some more.  By the time I got home last night I was literally sick from eating so much delicious food.  In fact, we had so much food left over we are having another BBQ today to finish it all up.  The fireworks were a lot of fun.  The husbands I think enjoy it more than the kids.  Every year they gather all of the cheap McDonalds happy meal toys and attach fireworks to them with duct tape.   I have to say, happy meal toys are extremely flammable.  The guys are like kids they are almost giddy when a toy catches fire and melts into a plastic puddle.  All in all it was a great night.

I decided to make a delicious dark chocolate pound cake with a sour cream glaze for our potluck BBQ last night.  It turned out so delicious despite the smoke filled house that it created.  The recipe I used was made for a 12 cup bundt pan, which mine is, but for some reason it spilled over the edges and dripped all over the oven floor.  The drippings became burnt puddles of sugar and chocolate.  There was so much smoke that I can't believe my fire alarms weren't going off.  So, I pulled the cake from the oven, turned the oven off and cleaned it all out.  then I put the cake back into the oven, crossed my fingers and hoped that at least it would be edible.  The cake of course sunk while it was sitting out and I knew that it wouldn't rise again so imagine my surprise when the cake turned out beautifully and delicious despite the fact that it was a little sunken on the underside.  The cake turned out richly chocolately with a chewy exterior and a brownie like texture inside.  The glaze was sweet and a little tangy and was a great contrast to the sweet chewy cake on the inside.  This was a great recipe despite all of the mishaps that took place while making it.  I might just make it again the same way, letting it spill out onto a pan and letting it sink down a little before baking it the rest of the way.

Kristen's Food June 2008 134

Dark Chocolate Pound Cake

1 cup (2 sticks) butter, softened

3 cups sugar

3 eggs

1/4 tsp almond extract

1 tsp vanilla extract

3 cups flour

1 cup dark dutch processed cocoa powder

1 Tbs. baking powder

1 tsp. salt

1 3/4 cup milk or half-and-half

1. Preheat the oven to 325° and grease a 12 cup bundt pan.   Cream the butter and the sugar together until light and fluffy, about 5 minutes.  Meanwhile, combine the flour, cocoa powder, baking powder and salt in a bowl and mix to combine.

2.  Add the eggs, one at a time, to the creamed butter and sugar, mixing well after each addition.  Add both of the extracts and mix to combine.

3.  Alternately add the dry ingredients and the milk, starting and ending with flour.  Mix until just combined.  Pour the mixture into prepared bundt pan filling only 3/4 of the way full.  (You may have a little extra batter.)  Bake for 90-95 minutes or until a toothpick comes out clean.  Let cool for 10 minutes in pan then remove to a cooling rack to finish cooling.

Sour Cream Glaze

1 lb (16 oz) powdered sugar

1/4 cup sour cream

1/4 tsp almond extract

about 2 Tbs. milk or half-and-half

1.  Mix all of the ingredients together with a whisk until smooth.  Add additional milk to thin to desired consistency.  Pour glaze over cake.

Friday, May 16, 2008

Easy Chocolate Oreo Truffles

Kristens Food May 2008 002 32

I know that I have been gone for awhile but I have a good reason. There are two things that I absolutely love doing one of course being cooking/baking the other is reading. The new Stephenie Meyer book called The Host came out last week and I couldn't put it down. So, as you can see, my cooking/baking passion took the back burner for a week. Now that I am done though, I plan on redeeming myself with several things this week. The first being super easy chocolate Oreo truffles. I can't take credit for this idea as I saw them on Bakearella's blog last year and have had them in my mind ever since. As promised, they were easy and delicious.

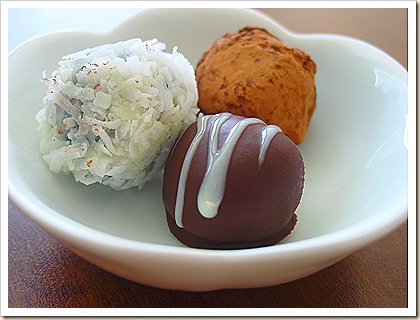
The inside is a combination of Oreos and cream cheese, then a coating of white or dark chocolate and an assortment of toppings, yumm...! I used dark chocolate with cocoa powder, white chocolate with coconut and then just plain dark chocolate with a drizzle of white chocolate.

Kristens Food May 2008 006Kristens Food May 2008 007 #2

Chocolate Oreo Truffles

Kristens Food May 2008 015 #2

1 package of Oreos

1 pkg. (8 0z) cream cheese, softened

dark chocolate

white chocolate

heavy cream (optional)

assorted toppings (nuts, coconut, cocoa powder, etc..)

1. In a food processor, grind the Oreos into crumb.

2. Mix the Oreo crumbs and the softened cream cheese together either by hand or in a food processor.

3. Scoop the mixture into balls and freeze or refrigerate until firm.

4. Melt the chocolate and add a little heavy cream to thin out if desired. Dip the truffles in the chocolate and roll in desired toppings. Chill until the chocolate is set.

del.icio.us Tags: ,

Friday, May 2, 2008

Brownies for breakfast?

 Kristen's Food April 2008 100

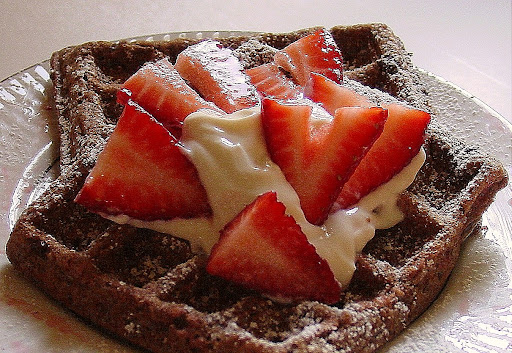
Ok, Ok, we really didn't have brownies for breakfast, what kind of mom do you think I am?  We did have chocolate chocolate chip waffles though and as I was eating them and receiving praise from all three of my kids I realized that I was feeding my family glorified brownies for breakfast.  At least it got me the title of "best cook ever" and "best mom ever".  I think that feeding my kids something that probably isn't that nutritious for breakfast once in while so that I can receive such praise is worth it.

It has been said that necessity is the mother of all invention and that is what it has felt like in my kitchen lately.  Every time I try to make a recipe lately I seem to be out of some key ingredient.  I set out to follow a recipe for Chocolate Waffles from Alton Brown and realized that I was an ounce short of cocoa powder, which is kind of an important ingredient in chocolate waffles.  I quickly looked through my pantry for a suitable substitution.  I found some unsweetened Baker's chocolate and decided that it would be a suitable substitution but that I would need something to counter balance the extra liquid and lack of dry ingredients.  I added a little cornstarch and some extra four and the waffles came out perfectly.  Now I can't vouch for how close they are to the original but these were definitely delicious.  I also served these waffles with a sweetened sour cream.  I  love to dip my strawberries in sweetened sour cream and so I thought that it would be suitable to put on top of the waffles with the strawberries to balance out the waffles.  It was delicious!

Kristen's Food April 2008 108

Here is the link to Alton's recipe, which I am sure is delicious!

Sweetened Sour Cream

1/4 Cup Sour Cream

1-2 Tbs. powdered sugar

1/4 tsp. vanilla

Mix all ingredients together, adding more or less sugar to taste.  Use to dip strawberries or top the waffles.

del.icio.us Tags: ,

Friday, April 11, 2008

Ooey, gooey, caramel and chocolate

Kristen's Food April 2008 015

Sorry that I have been gone for a while, my main computer crashed and it is the one that has my food pictures on it. But here I am with some more goodies for you.

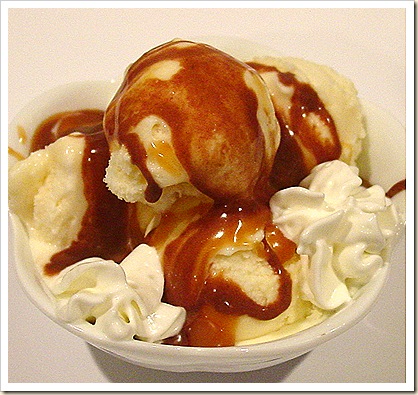
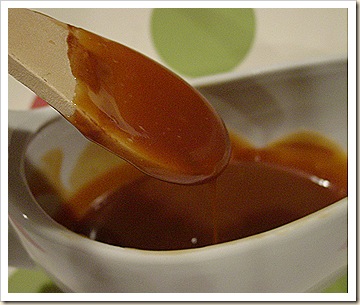
This week while lying in bed, I began to think of ice cream sundaes and yummy, ooey, gooey caramel sauce. So what do I do, I flip through my recipes and find one that I haven't tried before. This caramel sauce comes from one of my favorite chefs, Ina Garten. Her recipe is so easy and basically foolproof and makes the most perfect ice cream topping. It is so easy and quick that it doesn't even make sense to buy it, this is so much better.

Ina Garten's Caramel Sauce

Kristen's Food April 2008 036

1 1/2 cups sugar

1/3 cup water

1 1/4 cup heavy cream

1/2 tsp. vanilla

Mix the sugar and the water in a medium heavy-bottomed saucepan. Cook without stirring, over low heat for 5-10 minutes, until the sugar dissolves. Increase the heat to medium and boil uncovered until the sugar turns a warm chestnut brown (about 350 degrees on a candy thermometer), about 5-7 minutes, gently swirling the pan to stir mixture. Watch the mixture constantly at the end as it will go from caramel to burnt very quickly. Turn off the heat. Slowly add the cream and vanilla. The cream will bubble up and the caramel will solidify: don't worry. Simmer over low heat, stirring constantly until the caramel dissolves and the sauce is smooth, about 2 minutes. Allow to cool at room temperature for about 4 hours. it will thicken as it sits.

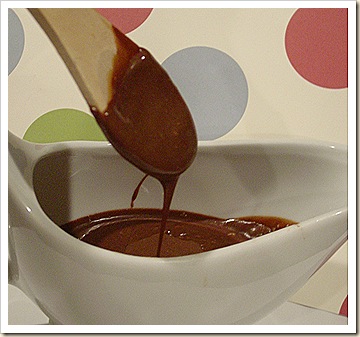
I also made a delicious homemade chocolate sauce that was just as good as the caramel. I looked through several recipes for homemade chocolate sauce but I was unhappy with many of the recipes as they contained corn syrup and other things that I just don't want in my food. So, I decided that my favorite chocolate sauce is ganache. I knew if I just thinned it out with by adding more cream than usual that it would be a perfect chocolate sauce. This is easier than the caramel and it is delicious!

Chocolate Sauce

Kristen's Food April 2008 028

1 1/4 cup heavy cream

8 oz of bittersweet of semi-sweet chocolate, chopped

1/2 tsp. vanilla

Place the chocolate in a large bowl. Bring the cream to a boil and pour over the chocolate, add the vanilla. Let sit without stirring for 5 minutes. Stir until smooth. The sauce will be thin, but will thicken as it sits. you can cool it quicker in the fridge. If the sauce gets to thick you can heat it up or add more cream.

del.icio.us Tags: ,

Tuesday, March 25, 2008

Peanut Butter Chocolate Brownies


I have to tell you that I love brownies. Not the cheap from the box kind, but real homemade brownies that are full of bittersweet chocolate. I love to keep them cold in the fridge and break off little pieces throughout the day. (It doesn't count when you don't eat it all at once, right?!) I love to add things to my favorite brownie recipe whether it be oreos, nuts, cream cheese or in this case peanut butter. Whoever thought up the winning combo of peanut butter and chocolate should be awarded a prize. The two just go so well together. I am not sure if you've been able to tell or not, but I have been on a bit of a chocolate and peanut butter kick lately. It seems that most of the desserts that I have made lately contain the combo and they have been delicious. This one is no exception. If you love peanut butter and chocolate, you've gotta try these.

Chocolate Peanut Butter Brownies
(adapted from a recipe from Everday Food Magazine)


1 cup flour
1/4 cup cocoa powder
1/2 tsp baking powder
1/2 tsp salt
1 stick of butter cut into pieces
1 1/3 cups of chocolate chips, I prefer bittersweet
1 1/4 cup sugar
3 eggs
6 Tbs. creamy peanut butter

1. Preheat oven to 350 degrees. Line a 9x9 pan with foil and spray with cooking spray. Set aside. In a bowl, mix together the flour, cocoa powder, baking powder and salt, stir with a fork to combine and set aside. In a bowl set over a pan of simmering water, melt the butter and chocolate. Stir occasionally until melted. Remove from the heat and add the sugar. Once mixed, add the eggs and mix well. Add the flour mixture stirring only until combined. Don't over mix.

2. Heat the peanut butter in a small dish for about 15-30 seconds until slightly melted. Do not overheat. If the peanut butter is too runny it won't swirl well with the brownies. Drop the peanut butter by tablespoon in about 6 seperate spots. Swirl the peanut butter and brownies mixture with a butter knife.

3. Bake for about 45 minutes or until the edges have crisped and the brownies look cooked through. Cool in the pan completely and then refrigerate until cold before cutting (This allows for a nice perfect cut.)

Sunday, March 23, 2008

Happy Easter!

Happy easter everyone. I hope you had a good day and were able to spend time with your family. My easter every year consists of a family gathering of about 40 people. My mother-in-law buys all 16 grankids matching outfits and then we go to church with her to show them off. Then we all crowd into my mother-in-laws house and have a huge easter egg hunt for the kids and then a nice big buffet style dinner. My kids look forward to it every year and I will admitt, so do I. I grew up in a very small family so I love the huge get togethers that my husbands side of the family has. My mother-in-law is an amzing planner and we always have great food and a wonderful time. I am so glad that we are able to make all of these memories and that we are all able to live so close so that we can have these big events often.

I had big plans full of all of the yummy desserts that I wanted to make for todays dinner, but I found out late yesterday that we already had several so I only made a few things. One of those things were the chocolate dipped strawberries. I'm sure that you don't need a recipe, but I'll give you one anyways as these were delicious and were gone in a flash.

Chocolate Dipped Strawberries

1 bag(12 oz) bittersweet chocolate chips
1/2 - 3/4 cup whipping cream
40 large strawberries
white chocolate for drizzling

1. Rinse strawberries to clean and dry thouroughly. Line 2 baking sheets with parchment or wax paper and set aside.

2. In a bowl set over a pan of simmering water, melt the chocolate and the cream together stirring frequently adding more cream if the mixture is too thick. Once the mixture is melted, turn off the heat, but leave the bowl over the water to keep the chocolate warm and melted.

3. Dip the strawberries in the chocolate and shake gently to remove any excess. Place on prepared baking sheets and let cool slightly. Heat the white chocolate in a small bowl in the microwave for 1-2 minutes, stirring after every 30 seconds. When melted, pour into a ziploc bag and snip the corner off. Drizzle the strawberries with the white chocolate. Place the baking sheets in the refrigerator to cool and harden.

Thursday, February 28, 2008

Can you say brownie points?!!


I have been needing something chocolatey lately and nothing curbs that chocolate craving like a rich, fudgy brownie. I have been making this fudgy brownie recipe that I found in the Every Day Food magazine for awhile now, but today, I decided to make it even better. Make the cream cheese version and add oreos! now who can resist that?!

As a rule, I always line my brownie pans with foil. I know that some recipes call for parchment paper, but I don't always have that on hand and I have found that foil works just as good (just don't forget to grease the foil). I also, cool the brownies in the pan, then lift them out with the foil and cool in the fridge before cutting. This helps me make a cleaner cut. I have also tripled this recipe when I am serving a big crowd, like family get togethers. With the recipe tripled you can bake it in a sheet pan lined with foil. The cooking time is reduced to about 40 minutes and makes about 40+ good sized brownies.


Super Fudgy Brownies
(From the Everyday Food Magazine)


1 stick of butter
1 cup flour
1/4 cup cocoa powder
1/2 tsp. baking powder
1/2 tsp. salt
8 oz. bittersweet or semi-sweet chocolate, chopped (I use the 60% cocoa chocolate chips)
1 1/4 cups sugar
3 eggs

For the cream cheese swirl

4 oz softened cream cheese
2 Tbs. softened butter
1/4 cup sugar
1 egg
2 Tbs flour

20 oreo cookies crushed

1. Preheat oven to 350 degrees. Line a 9 x9 pan with foil or parchment and grease. ( I don't have a 9 x 9 so I have baked this recipe in an 8 x 8 or an 8 x 11.5)

2. Mix the cream cheese ingredients together in the order listed, and set aside.

3. In a small bowl, whisk flour, cocoa, baking powder, and salt; set aside.

4. Place butter and chocolate in a large heat proof bowl set over (not touching the water) a saucepan of simmering water. Heat, stirring , until smooth and both butter and chocolate have melted. Remove the bowl from the pan. Add the sugar, mix to combine. Add the eggs;mix to combine. In batches, add the flour mixture and mix until just moistened ( do not overmix). Add half the crushed oreos to the batter.

5. Alternately sppon, chocolate mixture and cream cheese mixture into prepared pan. Swirl with the tip of a paring knife. Sprinkle the top with the remaining oreo cookies.

6. Bake for about 50 to 60 minutes, or until a toothpick inserted in center comes out with a few moist crumbs. Cool in pan 30 minutes. Lift brownies out of pan using the foil or parchment and cut using a dampened serrated knife.

Makes 16