Showing posts with label cake. Show all posts

Saturday, February 28, 2009

The Daring Bakers make Chocolate Valentino Cake

Kristen's Food February 2009 058 #2

It's the end of another month and time once again for another Daring Baker's challenge.  Being the month of love it was fitting that chocolate be the star of this months challenge.

The February 2009 challenge is hosted by Wendy of WMPE's blog and Dharm of Dad ~ Baker & Chef.  We have chosen a Chocolate Valentino cake by Chef Wan; a Vanilla Ice Cream recipe from Dharm and a Vanilla Ice Cream recipe from Wendy as the challenge.

We have had so many sweets around here that I chose to halve the recipe for the valentino cake and bake them in my muffin tin.  For the ice cream I decided to go my own way and make up my own recipe.  I ended up with a deliciously creamy coconut ice cream, which is definitely for coconut lovers only.  Since the valentino recipe wasn't all that challenging I also decided to make these little chocolate cups which was a first for me.  I was so excited with how they came out.  They looked so fancy that I really didn't want to eat them.

  I put one of the small valentino cakes in the bottom of the chocolate cup and then topped it with the creamy coconut ice cream and then added another sliver of the cake as an accent and to let you know what was inside.   All in all a fun and delicious challenge.

My sentiment on the cake is that it was very similar to my rich chocolate brownies with a little silkier texture,  like a mix between an deeply chocolaty brownie and a silky smooth mouse.  A little of this cake definitely goes a long way.

Chocolate Valentino
Preparation Time:  20 minutes

Kristen's Food February 2009 060

16 ounces (1 pound) (454 grams) of semisweet chocolate, roughly chopped
½ cup (1 stick) plus 2 tablespoons (146 grams total) of unsalted butter
5 large eggs separated


1. Put chocolate and butter in a heatproof bowl and set over a pan of simmering water (the bottom of the bowl should not touch the water) and melt, stirring often.

2. While your chocolate butter mixture is cooling. Butter your pan and line with a parchment circle then butter the parchment.

3. Separate the egg yolks from the egg whites and put into two medium/large bowls.

4. Whip the egg whites in a medium/large grease free bowl until stiff peaks are formed (do not over-whip or the cake will be dry).

5. With the same beater beat the egg yolks together.

6. Add the egg yolks to the cooled chocolate.

7. Fold in 1/3 of the egg whites into the chocolate mixture and follow with remaining 2/3rds. Fold until no white remains without deflating the batter. {link of folding demonstration}

8. Pour batter into prepared pan, the batter should fill the pan 3/4 of the way full, and bake at 375F/190C

9. Bake for 25 minutes until an instant read thermometer reads 140F/60C.

Note – If you do not have an instant read thermometer, the top of the cake will look similar to a brownie and a cake tester will appear wet.

10. Cool cake on a rack for 10 minutes then unmold.

Coconut Ice Cream

1 can coconut milk

1/3 cup heavy cream

1 cup milk

5 egg yolks

3/4 cup sugar

1 tsp. coconut extract

1.  Heat the coconut milk, cream and milk until it just begins to from bubbles around the edges.

2.  Meanwhile, in the bowl of a mixer with the whisk attachment, beat the egg yolks and sugar together until light and pale and the mixture falls back on itself and forms ribbons.

3.  With the mixer on low,  slowly drizzle in a ladle full of the warm milk mixture.  Continue adding the milk mixture in ladle-fulls until you've add about 1/2 of the milk mixture.  Then pour the egg yolk  mixture back into the pan with the rest of the milk mixture.

4.  Put the mixture back over medium-low to medium heat and heat stirring constantly until the mixture begins to thicken and coats the back of a spoon.  Do not let it boil.

5.  Pour the thickened mixture through a sieve into a medium bowl.  Stir in the extract and let the mixture sit out to cool.  Once cooled, cover and refrigerate until well chilled preferably overnight.

6.  Freeze in ice cream maker according to the manufacturers instructions.

Wednesday, July 30, 2008

Filbert Gateau with Praline Buttercream

Kristen's Food July 2008 140

It's the end of the month and time for another Daring Baker's challenge. I have really loved being a part of the Daring Bakers and trying new recipes each month. It is fun to see how all of the other Daring Bakers interpret the same recipe.

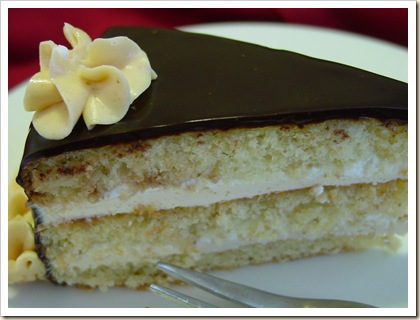
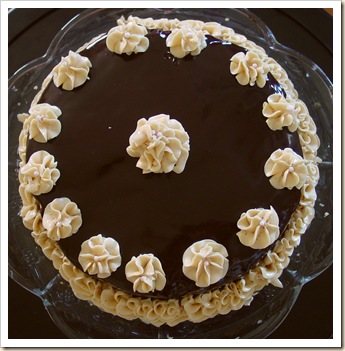
This months recipe was a hazelnut cake which was brushed with a simple syrup and layered with praline buttercream and whipped cream. The whole cake was then glazed with a dark chocolate ganache and decorated with more of the praline buttercream. Nothing in this recipe was really difficult, there were just many steps so you had to plan it out and do a few of the steps ahead. The only difficulty I had was in shelling the hazelnuts. I tried everything, toasting, blanching, steaming, toasting again. I ended up enlisting my husbands help and peeling the remaining stubborn hazelnuts one by one. Next time I would shell out the extra money for the pre-shelled hazelnuts. Apart from that little set back, everything went pretty smoothly. I didn't have a 10 inch cake pan so I went for two 9 inch cake pans. The layers turned out pretty thin but all in all it worked out perfectly. I also left out all of the alcohol and replaced it in many places with almond extract.

All in all, this was a fun challenge with delicious results. I loved the cake with it's slightly chewy nutty texture and the praline buttercream was light and smooth with a nutty caramely tang. The bittersweet chocolate just brought the whole thing together with it's velvety rich flavor. I would love to make this again with almonds or pistachios for a change in flavor and texture. Give this a try but don't forget to pace yourself. This isn't something that you can finish in a matter of hours. If you do your prep it comes together as simple as can be.

Check out what all of the other amazing Daring Bakers made. There are so many amazing cakes out there. Thanks to Chris from Mele Cotte for this fun challenge. I can't wait to see what we'll be doing next month!

***If you live near me (you know who you are) and are reading this, leave me a comment and I'll bring you a slice of this cake. ( I just don't want to eat the whole thing myself!)***

Filbert Gateau with Praline Buttercream
From Great Cakes by Carol Walter
Kristen's Food July 2008 099

1 Filbert Genoise
1 recipe sugar syrup, flavored with dark rum
1 recipe Praline Buttercream
½ cup heavy cream, whipped to soft peaks
1 recipe Apricot Glaze
1 recipe Ganache Glaze, prepared just before using
3 tablespoons filberts, toasted and coarsely chopped

Filbert Genoise
Because of the amount of nuts in the recipe, this preparation is different from a classic genoise.
1 ½ cups hazelnuts, toasted/skinned
2/3 cup cake flour, unsifted
2 Tbsp. cornstarch
7 large egg yolks
1 cup sugar, divided ¼ & ¾ cups
1 tsp. vanilla extract
½ tsp. grated lemon rind
5 lg. egg whites
¼ cup warm, clarified butter (100 – 110 degrees)

1. Position rack in the lower 3rd of the oven and preheat to 350 degrees. Grease and flour a 10” X 2” inch round cake pan.
Using a food processor, process nuts, cake flour, and cornstarch for about 30 seconds. Then, pulse the mixture about 10 times to get a fine, powdery mixture. You’ll know the nuts are ready when they begin to gather together around the sides of the bowl. While you want to make sure there aren’t any large pieces, don’t over-process. Set aside.

2. Put the yolks in the bowl of an electric mixer, with the whisk attachment, and beat until thick and light in color, about 3-4 minutes on med-high speed. Slowly, add ¾ cup of sugar. It is best to do so by adding a tablespoon at a time, taking about 3 minutes for this step. When finished, the mixture should be ribbony. Blend in the vanilla and grated lemon rind. Remove and set aside.
Place egg whites in a large, clean bowl of the electric mixer with the whisk attachment and beat on medium speed, until soft peaks. Increase to med-high speed and slowly add the remaining ¼ cup of sugar, over 15-20 seconds or so. Continue to beat for another ½ minute.

3. Add the yolk mixture to the whites and whisk for 1 minute.
Pour the warm butter in a liquid measure cup (or a spouted container). * It must be a deep bottom bowl and work must be fast.* Put the nut meal in a mesh strainer (or use your hand – working quickly) and sprinkle it in about 2 tablespoons at a time – folding it carefully for about 40 folds. Be sure to exclude any large chunks/pieces of nuts. Again, work quickly and carefully as to not deflate the mixture. When all but about 2 Tbsp. of nut meal remain, quickly and steadily pour the warm butter over the batter. Then, with the remaining nut meal, fold the batter to incorporate, about 13 or so folds.

4. With a rubber spatula, transfer the batter into the prepared pan, smoothing the surface with the spatula or back of a spoon.

**If collected butter remains at the bottom of the bowl, do not add it to the batter! It will impede the cake rising while baking.
Tap the pan on the counter to remove air bubbles and bake in the preheated oven for 30-35 minutes. You’ll know the cake is done when it is springy to the touch and it separates itself from the side of the pan. Remove from oven and allow to stand for 5 minutes. Invert onto a cake rack sprayed with nonstick coating, removing the pan. Cool the cake completely.

*If not using the cake right away, wrap thoroughly in plastic wrap, then in a plastic bag, then in the refrigerator for up to 3 days. If freezing, wrap in foil, then the bag and use within 2-3 months.

Sugar Syrup
Makes 1 cup, good for one 10-inch cake – split into 3 layers
1 cup water
¼ cup sugar
2 Tbsp. dark rum or orange flavored liqueur

1. In a small, yet heavy saucepan, bring the water and sugar to a boil and simmer for 5 minutes. Remove from heat, add the liqueur. Cool slightly before using on the cake. *Can be made in advance.

Praline Buttercream

1 recipe Swiss Buttercream
1/3 cup praline paste
1 ½ - 2 Tbsp. Jamaican rum (optional)
Blend ½ cup buttercream into the paste, then add to the remaining buttercream. Whip briefly on med-low speed to combine. Blend in rum.

Swiss Buttercream
4 lg. egg whites
¾ cup sugar
1 ½ cups (3 sticks) unsalted butter, slightly firm
1 ½ -2 Tbsp. Grand Marnier or liqueur of your choice
1 tsp. vanilla

1. Place the egg whites in a lg/ bowl of a elevtric mixer and beat with the whisk attachment until the whites are foamy and they begin to thicken (just before the soft peak stage). Set the bowl over a saucepan filled with about 2 inches of simmering water, making sure the bowl is not touching the water. Then, whisk in the sugar by adding 1-2 tablespoon of sugar at a time over a minutes time. Continue beating 2-3 minutes or until the whites are warm (about 120 degrees) and the sugar is dissolved. The mixture should look thick and like whipped marshmallows.

2. Remove from pan and with either the paddle or whisk attachment, beat the egg whites and sugar on med-high until its a thick, cool meringue – about 5-7 minutes. *Do not overbeat*. Set aside.

3. Place the butter in a separate clean mixing bowl and, using the paddle attachment, cream the butter at medium speed for 40-60 seconds, or until smooth and creamy. *Do not overbeat or the butter will become toooooo soft.*

4. On med-low speed, blend the meringue into the butter, about 1-2 Tbsp. at a time, over 1 minute. Add the liqueur and vanilla and mix for 30-45 seconds longer, until thick and creamy.
Refrigerate 10-15 minutes before using.

Wait! My buttercream won’t come together! Reheat the buttercream briefly over simmering water for about 5 seconds, stirring with a wooden spoon. Be careful and do not overbeat. The mixture will look broken with some liquid at the bottom of the bowl. Return the bowl to the mixer and whip on medium speed just until the cream comes back together.

Wait! My buttercream is too soft! Chill the buttercream in the refrigerator for about 10 minutes and rewhip. If that doesn’t work, cream an additional 2-4 Tbsp. of butter in a small bowl– making sure the butter is not as soft as the original amount, so make sure is cool and smooth. On low speed, quickly add the creamed butter to the buttercream, 1 Tbsp. at a time.
Refrigerate in an airtight container for up to 5 days, or can be frozen for up to 6 months. If freezing, store in 2 16-oz. plastic containers and thaw in the refrigerator overnight or at room temperature for several hours.

Praline Paste
1 cup (4 ½ oz.) Hazelnuts, toasted/skinless
2/3 cup Sugar

1. Line a jelly roll pan with parchment and lightly butter.
Put the sugar in a heavy 10-inch skillet. Heat on low flame for about 10-20 min until the sugar melts around the edges. Do not stir the sugar. Swirl the pan if necessary to prevent the melted sugar from burning. Brush the sides of the pan with water to remove sugar crystals. If the sugar in the center does not melt, stir briefly. When the sugar is completely melted and caramel in color, remove from heat. Stir in the nuts with a wooden spoon and separate the clusters. Return to low heat and stir to coat the nuts on all sides. Cook until the mixture starts to bubble. **Remember – extremely hot mixture.** Then onto the parchment lined sheet and spread as evenly as possible. As it cools, it will harden into brittle. Break the candied nuts into pieces and place them in the food processor. Pulse into a medium-fine crunch or process until the brittle turns into a powder. To make paste, process for several minutes. Store in an airtight container and store in a cook dry place. Do not refrigerate.

Apricot Glaze
Good for one 10-inch cake
2/3 cup thick apricot preserves
1 Tbsp. water
In a small, yet heavy saucepan, bring the water and preserves to a slow boil and simmer for 2-3 minutes. If the mixture begins to stick to the bottom of the saucepan, add water as needed.
Remove from heat and, using a strainer, press the mixture through the mesh and discard any remnants. With a pastry brush, apply the glaze onto the cake while the cake is still warm. If the glaze is too thick, thin to a preferred consistency with drops of water.

Ganache Glaze
Makes about 1 cup, enough to cover the top and sides of a 9 or 10 inch layer or tube cake
**Ganache can take on many forms. While warm – great fudge sauce. While cool or lukewarm – semisweet glaze. Slightly chilled – can be whipped into a filling/frosting. Cold & solid – the base of candied chocolate truffles.
6 oz. (good) semisweet or bittersweet chocolate, like Lindt
6 oz. (¾ cup heavy cream
1 tbsp. light corn syrup
1 Tbsp. Grand Marnier, Cointreay, or dark Jamaican rum (optional)
¾ tsp. vanilla
½ - 1 tsp. hot water, if needed

1. Blend vanilla and liqueur/rum together and set aside.
Break the chocolate into 1-inch pieces and place in the basket of a food processor and pulse until finely chopped. Transfer into a medium sized bowl and set aside.
Heat the cream and corn syrup in a saucepan, on low, until it reached a gentle boil. Once to the gently boil, immediately and carefully pour over the chocolate. Leave it alone for one minute, then slowly stir and mix the chocolate and cream together until the chocolate is melted and incorporated into the cream. Carefully blend in vanilla mixture. If the surface seems oily, add ½ - 1 tsp hot water. The glaze will thicken, but should still be pourable. If it doesn’t thicken, refrigerate for about 5 minutes, but make sure it doesn’t get too cold!

Assembling Cake
Cut a cardboard disk slightly smaller than the cake. Divide the cake into 3 layers and place the first layer top-side down on the disk. Using a pastry brush, moisten the layer with 3-4 Tbsp. of warm sugar syrup. Measure out 1 cup of praline buttercream and set aside.

Spread the bottom layer with a ¼-inch thickness of the remaining buttercream. Cover with ½ of the whipped cream, leaving ¼-inch border around the edge of the cake. Place the middle layer over the first, brush with sugar syrup, spreading with buttercream. Cover with the remaining whipped cream.
Moisten the cut side of the third layer with additional sugar syrup and place cut side down on the cake. Gently, press the sides of the cake to align the layers. Refrigerate to chill for at least 30 minutes.

Lift the cake by sliding your palm under the cardboard. Holding a serrated or very sharp night with an 8-ich blade held parallel to the sides of the cake, trim the sides so that they are perfectly straight. Cut a slight bevel at the top to help the glaze drip over the edge. Brush the top and sides of the cake with warm apricot glaze, sealing the cut areas completely. Chill while you prepare the ganache.

Place a rack over a large shallow pan to catch the ganache drippings. Remove the gateau from the refrigerator and put it the rack. With a metal spatula in hand, and holding the saucepan about 10 inches above the cake, pour the ganache onto the cake’s center. Move the spatula over the top of the ganache about 4 times to get a smooth and mirror-like appearance. The ganache should cover the top and run down the sides of the cake. When the ganache has been poured and is coating the cake, lift one side of the rack and bang it once on the counter to help spread the ganache evenly and break any air bubbles. (Work fast before setting starts.) Patch any bare spots on the sides with a smaller spatula, but do not touch the top after the “bang”. Let the cake stand at least 15 minutes to set after glazing.

Saturday, July 5, 2008

Dark Chocolate Pound Cake

Kristen's Food June 2008 131
 

I hope that everyone had a wonderful 4th of July.  We had a great time eating, swimming lighting off fireworks and of course eating some more.  By the time I got home last night I was literally sick from eating so much delicious food.  In fact, we had so much food left over we are having another BBQ today to finish it all up.  The fireworks were a lot of fun.  The husbands I think enjoy it more than the kids.  Every year they gather all of the cheap McDonalds happy meal toys and attach fireworks to them with duct tape.   I have to say, happy meal toys are extremely flammable.  The guys are like kids they are almost giddy when a toy catches fire and melts into a plastic puddle.  All in all it was a great night.

I decided to make a delicious dark chocolate pound cake with a sour cream glaze for our potluck BBQ last night.  It turned out so delicious despite the smoke filled house that it created.  The recipe I used was made for a 12 cup bundt pan, which mine is, but for some reason it spilled over the edges and dripped all over the oven floor.  The drippings became burnt puddles of sugar and chocolate.  There was so much smoke that I can't believe my fire alarms weren't going off.  So, I pulled the cake from the oven, turned the oven off and cleaned it all out.  then I put the cake back into the oven, crossed my fingers and hoped that at least it would be edible.  The cake of course sunk while it was sitting out and I knew that it wouldn't rise again so imagine my surprise when the cake turned out beautifully and delicious despite the fact that it was a little sunken on the underside.  The cake turned out richly chocolately with a chewy exterior and a brownie like texture inside.  The glaze was sweet and a little tangy and was a great contrast to the sweet chewy cake on the inside.  This was a great recipe despite all of the mishaps that took place while making it.  I might just make it again the same way, letting it spill out onto a pan and letting it sink down a little before baking it the rest of the way.

Kristen's Food June 2008 134

Dark Chocolate Pound Cake

1 cup (2 sticks) butter, softened

3 cups sugar

3 eggs

1/4 tsp almond extract

1 tsp vanilla extract

3 cups flour

1 cup dark dutch processed cocoa powder

1 Tbs. baking powder

1 tsp. salt

1 3/4 cup milk or half-and-half

1. Preheat the oven to 325° and grease a 12 cup bundt pan.   Cream the butter and the sugar together until light and fluffy, about 5 minutes.  Meanwhile, combine the flour, cocoa powder, baking powder and salt in a bowl and mix to combine.

2.  Add the eggs, one at a time, to the creamed butter and sugar, mixing well after each addition.  Add both of the extracts and mix to combine.

3.  Alternately add the dry ingredients and the milk, starting and ending with flour.  Mix until just combined.  Pour the mixture into prepared bundt pan filling only 3/4 of the way full.  (You may have a little extra batter.)  Bake for 90-95 minutes or until a toothpick comes out clean.  Let cool for 10 minutes in pan then remove to a cooling rack to finish cooling.

Sour Cream Glaze

1 lb (16 oz) powdered sugar

1/4 cup sour cream

1/4 tsp almond extract

about 2 Tbs. milk or half-and-half

1.  Mix all of the ingredients together with a whisk until smooth.  Add additional milk to thin to desired consistency.  Pour glaze over cake.

Wednesday, May 28, 2008

The Daring Bakers go to the Opera

Kristens Food May 2008 058

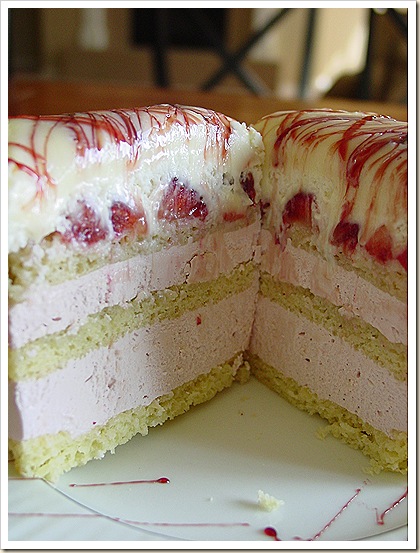
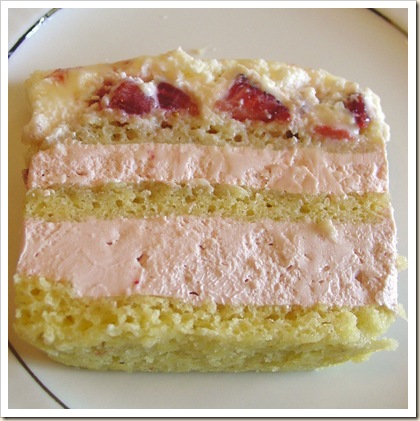
Well, it's the end of the month and time yet again for another Daring Bakers challenge. This months recipe was hosted by four lovely ladies, Ivonne of Cream Puffs in Venice, Lis of La Mia Cucina, Fran from Apples Peaches Pumpkin Pie and Shea from Whiskful. The challenge this month was to make Opera Cake. Now, I had never heard of opera cake before this challenge but I learned quickly all about it. Basically it's an almond sponge cake called, joconde ,brushed with a flavored simple syrup. Then it is layered with buttercream and then a chocolate mousse and then a gannache glaze. (Whew, how did I fit that all into one sentence!) Traditionally, Opera cakes are made with dark chocolate or coffee flavors. For this challenge were were asked to use only light colors and white chocolate. I have to tell you that I really don't like white chocolate. It is always way too sweet for me and I just can't stand it. I used it in this recipe as directed and to my dismay, I still didn't like it, it was just too darn sweet. I ended up with 7 miniature Opera Cakes that I couldn't eat and didn't really want to pass out to people. I brought them over to my mother-in-laws where there are always tons of people in hopes that they would get eaten up and luckily they did.

I left the cake the same and brushed it with an almond flavored simple syrup. I flavored the buttercream with a pomegranate reduction. This was by far my favorite part. The pomegranate helped a little with the sweetness and just tasted amazing. In fact, I had some of the pomegranate reduction left so I added it to some softened butter to make a pomegranate butter, let me just say, delicious. I kept searching for more things to put it on. It was great on waffles and toast and I have a few more things I'd like try it on. I also was able to make a pomegranate poppy seed salad dressing which was delicious. Anyhoo, back to the opera cake. I made the mousse just as it was written in the recipe with the white chocolate and the heavy cream. I added a layer of strawberries before adding the mousse. Then on to the glaze. I also made it per the recipe only drizzling it with the pomegranate reduction so that the two could set and firm up together. All in all the cake was a success, but I just wasn't happy with the white chocolate with it's cloyingly sweet taste. I think that I would have liked one made with bittersweet chocolate and maybe a salted caramel buttercream. So, maybe I'll try it again with that combo if I get bored one day...

Kristens Food May 2008 061 #2

Check out all over the other Daring Baker's creations to see some amazing Opera Cakes. Kristens Food May 2008 054 #2

For the joconde
(Note: The joconde can be made up to 1 day in advance and kept wrapped at room temperate)
What you’ll need:
•2 12½ x 15½-inch (31 x 39-cm) jelly-roll pans (Note: If you do not have jelly-roll pans this size, do not fear! You can use different-sized jelly-roll pans like 10 x 15-inches.)
•a few tablespoons of melted butter (in addition to what’s called for in the ingredients’ list) and a brush (to grease the pans)
•parchment paper
•a whisk and a paddle attachment for a stand mixer or for a handheld mixer
•two mixing bowls (you can make do with one but it’s preferable to have two)
Ingredients:
6 large egg whites, at room temperature
2 tbsp. (30 grams) granulated sugar
2 cups (225 grams) ground blanched almonds (Note: If you do not want to use almond meal, you can use another nut meal like hazelnut. You can buy almond meal in bulk food stores or health food stores, or you can make it at home by grinding almonds in the food processor with a tablespoon or two of the flour that you would use in the cake. The reason you need the flour is to prevent the almonds from turning oily or pasty in the processor. You will need about 2 cups of blanched almonds to create enough almond meal for this cake.)
2 cups icing sugar, sifted
6 large eggs
½ cup (70 grams) all-purpose flour
3 tbsp. (1½ ounces; 45 grams) unsalted butter, melted and cooled
1.Divide the oven into thirds by positioning a rack in the upper third of the oven and the lower third of the oven.
2.Preheat the oven to 425◦F. (220◦C).
3.Line two 12½ x 15½- inch (31 x 39-cm) jelly-roll pans with parchment paper and brush with melted butter.
4.In the bowl of a stand mixer fitted with the whisk attachment (or using a handheld mixer), beat the egg whites until they form soft peaks. Add the granulated sugar and beat until the peaks are stiff and glossy. If you do not have another mixer bowl, gently scrape the meringue into another bowl and set aside.
5.If you only have one bowl, wash it after removing the egg whites or if you have a second bowl, use that one. Attach the paddle attachment to the stand mixer (or using a handheld mixer again) and beat the almonds, icing sugar and eggs on medium speed until light and voluminous, about 3 minutes.
6.Add the flour and beat on low speed until the flour is just combined (be very careful not to overmix here!!!).
7.Using a rubber spatula, gently fold the meringue into the almond mixture and then fold in the melted butter. Divide the batter between the pans and spread it evenly to cover the entire surface of each pan.
8.Bake the cake layers until they are lightly browned and just springy to the touch. This could take anywhere from 5 to 9 minutes depending on your oven. Place one jelly-roll pan in the middle of the oven and the second jelly-roll pan in the bottom third of the oven.
9.Put the pans on a heatproof counter and run a sharp knife along the edges of the cake to loosen it from the pan. Cover each with a sheet of parchment or wax paper, turn the pans over, and unmold.
10.Carefully peel away the parchment, then turn the parchment over and use it to cover the cakes. Let the cakes cool to room temperature.
For the syrup
(Note: The syrup can be made up to 1 week in advance and kept covered in the refrigerator.)
What you’ll need:
•a small saucepan
Ingredients:
½ cup (125 grams) water
⅓ cup (65 grams) granulated sugar
1 to 2 tbsp. of the flavouring of your choice (i.e., vanilla extract, almond extract, cognac, limoncello, coconut cream, honey etc.)
1.Stir all the syrup ingredients together in the saucepan and bring to a boil.
2.Remove from the heat and let cool to room temperature.
For the buttercream
(Note: The buttercream can be made up to 1 month in advance and packed in an airtight container. If made way in advance, you can freeze the buttercream. Alternatively you can refrigerate it for up to 4 days after making it. To use the buttercream simply bring it to room temperature and then beat it briefly to restore its consistency.)
(Update Note: The recipe for the buttercream that is listed below was originally based on the original but we had some typos. It's all very confusing (we're good at confusing ourselves) but here is the short of it: When testing the buttercream, we tested a modified version (we're crazy like that!!!) that had 2 cups sugar, ½ cup water and 1¾ cups butter. Yes. That's right. 1¾ cups of butter. The eggs remained the same. We ended up with a very creamy buttercream. VERY. CREAMY. But we don’t want anyone to be afraid of our modified version so you have the option of using the original version listed below or the quantities we’ve listed here in this note. If you are still confused and want to cry, then please e-mail us and we will comfort you!!! We promise!!!)
What you’ll need:
•a small saucepan
•a candy or instant-read thermometer
•a stand mixer or handheld mixer
•a bowl and a whisk attachment
•rubber spatula
Ingredients:
1 cup (100 grams) granulated sugar
¼ cup (60 grams) water
seeds of one vanilla bean (split a vanilla bean down the middle and scrape out the seeds) or 1 tbsp. pure vanilla extract (Note: If you are flavouring your buttercream and do not want to use the vanilla, you do not have to. Vanilla will often enhance other flavours but if you want an intense, one-flavoured buttercream, then by all means leave it out!)
1 large egg
1 large egg yolk
1¾ sticks (7 ounces; 200 grams) unsalted butter, at room temperature
flavouring of your choice (a tablespoon of an extract, a few tablespoons of melted white chocolate, citrus zest, etc.)
1.Combine the sugar, water and vanilla bean seeds or extract in a small saucepan and warm over medium heat just until the sugar dissolves.
2.Continue to cook, without stirring, until the syrup reaches 225◦F (107◦C) [*Note: Original recipe indicates a temperature of 255◦F (124◦C), however, when testing the recipe I found that this was too high so we heated to 225◦F and it worked fine] on a candy or instant-read thermometer. Once it reaches that temperature, remove the syrup from the heat.
3.While the syrup is heating, begin whisking the egg and egg yolk at high speed in the bowl of your mixer using the whisk attachment. Whisk them until they are pale and foamy.
4.When the sugar syrup reaches the correct temperature and you remove it from the heat, reduce the mixer speed to low speed and begin slowly (very slowly) pouring the syrup down the side of the bowl being very careful not to splatter the syrup into the path of the whisk attachment. Some of the syrup will spin onto the sides of the bowl but don’t worry about this and don’t try to stir it into the mixture as it will harden!
5.Raise the speed to medium-high and continue beating until the eggs are thick and satiny and the mixture is cool to the touch (about 5 minutes or so).
6.While the egg mixture is beating, place the softened butter in a bowl and mash it with a spatula until you have a soft creamy mass.
7.With the mixer on medium speed, begin adding in two-tablespoon chunks. When all the butter has been incorporated, raise the mixer speed to high and beat until the buttercream is thick and shiny.
8.At this point add in your flavouring and beat for an additional minute or so.
9.Refrigerate the buttercream, stirring it often, until it’s set enough (firm enough) to spread when topped with a layer of cake (about 20 minutes).
For the white chocolate ganache/mousse

(Note: The mousse can be made ahead and refrigerated until you’re ready to use it.)
What you’ll need:
•a small saucepan
•a mixer or handheld mixer
Ingredients:
7 ounces white chocolate
1 cup plus 3 tbsp. heavy cream (35% cream)
1 tbsp. liquer of your choice (Bailey’s, Amaretto, etc.)
1.Melt the white chocolate and the 3 tbsp. of heavy cream in a small saucepan.
2.Stir to ensure that it’s smooth and that the chocolate is melted. Add the tablespoon of liqueur to the chocolate and stir. Set aside to cool completely.
3.In the bowl of a stand mixer, whip the remaining 1 cup of heavy cream until soft peaks form.
4.Gently fold the whipped cream into the cooled chocolate to form a mousse.
5.If it’s too thin, refrigerate it for a bit until it’s spreadable.
6.If you’re not going to use it right away, refrigerate until you’re ready to use.
For the glaze
(Note: It’s best to make the glaze right when you’re ready to finish the cake.)
What you’ll need:
•a small saucepan or double boiler
Ingredients:
14 ounces white chocolate, coarsely chopped
½ cup heavy cream (35% cream)
1.Melt the white chocolate with the heavy cream. Whisk the mixture gently until smooth.
2.Let cool for 10 minutes and then pour over the chilled cake. Using a long metal cake spatula, smooth out into an even layer.
3.Place the cake into the refrigerator for 30 minutes to set.
Assembling the Opéra Cake
(Note: The finished cake should be served slightly chilled. It can be kept in the refrigerator for up to 1 day).
Line a baking sheet with parchment or wax paper.
Working with one sheet of cake at a time, cut and trim each sheet so that you have two pieces (from each cake so you’ll have four pieces in total): one 10-inch (25-cm) square and one 10 x 5-inch (25 x 12½-cm) rectangle.
Step A (if using buttercream only and not making the ganache/mousse):
Place one square of cake on the baking sheet and moisten it gently with the flavoured syrup.
Spread about one-third of the buttercream over this layer.
Top with the two rectangular pieces of cake, placing them side by side to form a square. Moisten these pieces with the flavoured syrup.
Spread another third of the buttercream on the cake and then top with the third square of joconde. Use the remaining syrup to wet the joconde. Spread the remaining buttercream on top of the final layer of joconde and then refrigerate until very firm (at least half an hour).
Make the glaze and after it has cooled, pour/spread it over the top of the chilled cake. Refrigerate the cake again to set the glaze.
Serve the cake slightly chilled. This recipe will yield approximately 20 servings.
Step B (if making the ganache/mousse):
Place one square of cake on the baking sheet and moisten it gently with the flavoured syrup.
Spread about three-quarters of the buttercream over this layer.
Top with the two rectangular pieces of cake, placing them side by side to form a square. Moisten these pieces with the flavoured syrup.
Spread the remaining buttercream on the cake and then top with the third square of joconde. Use the remaining syrup to wet the joconde and then refrigerate until very firm (at least half an hour).
Prepare the ganache/mousse (if you haven’t already) and then spread it on the top of the last layer of the joconde. Refrigerate for at least two to three hours to give the ganache/mousse the opportunity to firm up.
Make the glaze and after it has cooled, pour/spread it over the top of the chilled cake. Refrigerate the cake again to set the glaze.
Serve the cake slightly chilled. This recipe will yield approximately 20 servings.

del.icio.us Tags:

Monday, May 19, 2008

Lemon Cream Cake

Kristens Food May 2008 037 #2 When Helen of Tartlette announced that she was hosting this months Sugar High Friday and that the theme was citrus, I knew I was in. I love desserts that are light and citrusy but what to make? I have a few lemon standbys that I always go for but this time I wanted to try something a little different. My mother-in-law has been talking about Olive Garden's Lemon Cream Cake a lot lately, so this post is dedicated to her and my attempt to recreate it. I think it turned out pretty darn close and boy was it delicious.

I decided to use the cake form Dorie Greenspan's party cake recipe since it had a nice crumb and was light. The filling I just kind of improvised as I went along, it's kind of a lemon and cream cheese mousse. The topping is just a crumb topping with powdered sugar, flour, butter and vanilla. Altogether delicious!

Lemon Cream CakeKristens Food May 2008 038 #3

Cake

2 1/4 cups cake flour
1 tablespoon baking powder
½ teaspoon salt
1 ¼ cups buttermilk
4 large egg whites (save the yolks for the lemon curd)
1 ½ cups sugar
2 teaspoons grated lemon zest
1 stick (8 tablespoons) unsalted butter, at room temperature
1 tsp. vanilla

To Make the Cake
Sift together the flour, baking powder and salt.
Whisk together the milk and egg whites in a medium bowl.
Put the sugar and lemon zest in a mixer bowl or another large bowl and rub them together with your fingers until the sugar is moist and fragrant.
Add the butter and working with the paddle or whisk attachment, or with a hand mixer, beat at medium speed for a full 3 minutes, until the butter and sugar are very light.
Beat in the extract, then add one third of the flour mixture, still beating on medium speed.
Beat in half of the milk-egg mixture, then beat in half of the remaining dry ingredients until incorporated.
Add the rest of the milk and eggs beating until the batter is homogeneous, then add the last of the dry ingredients.
Finally, give the batter a good 2- minute beating to ensure that it is thoroughly mixed and well aerated.
Divide the batter between the two pans and smooth the tops with a rubber spatula.
Bake for 30-35 minutes, or until the cakes are well risen and springy to the touch – a thin knife inserted into the centers should come out clean
Transfer the cakes to cooling racks and cool for about 5 minutes, then run a knife around the sides of the cakes, unfold them and peel off the paper liners.
Invert and cool to room temperature, right side up (the cooled cake layers can be wrapped airtight and stored at room temperature overnight or frozen for up to two months).

Filling

1/3 cup simple syrup (you will need more simple syrup to brush on the cake)
1 package unflavored powdered gelatin
1 batch of lemon curd (recipe follows)
1 pkg. (8oz) cream cheese, softened
3/4 cup whipping cream

1. Bloom the gelatin in a few Tbs. of water for about 5 minutes. Heat the simple syrup over medium heat and add the gelatin, bring the mixture to a simmer, stirring constantly, until the gelatin is completely dissolved. Set aside to cool.

2. In a chilled mixing bowl, beat the whipping cream until it forms stiff peaks. Transfer to another bowl and set aside.

3. In the mixing bowl, beat the cream cheese and the lemon curd until it is well mixed. Slowly drizzle in the cooled simple syrup, scraping down sides as needed. Add the whipping cream and beat with the whisk attachment until incorporated.

4. Chill the mixture until slightly thickened.

Lemon Curd

2 large lemons
4 large egg yolks
2/3 cup sugar
4 tablespoons butter, cold

1. Zest the lemons and set aside. Juice the zested lemons and strain the juice. In a small mixing bowl, whisk the egg yolks and sugar until smooth. Stir in the zest and lemon juice.

2. Pour the mixture into a non-reactive saucepan. Over medium heat, bring to a simmer. Reduce the heat to low and continue to cook, stirring constantly with a wooden spoon, until the mixture thickens and coats the back of a spoon. Remove from the heat and pour through a strainer into a glass bowl. Stir in the butter, 1 tablespoon at a time. Cool to room temperature then press a piece of plastic wrap onto the surface and chill in the fridge until completely chilled and set.

Vanilla Crumb Topping

1/2 cup flour

1/2 cup plus 2 Tbs. powdered sugar

5 Tbs. chilled butter cut into small pieces

1 tsp. vanilla

1. In a bowl mix the flour and powdered sugar. Cut in the chilled butter until small pea sized balls form. Drizzle the vanilla over and mix to combine. Chill the mixture until needed.

Assembling the cake.

When the cake cooled, slice in half horizontally. Brush the cut sides of the cake with the remaining simple syrup. Spread 2/3 of the filling on the bottom half of the cake. Top with the other layer of cake. Frost the top and the outside of the cake with the remaining filling and then press the crumb mixture onto the sides and top of the cake. Dust with powdered sugar. Chill for several hours or freeze to firm up the filling. Dust extra with powdered sugar before serving.

del.icio.us Tags: ,,

Sunday, March 30, 2008

Daring Bakers Challenge #1


Awhile ago while searching through food blogs, I kept comming across the Daring Baker's logo and wondered what it was. So, I clicked on the link and found a community of food bloggers looking for a challenge. Every month the group is given a recipe that is chosen by a predetermined host. The whole group is to make the recipe as listed only making changes as allowed by the host. Then the group all posts their results on the same day. I had been looking for some way to turn my love of cooking and baking into more of a challenge. I knew that this was the group for me. I quickly e-mailed the group organizers and here I am with my first Daring Baker's challenge.

This months challenge was a "Perfect Party Cake" by Dorie Greenspan. And may I say that it really was a perfect party cake. The cake was light and sweet and the swiss meringue buttercream was smooth and silky. I brought it over to our Easter dinner wondering how it would go over. I knew that there would be one of those death-by-chocolate cakes there and was worried that people would go for the classic. I couldn't have been prouder, my cake was gone in a flash with rave reviews while the chocolate cake sat there with few slices gone. This definately was a delicious challenge. I have even received requests to make this cake again. Thanks Morven for picking this wonderful recipe.

We were allowed to fill our cakes with our choice of filling so I decided to make a bavarian cream using coconut milk and whipping cream. I really wanted to use some fresh berries in the filling but I had to make the cake the night before and was worried that it would make the cake soggy. I skipped the lemon extract in the cake and substituted almond and vanilla extracts since that is what I had on hand. I topped the cake with shavings of bittersweet chocolate and a few fanned strawberries. It looked as good as it tasted.


I can't wait to make this cake again with some other variations. The frosting is a keeper and goes on smooth and light. The cake is sweet and spongy and would lend itself to any flavor willing to be joined with it. It truly is the perfect party cake and will now become a staple in my house.

Here are a few pictures of the process.
Here is one of the completed cakes. They don't rise as much as the typical cake but are light and delicious. I ended up makeing four cakes altogether and using three of them which I torted, giving me six layers.


Here is the beautifully whipped meringue for the swiss meringue buttercream. If you look carefully you can see a face in the meringue on the right hand side of the whisk. :)


Here is a completed slice of the cake. Doesn't it look delicious?!


The Perfect Party Cake
by Dorie Greenspan


For the Cake


2 1/4 cups cake flour
1 tablespoon baking powder
½ teaspoon salt
1 ¼ cups whole milk or buttermilk (I prefer buttermilk with the lemon)
4 large egg whites
1 ½ cups sugar
2 teaspoons grated lemon zest
1 stick (8 tablespoons or 4 ounces) unsalted butter, at room temperature
½ teaspoon pure lemon extract

For the Buttercream
1 cup sugar
4 large egg whites
3 sticks (12 ounces) unsalted butter, at room temperature
¼ cup fresh lemon juice (from 2 large lemons)
1 teaspoon pure vanilla extract

For Finishing
2/3 cup seedless raspberry preserves stirred vigorously or warmed gently until spreadable
About 1 ½ cups sweetened shredded coconut

Getting Ready
Centre a rack in the oven and preheat the oven to 350 degrees F. Butter two 9 x 2 inch round cake pans and line the bottom of each pan with a round of buttered parchment or wax paper. Put the pans on a baking sheet.

To Make the Cake
Sift together the flour, baking powder and salt.
Whisk together the milk and egg whites in a medium bowl.
Put the sugar and lemon zest in a mixer bowl or another large bowl and rub them together with your fingers until the sugar is moist and fragrant.
Add the butter and working with the paddle or whisk attachment, or with a hand mixer, beat at medium speed for a full 3 minutes, until the butter and sugar are very light.
Beat in the extract, then add one third of the flour mixture, still beating on medium speed.
Beat in half of the milk-egg mixture, then beat in half of the remaining dry ingredients until incorporated.
Add the rest of the milk and eggs beating until the batter is homogeneous, then add the last of the dry ingredients.
Finally, give the batter a good 2- minute beating to ensure that it is thoroughly mixed and well aerated.
Divide the batter between the two pans and smooth the tops with a rubber spatula.
Bake for 30-35 minutes, or until the cakes are well risen and springy to the touch – a thin knife inserted into the centers should come out clean
Transfer the cakes to cooling racks and cool for about 5 minutes, then run a knife around the sides of the cakes, unfold them and peel off the paper liners.
Invert and cool to room temperature, right side up (the cooled cake layers can be wrapped airtight and stored at room temperature overnight or frozen for up to two months).

To Make the Buttercream
Put the sugar and egg whites in a mixer bowl or another large heatproof bowl, fit the bowl over a plan of simmering water and whisk constantly, keeping the mixture over the heat, until it feels hot to the touch, about 3 minutes.
The sugar should be dissolved, and the mixture will look like shiny marshmallow cream.
Remove the bowl from the heat.
Working with the whisk attachment or with a hand mixer, beat the meringue on medium speed until it is cool, about 5 minutes.
Switch to the paddle attachment if you have one, and add the butter a stick at a time, beating until smooth.
Once all the butter is in, beat in the buttercream on medium-high speed until it is thick and very smooth, 6-10 minutes.
During this time the buttercream may curdle or separate – just keep beating and it will come together again.
On medium speed, gradually beat in the lemon juice, waiting until each addition is absorbed before adding more, and then the vanilla.
You should have a shiny smooth, velvety, pristine white buttercream. Press a piece of plastic against the surface of the buttercream and set aside briefly.

To Assemble the Cake
Using a sharp serrated knife and a gentle sawing motion, slice each layer horizontally in half.
Put one layer cut side up on a cardboard cake round or a cake plate protected by strips of wax or parchment paper.
Spread it with one third of the preserves.
Cover the jam evenly with about one quarter of the buttercream.
Top with another layer, spread with preserves and buttercream and then do the same with a third layer (you’ll have used all the jam and have buttercream leftover).
Place the last layer cut side down on top of the cake and use the remaining buttercream to frost the sides and top.
Press the coconut into the frosting, patting it gently all over the sides and top.

Serving
The cake is ready to serve as soon as it is assembled, but I think it’s best to let it sit and set for a couple of hours in a cool room – not the refrigerator. Whether you wait or slice and enjoy it immediately, the cake should be served at room temperature; it loses all its subtlety when it’s cold. Depending on your audience you can serve the cake with just about anything from milk to sweet or bubbly wine.

Storing
The cake is best the day it is made, but you can refrigerate it, well covered, for up to two days. Bring it to room temperature before serving. If you want to freeze the cake, slide it into the freezer to set, then wrap it really well – it will keep for up to 2 months in the freezer; defrost it, still wrapped overnight in the refrigerator.

Playing Around
Since lemon is such a friendly flavour, feel free to make changes in the preserves: other red preserves – cherry or strawberry – look especially nice, but you can even use plum or blueberry jam.

Fresh Berry Cake
If you will be serving the cake the day it is made, cover each layer of buttercream with fresh berries – use whole raspberries, sliced or halved strawberries or whole blackberries, and match the preserves to the fruit. You can replace the coconut on top of the cake with a crown of berries, or use both coconut and berries. You can also replace the buttercream between the layers with fairly firmly whipped sweetened cream and then either frost the cake with buttercream (the contrast between the lighter whipped cream and the firmer buttercream is nice) or finish it with more whipped cream. If you use whipped cream, you’ll have to store the cake the in the refrigerator – let it sit for about 20 minutes at room temperature before serving.

Coconut Bavarian Cream

1 can coconut milk
less than 1/4 cup whipping cream, enough to equal 2 cups when added to the coconut milk
1/2 tsp coconut extract
1/2 tsp vanilla extract
6 egg yolks
2/3 cup sugar
1 pkg. unflavored gelatin (about 1 Tbs.)
3 Tbs. water

1. Put the coconut milk, whipping cream and extracts into a saucepan and bring to a boil. Meanwhile, beat the egg yolks and sugar on medium speed until it thickens and forms a ribbon. Still beating, slowly add the hot milk mixture into the yolk mixture. Do not add it too quickly or you will scramble the eggs.

2. Pour the water into a bowl and sprinkle with the gelatin. Allow the gelatin to "bloom" until needed.

3. Pour the mixture back into the saucepan and heat over low to medium-low heat stirring constantly with a wooden spoon until mixture thickens and leaves a trail on the back of the spoon. Do not let the mixture boil. Turn off the heat and add the gelatin mixture whisking to combine until smooth.

4. Move the pan to a bowl of ice water to stop the cooking process and to cool. Pour slightly cooled mixture into a bowl and cover with platic wrap, pressing it onto the surface of the cream. Refrigerate until chilled and thickened.

*to give it a lighter texture, once cooled you can fold in some fresh whipped cream.

Monday, March 17, 2008

The cake is a BIG deal!!!


Happy Saint Patrick Day everyone! I hope that you all remembered to wear green today. I have got to tell you that St. Patricks day is special to me because it is also my son's birthday. (I think that he is destined to have green birthday parties for the rest of his life!) But, the cake is why I am writing. Not because it was super delicious,which it was, but because this was my son's first birthday cake.


You see, he was sick for the first year and a half of his life and was unable to eat any food. His first birthday was hard, more so for me than him. You don't really realize how much of a food centered society we are until you have to be removed from it. Every family gathering was hard because there was always a ton of food and thus stuff to tempt my son. How do you explain to a one year old that he can't eat something because it will make him sick, especially when all the other kids are eating it? Our life with food was dramatically altered for that year and a half. No more eating out, many of our meals were eaten when he was asleep and when he was awake we had to keep his highchair away from the table so he couldn't see what we were eating. We would often give him ice chips from a bowl to make him feal like he was eating. Amazingly enough, he is now eating almost everything. I have been lucky enough to see many miracles in my life but for this one I thank my Heavenly Father daily. With his diagnosis, he was not supposed to recover like this and so I am forever grateful that he has recovered and that he can eat with the rest of us and enjoy birthday cake on his birthday. I know several other children with the same diagnosis who have not been so fortunate and it pains me to see the way that they have to go through life without the enjoyment of a birthday cake among other things.

Without further ado, here are some cute pics of my sone enjoying his first birthday cake. (Which was super delicious by the way. Four layers of peanut butter frosting between chocolate pound cake and topped off with a Chocolate swiss meringue buttercream! You can't beat that for a first birthday cake! Yumm!)

Rockwell blowing out his birthday candle. Isn't he cute!


Rockwell on his first birthday, eating a popsicle made from his medical formula. Yummy!


Rockwell on his birthday this year, finally enjoying some birthday cake!!!

**For more information on Eosinophilic Disorders please check out APFED (American Partnership for Eosinophilic Disorders).

Sunday, March 9, 2008

When life hands you lemons...

...make lemon cake!


I never was much of a lemon fan when it came to desserts, or at least I thought I wasn't. That is until I took one look at Ina Garten's lemon cake. I love her show and when I saw her make that delectable lemon cake, I was smitten. I have been a lemon beleiver ever since.

The cake definately contains a healthy dose of lemons. The batter is filled with zest and lemon juice. Then after the cake comes out of the oven, a simple syrup of lemon juice and sugar is poured over the top. But wait, there's more. Once the cake has cooled, it is then topped with an icing made of fresh squeezed lemon juice and powdered sugar. It is so delicious. In fact, when this cake comes out of the oven, the edges are slightly brown and chewy and if I know that I will be the one to partake of that cake, I'll pick off the edges and eat them while they're still hot.

Today, instead of making the cake in loaf pans as the recipe says, I made them into delectable little cupcakes. I was amazed how easily the recipe went from loaf pans to the little cakes; making 24 perfect cupcakes.


Ina Garten's Lemon cake

1/2 pound (2 sticks) unsalted butter at room temperature
2 1/2 cups granulated sugar, divided
4 extra-large eggs, at room temperature
1/3 cup grated lemon zest lightly packed (6 to 8 large lemons - Use only fresh lemon juice and zest)
3 cups all-purpose flour
1/2 teaspoon baking powder
1/2 teaspoon baking soda
1 teaspoon kosher salt
3/4 cup freshly squeezed lemon juice
3/4 cup buttermilk, at room temperature
1 teaspoon pure vanilla extract

For the glaze:
2 cups confectioners' sugar
3 1/2 tablespoons freshly squeezed lemon juice

1. Preheat the oven to 350 degrees F*. Grease and flour 2 (8 1/2 by 4 1/4 by 2 1/2-inch) loaf pans. Cream the butter and 2 cups granulated sugar in the bowl of an electric mixer fitted with the paddle attachment, the key to great cakes is beating the butter and sugar until the mixture's until light and fluffy, about 5 minutes.

2. With the mixer on medium speed add the eggs, (break the eggs into a dish before adding to the batter to avoid a bad egg or shells in the batter) 1 at a time, and the lemon zest. Sift together the flour, to make sure there are no lumps, baking powder, baking soda, and salt in a bowl.

3. Separately, combine 1/4 cup lemon juice, the buttermilk, and vanilla. Add the flour and buttermilk mixtures alternately, beginning and ending with the flour. Divide evenly between the pans, smooth the tops, and bake for 45 minutes to 1 hour, until a cake tester comes out clean.

4. Cook 1/2 cup granulated sugar with 1/2 cup lemon juice in a small saucepan and cook over low heat until the sugar dissolves. When the cakes are done, cool for 10 minutes, invert them onto a rack set over a tray and spoon the lemon syrup over the cakes. Allow the cakes to cool completely.

5. For the glaze, combine the confectioners' sugar and the lemon juice in a bowl, mixing with a wire whisk until smooth. Pour over the tops of the cakes and allow the glaze to drizzle down the sides. To freeze these cakes, prepare them except the glaze. Wrap them well in plastic wrap and freeze. When you're ready to use, defrost and glaze.

note*: To make cupcakes, preheat oven to 325 degrees. Divide batter to make 24 cupcakes. Lightly bang the cupcake pans against a counter to get any air bubbles out. Bake for 25-30 minutes or until a cake tester comes out clean. Follow the steps for glazing and icing.

Tuesday, March 4, 2008

Chocolate Zucchini Snack Cake

I had to run to "Wally World" last night to my dismay, as I try to avoid that store like the plague. And a trip to the store with three hungry and tired kids is never fun, especially when you get to the checkout line. You see the stores have it down, tempt the kids with a wide assortment of candy and treats when you are inevitably at your witts end after a long shopping trip. They also like to make sure that the lines are long so that your kids will have a half of an hour to ask you for said treats. I admitt, I usually give in, I mean a 50 cent piece of candy is worth my sanity right?! So, my point of the story is that I have my own temptation at the checkout line too, and more often than not I give in to myself. I love the food magazines that they place on the racks above all of the candy. I usually browse through them while I am waiting in those impossibly long lines and if they look good, I'll buy them. Last night I found one that I had to buy. It was a Betty Crocker Cakes mini magazine. It had all of these quick and easy cake recipes using, you guessed it, Betty Crocker cake mixes. I love homemade cakes, but sometimes you just need somthing quick and easy. As I flipped through it I found this chocolate zucchini snack cake recipe that I had all of the ingredients for, (well almost all of them, see below). It was a moist chocolate cake which was lower in fat and was topped with nuts. I'll tell you, I'm a nut lover anything with chocolate must have nuts so this one hit the spot. My kids loved it and had no idea that it has zucchini hidden inside. In fact, as I was typing this, my 2 year old climbed up onto the counter and began grabbing handfuls of the cake, what a mess! At least he is cute, so I'll forgive him.


Chocolate Zucchini Snack Cake
(from the Betty Crocker Cakes magazine)


1 3/4 cup German chocolate cake mix
1 cup shredded zucchini
1/2 tsp cinnamon
1/8 tsp cloves
1/4 cup buttermilk*
2 Tbs. vegetable oil
1 egg
1/4 cup chopped nuts
1/4 cup miniature chocolate chips

1. preheat oven to 350 degrees. Spray a 8 in or 9 in round pan with cooking spray.

2. In a large bowl, beat cake mix, zucchini, cinnamon, cloves, buttermilk, oil and egg with mixer until moistened. Beat on medium spead for 2 more minutes, scraping bowl ocassionally. Pur into pan. sprinkle evenly with nuts and chocolate chips.

3. bake 30 to 35 minutes or until toothpick inserted in center comes out clean. Cool completelt, about 1 hour.

*I was all out of buttermilk so I used 1/4 cup of sour cream and 1 Tbs. of milk. The recipe also says that you can use 3/4 tsp. lemon juice or vinager added to milk to equal 1/4 cup in place of the buttermilk. Just let it stand for 5 minutes before adding it to the cake ingredients.