Saturday, November 29, 2008

Caramel Cake with the Daring Bakers


I hope that everyone had a great Thanksgiving.  I had a great time with all of my family.  I was really relaxed this year despite having 40 people over.  We had so much food.  In fact, we had a whole turkey left over which we didn't even carve.  My fridge is stocked with leftovers and several yummy pies which I am eating bite by bite right out of the pie plates.  I think this year could be the year that I gain a few extra pounds over the holidays.  It's just so hard to resist all of the delicious food.

Of course then there's the Daring Baker's challenge which came right after Thanksgiving.  Of course I had to be a procrastinator and was up finishing it tonight after 9 hours of work.  I am so tired so if this post doesn't make sense, forgive me.

This months challenge was a recipe form Shuna Fish Lydon for Caramel Cake with Caramelized Butter Frosting.  Our hosts this month were Dolores from Culinary Curiosity, Alex from Brownie of the Blondie and  Jenny of  Foray into Food. And for those gluten free bakers Natalie of Gluten-a-Go-Go  lent a hand too.

I decided to halve the recipe and make cupcakes instead of one large cake because I really need more dessert around here just like I need a hole in my head.  Instead of lining my pan with liners I put in little squares of parchment.  I reduced the sugar slightly on the cupcakes and frosting after reading several posts about how sweet they both were.  Overall, my favorite part of this challenge was the frosting and let me tell you, I usually don't like frosting.  This one has a really caramely flavor from the brown butter and the caramel syrup.  It is absolutely delicious.  The cake was good too with a nice moist ,tight crumb.  I thought that it lacked a little caramel flavor.  I think next time I will  add a little more of the caramel syrup.

Overall, the challenge was quick easy and delicious.  I will be keeping that frosting recipe on hand for future use.  I can't wait to see what the Daring Bakers will have in store for us next month!

Caramel Cake With Caramelized Butter Frosting:

10 Tablespoons unsalted butter at room temperature
1 1/4 Cups granulated sugar
1/2 teaspoon kosher salt
1/3 Cup Caramel Syrup (see recipe below)
2 each eggs, at room temperature
splash vanilla extract
2 Cups all-purpose flour
1/2 teaspoon baking powder
1 cup milk, at room temperature

Preheat oven to 350F. Butter one tall (2 – 2.5 inch deep) 9-inch cake pan.

In the bowl of a stand mixer fitted with a paddle attachment, cream butter until smooth. Add sugar and salt & cream until light and fluffy.

Slowly pour room temperature caramel syrup into bowl. Scrape down bowl and increase speed. Add eggs/vanilla extract a little at a time, mixing well after each addition. Scrape down bowl again, beat mixture until light and uniform.

Sift flour and baking powder. Turn mixer to lowest speed, and add one third of the dry ingredients. When incorporated, add half of the milk, a little at a time. Add another third of the dry ingredients, then the other half of the milk and finish with the dry ingredients. {This is called the dry, wet, dry, wet, dry method in cake making. It is often employed when there is a high proportion of liquid in the batter.}

Take off mixer and by hand, use a spatula to do a few last folds, making sure batter is uniform. Turn batter into prepared cake pan. Place cake pan on cookie sheet or 1/2 sheet pan. Set first timer for 30 minutes, rotate pan and set timer for another 15-20 minutes. Your own oven will set the pace. Bake until sides pull away from the pan and skewer inserted in middle comes out clean. Cool cake completely before icing it. Cake will keep for three days outside of the refrigerator.

Caramel Syrup:
2 cups sugar
1/2 cup water
1 cup water (for "stopping" the caramelization process)

In a small stainless steel saucepan, with tall sides, mix water and sugar until mixture feels like wet sand. Brush down any stray sugar crystals with wet pastry brush. Turn on heat to highest flame. Cook until smoking slightly: dark amber.
When color is achieved, very carefully pour in one cup of water. Caramel will jump and sputter about! It is very dangerous, so have long sleeves on and be prepared to step back.
Whisk over medium heat until it has reduced slightly and feels sticky between two fingers. {Obviously wait for it to cool on a spoon before touching it.}

Caramelized Butter Frosting:
12 tablespoons unsalted butter
1 pound confectioner’s sugar, sifted
4-6 tablespoons heavy cream
2 teaspoons vanilla extract
2-4 tablespoons caramel syrup
Kosher or sea salt to taste

Cook butter until brown. Pour through a fine meshed sieve into a heatproof bowl, set aside to cool.

Pour cooled brown butter into mixer bowl. In a stand mixer fitted with a paddle or whisk attachment, add confectioner's sugar a little at a time. When mixture looks too chunky to take any more, add a bit of cream and or caramel syrup. Repeat until mixture looks smooth and all confectioner's sugar has been incorporated. Add salt to taste.

Note: Caramelized butter frosting will keep in fridge for up to a month.To smooth out from cold, microwave a bit, then mix with paddle attachment until smooth and light.

Overall, I think the frosting is a keeper, I will keep that recipe tucked away for another time.  the cake was alright but nothing to jump through hoops for.  It was a fun and easy challenge.  I can't wait to see what next month will bring!

Thursday, November 20, 2008

Individual Apple Pies

Kristen's Food November 2008 109 

I can't believe that November is just about over and that Thanksgiving is next week.  Were does the time go?  I love that we have a holiday where we can be gluttons.  I am already dreaming about all of the yummy food.  We usually have so much food that we are eating Thanksgiving for about a week.  I can't wait for the mashed potatoes and roasted veggies and stuffing and pie and...the list could go on and on.

I will be hosting Thanksgiving dinner again this year which means 30+ people will be invading my house.  We will cook 2 huge turkeys and a ham, 20 pounds of mashed  potatoes, stuffing, yams corn, rolls, squash and probably about 8-10 pies.  I love pie.  My mom would make me pie every year for my birthday so I have an affinity for good pie.  In fact, as I am typing this, I am eating the pie from the pictures and boy is it good.

This pie recipe is great if you are having a small Thanksgiving and would like to treat everyone to their own mini pies.  Obviously it won't work for my large gathering unless I was a masochist and wanted to stay up all  night baking a million little pies.   It would work well for any leftover pie dough that you have and is a great late night snack.  All you need are some little pot pie tins or ramekins, I think some mini tart pans would also work great.  I used a 6 oz. glass ramekin which worked perfectly.  There is nothing fancy about this pie, just the traditional apple pie.  If you wanted to change it up a bit you could throw in some chopped up caramels and toss in a few pecans or use some orange blossom honey in place of the sugar with a little added citrus zest.  You really can individualize this pie.  So, if you have a hankering for some apple pie, give this one a go.

Individual Apple Pies

 Kristen's Food November 2008 112

Pie dough

3 cups flour, spooned and leveled

1/4 tsp salt

2 Tbs. sugar

1/2 cup shortening

1/2 cup (1 stick) chilled butter cut into small pieces

Ice water

1.  In a large bowl, stir together the flour, sugar and salt.  Add the shortening and the butter and cut it into the flour using two knives or a pastry cutter.  You want the pieces of butter and shortening to be about the size of peas.

2.  Once the mixture is combined, move most of it to one side of the bowl.  Pour a Tablespoon of water over the small bit of flour mixture and pull the dough together with a fork.  Try to work the dough very little as overworking it will cause the gluten to form and will toughen the crust.  Move the moistened dough aside and pull aside some more of the dry flour mixture and repeat until the dough is moist enough to be formed into a ball.

3.  Separate the dough into 1/2 cup size balls of dough, wrap in plastic wrap and chill for at least an hour.

for each individual pie

2 granny smith apples

1/4 cup sugar

2 tsp. flour

1 tsp. cinnamon

juice of 1/2 a small lemon

1 tsp butter cut into small pieces

for the glaze

1 egg yolk

2 tsp. heavy cream

sugar for sprinkling on top

1. Preheat the oven to 375°.  Peal, core and thinly slice the apples.  Sprinkle with the lemon juice and toss to combine.  Add the sugar, cinnamon and flour and toss to combine.  Set aside.

2.  Grease your ramekins.  Roll out one piece of dough at a time, you want the dough to be fairly thin as there is a large ratio of dough to apples.  Roll up onto rolling pan and then fit into the ramekin.  Trim the edges, leaving a little overhang.  Fill with the apples, you ant to mound up the apples as they will shrink down as they cook.  Top with the pieces of butter.

3.  Roll out a second piece of dough and either fit to the top of the pie or cut into strips for a lattice pattern.  If not using the lattice pattern, don't forget to poke holes in the top crust to allow the steam to escape.  Tuck the ends under with the bottom crust.

4.  Mix together the glaze ingredients and brush lightly onto the top crust.  Sprinkle with a little sugar.  Place on baking sheet to catch drips and bake for 30 minutes.  Cover the tops of the pies with foil and then bake for an additional 15-20 minutes or until bubbling and cooked through.  Let cool before eating.

Sunday, November 16, 2008

Triple Threat Brownies

Kristen's Food November 2008 094

Man, things have been so busy.  I feel like my life is racing out of control and leaving me behind.  All areas of my life seem to be disorganized.  It is amazing that I was finally able to get something up on my blog.  I apologize for my lack of posts.  I hope to make it up very soon.  It's not that I haven't made anything, it's just that I haven't had the time or energy to post it.  Hopefully that will all change here soon.  I would like to get a few great Thanksgiving dishes in here soon, so look for those soon.

Now, onto tonight's treat.  I have had this triple layer brownie in my mind for awhile now but have not had all of the ingredients on hand at one time, until last night.  These brownies were inspired by a triple layer mouse cake that I saw once on Martha Stewart several years back.  I thought it would be great to have 3 different layers in one brownie.  I was hoping for more of a distinction between the dark chocolate and the milk chocolate layers but even without that, they were still absolutely delicious!

The bottom layer is a rich dark chocolate brownie with bittersweet chocolate chips.  The middle is a creamy  milk chocolate brownie with Heath toffee pieces and the top layer is a white chocolate brownie with macadamia nuts.  I then drizzled the rich chocolaty layers with more dark chocolate.  What more can you ask for in one little brownie, it's got something for everyone.  These brownies are definitely a chocolate lovers dream.  Don't get overwhelmed by the list of ingredients.  As long as you have everything out and measured before hand the brownies will come together in a snap.

Triple Threat Brownies

Kristen's Food November 2008 064

For the dark chocolate layer

4 Tbs. Butter

4 oz. dark chocolate

½ cup flour

2 Tbs. cocoa powder

¼ tsp. baking powder

¼ tsp. salt

½ cup sugar

1 egg + 1 egg yolk

½ cup dark chocolate chips

For the Milk Chocolate layer

4 Tbs. Butter

4 oz. milk chocolate

½ cup flour

2 Tbs. cocoa powder

¼ tsp. baking powder

¼ tsp. salt

½ cup sugar

1 egg + 1 egg yolk

½ cup toffee bits

For the white chocolate layer

4 Tbs. Butter

4 oz. white chocolate

½ cup flour + 2 Tbs. flour

¼ tsp. baking powder

¼ tsp. salt

½ cup sugar

1 egg + 1 egg white

½ cup macadamia nuts

1. Preheat the oven to 350°. Line a 13x9 pan with foil and spray with cooking spray, set aside. In 3 separate bowls, combine the chocolate and butter for each of the three layers. In another 3 bowls measure out the dry ingredients, excluding the sugar, for each layer.

2. Beginning with the dark chocolate layer, melt the butter and chocolate over a double broiler or in the microwave in 10 second intervals until melted. Remove from heat and stir in the sugar, then the eggs until well combined. Give the dry ingredients a quick stir and dump them into the chocolate mixture. Stir until just combined. Add the chocolate chips and stir to combine. Pour into the bottom of pan and spread out using a slightly damp offset spatula.

3. Continue with the other two layers in the same manner. Be careful when pouring and spreading in the pan so that the layers stay separated.

4. Bake for about 40 minutes or until a toothpick inserted in the center comes out with a few moist crumbs attached. Let cool in pan for about 1 hour then using the foil as handles, carefully remove the brownies from the pan and continue to cool in the fridge until well chilled, this helps when cutting. Cut into squares and drizzle with more melted dark chocolate if desired.

Wednesday, November 5, 2008

Homemade Ricotta

Kristen's Food November 2008 017

I saw a recipe  homemade ricotta a few months ago and it has been in the back of my mind as something to try.  Lately I've had this hankering for some lasagna and thought that this would be a great time to try my hand at cheese making.  As far as cheese go, ricotta couldn't be simpler.  It doesn't require rennet or any special equipment aside from some cheesecloth and can be made in about 15 minutes, from start to finish.  It can also be seasoned in a variety of ways from sweet to savory.  The ricotta turned out perfect with a soft slightly grainy texture and a very mild flavor that tasted great once salted.  I would love to make another batch and mix in some honey and toasted walnuts and spread on a toasted baguette or make a ricotta cake.  There are just so many options for this mild and versatile cheese.

For the lasagna, I added a little olive oil and some basil and rosemary to the ricotta for flavor.   I loaded the lasagna with roasted eggplant, zucchini, portobello mushrooms and carrots.  Topped the noodles with a homemade marinara and smothered the whole thing with a tangy provolone cheese.  It may not have been my husbands favorite, due to the veggies, but for me it was heaven and way better than any Italian restaurant.  I actually threw this whole thing together, including the cheese making in about an hour.  Not bad for a delicious meal that was almost completely made from scratch, next time I'll have to make the pasta too.

Kristen's Food November 2008 028

Homemade Ricotta

From the NY Times

2 quarts milk, preferably whole

2 cups buttermilk

1.  Line a colander with 4 layers of cheesecloth and set in the sink or over a bowl.

2.   Heat the milk and buttermilk in a large stockpot over high heat stirring constantly, scraping the bottom of the pan, to prevent scorching.  When the milk reaches about 170° the curds will separate form the liquid.  the milk will look like a cloudy water with very small curds mixed throughout.  Turn off the heat and pour the mixture into the cheesecloth and let drain for about 5 minutes.  Then gather the edges of the cheesecloth and gently pull together to remove any excess liquid.  Do not squeeze unless you want a drier ricotta.  Let drain for a few more minutes and season to taste.

Wednesday, October 29, 2008

Daring Bakers make Pizza

Kristen's Food October 2008 094

It's time for another Daring Bakers challenge.  This month, Rosa from Rosa's Yummy Yums chose pizza as our challenge.  In all honesty, I make pizza quite often and wasn't really challenged but it sure was fun and absolutely delicious.  I love this crust recipe which was from Peter Reinhart's The Bread Bakers Apprentice.  It makes a chewy crust that is similar to a ciabatta bread and works so well with a wide variety of ingredients.

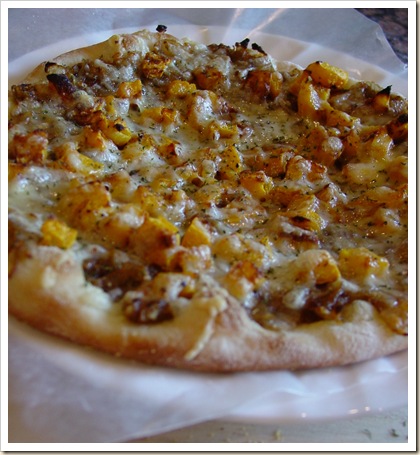
  I was able to make several pizzas with the one batch of dough.  The first was my tasty fall pizza which was inspired by my trip to a local farm and orchard.  Just a few miles down the road is a local orchard that has this cute little store in an old barn.  They sell all of their own produce which is always so delicious.   I was able to pick up some candy onions and a few pumpkins and squashes.  Now my pizza began to take shape.  I knew that the sweet onions would be great caramelized and the sweet and nutty butternut squash needed to be roasted.  I complimented the two ingredients with a creamy, salty fontina and viola my pizza was born. I actually ate it for breakfast and lunch.Kristen's Food October 2008 093

I then needed to make pizzas that the rest of my family would eat so I made a fresh batch of marinara and took the traditional route and made a pepperoni and a cheese pizza.  The family gobbled them all up and gave them both a big thumbs up.

Kristen's Food October 2008 099 

I still had two more balls of dough left the next day so I brushed the shaped dough with olive oil and some sea salt abd baked them.  Once they cooled off I spread them with a mixture of cream cheese and sour cream mixed with some seasonings and then topped them with fresh broccoli, cucumbers, red peppers, tomatoes and grated carrots.  It was light and tasty and worked well with the chewy crust.

Kristen's Food October 2008 116

Overall, this was a very tasty and fun recipe and am glad that I was able to participate in this challenge.  If you're looking for a great pizza dough recipe, you must try this one, it is delicious!   And, don't forget to check out all of the other Daring Baker's tasty creations.


BASIC PIZZA DOUGH
Original recipe taken from “The Bread Baker’s Apprentice” by Peter Reinhart.
Makes 6 pizza crusts (about 9-12 inches/23-30 cm in diameter).

Ingredients:
4 1/2 Cups  Unbleached high-gluten  bread flour or all purpose flour, chilled
1 3/4 Tsp Salt
1 Tsp Instant yeast
1/4 Cup  Olive oil or vegetable oil
1 3/4 Cups  Water, ice cold (40° F/4.5° C)
1 Tbs. sugar
Semolina/durum flour or cornmeal for dusting

DAY ONE
Method:
1. Mix together the flour, salt and instant yeast in a big bowl (or in the bowl of your stand mixer).

2. Add the oil, sugar and cold water and mix well (with the help of a large wooden spoon or with the paddle attachment, on low speed) in order to form a sticky ball of dough. On a clean surface, knead for about 5-7 minutes, until the dough is smooth and the ingredients are homogeneously distributed. If it is too wet, add a little flour (not too much, though) and if it is too dry add 1 or 2 teaspoons extra water.
NOTE: If you are using an electric mixer, switch to the dough hook and mix on medium speed for the same amount of time.The dough should clear the sides of the bowl but stick to the bottom of the bowl. If the dough is too wet, sprinkle in a little more flour, so that it clears the sides. If, on the contrary, it clears the bottom of the bowl, dribble in a teaspoon or two of cold water.
The finished dough should be springy, elastic, and sticky, not just tacky, and register 50°-55° F/10°-13° C.

3. Flour a work surface or counter.  Line a jelly pan with baking paper/parchment. Lightly oil the paper.

4. With the help of a metal or plastic dough scraper, cut the dough into 6 equal pieces (or larger if you want to make larger pizzas).
NOTE: To avoid the dough from sticking to the scraper, dip the scraper into water between cuts.

5. Sprinkle some flour over the dough. Make sure your hands are dry and then flour them.  Gently round each piece into a ball.
NOTE: If the dough sticks to your hands, then dip your hands into the flour again.

6. Transfer the dough balls to the lined jelly pan and mist them generously with spray oil. Slip the pan into plastic bag or enclose in plastic food wrap.

7. Put the pan into the refrigerator and let the dough rest overnight or for up to thee days.
NOTE: You can store the dough balls in a zippered freezer bag if you want to save some of the dough for any future baking. In that case, pour some oil(a few tablespoons only) in a medium bowl and dip each dough ball into the oil, so that it is completely covered in oil. Then put each ball into a separate bag. Store the bags in the freezer for no longer than 3 months. The day before you plan to make pizza, remember to transfer the dough balls from the freezer to the refrigerator.

DAY TWO
8. On the day you plan to eat pizza, exactly 2 hours before you make it, remove the desired number of dough balls from the refrigerator. Dust the counter with flour and spray lightly with oil. Place the dough balls on a floured surface and sprinkle them with flour. Dust your hands with flour and delicately press the dough into disks about 1/2 inch/1.3 cm thick and 5 inches/12.7 cm in diameter. Sprinkle with flour and mist with oil. Loosely cover the dough rounds with plastic wrap and then allow to rest for 2 hours.
Or

9. At least 45 minutes before making the pizza, place a baking stone on the lower third of the oven.  Preheat the oven as hot as possible (500° F/260° C).
NOTE: If you do not have a baking stone, then use the back of a jelly pan. Do not preheat the pan.

10. Generously sprinkle the back of a jelly pan with semolina/durum flour or cornmeal. Flour your hands (palms, backs and knuckles). Take 1 piece of dough by lifting it with a pastry scraper. Lay the dough across your fists in a very delicate way and carefully stretch it by bouncing it in a circular motion on your hands, and by giving it a little stretch with each bounce. Once the dough has expanded outward, move to a full toss.

NOTE: Make only one pizza at a time.
During the tossing process, if the dough tends to stick to your hands, lay it down on the floured counter and reflour your hands, then continue the tossing and shaping.
In case you would be having trouble tossing the dough or if the dough never wants to expand and always springs back, let it rest for approximately 5-20 minutes in order for the gluten to relax fully,then try again.
You can also resort to using a rolling pin, although it isn’t as effective as the toss method.

11. When the dough has the shape you want (about 9-12 inches/23-30 cm in diameter - for a 6 ounces/180g piece of dough), place it on the back of the jelly pan, making sure there is enough semolina/durum flour or cornmeal to allow it to slide and not stick to the pan.

12. Lightly top it with sweet or savory toppings of your choice.

13. Slide the garnished pizza onto the stone in the oven or bake directly on the jelly pan. Close the door and bake for abour 5-8 minutes.

If the top gets done before the bottom, you will need to move the stone or jelly pane to a lower shelf before the next round. On the contrary, if the bottom crisps before the cheese caramelizes, then you will need to raise the stone or jelly.

14. Take the pizza out of the oven and transfer it to a cutting board or your plate. In order to allow the cheese to set a little, wait 3-5 minutes before slicing or serving.

Thursday, October 16, 2008

Mini Pumpkin Cheesecakes with Chocolate Ganache

Kristen's Food October 2008 078

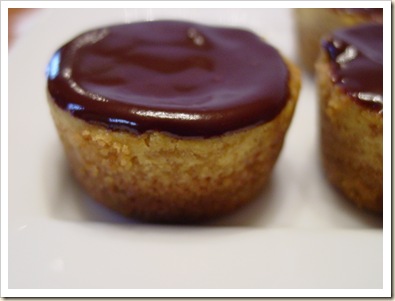
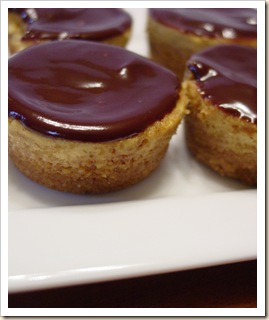
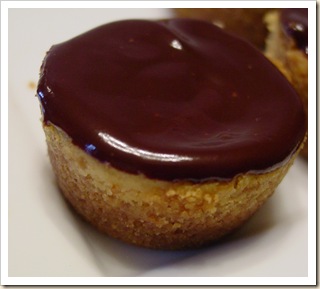
I am going to start by saying that I love cheesecake. It is probably my one major vice out of all desserts. Most others I can put down and not eat after a few bites, but cheesecake is another story. In fact, when I made the cheesecake for a Daring Baker's challenge a few months ago I ate the whole thing , by myself. Now we aren't talking about a small cheesecake, we are talking about a 13x9 pan full of cheesecake. I left it in the fridge with a fork and would just come back throughout the day for a few little bites. Before I knew it, the cheesecake was gone.

I have been wanting to make cheesecake for a few weeks now. And was planning on making a full pan of cheesecake, but over the weeks, I used the cream cheese for other things. So, when I decided to make the these yesterday I only had one package of cream cheese left. I decided that the cheesecake would have to be mini. Now, this could be just as dangerous, the cheesecakes are perfectly bite size and just waiting there in the fridge for me to eat them. I had some pumpkin left over from those cookies and also some chocolate ganache from a cake and so I thought that I'd use those up too.

These little cheesecakes with pumpkin and chocolate turned out so delicious. I really need to get them out of the house before I eat them all! I tell you what, I could not for the life of me get my pumpkin hating husband to try these. So, more for me, he doesn't know what he is missing out on.

Mini Pumpkin Cheesecakes with Chocolate GanacheKristen's Food October 2008 069

6 long sheets of graham crackers

1 Tbs. sugar

a pinch of salt

2 Tbs. butter, melted

1 pkg. (8oz.) cream cheese, softened

1/3 cup sugar

1 egg, room temperature

1/2 tsp vanilla

a pinch of salt

1 1/4 tsp pumpkin pie spice

1/3 canned pumpkin

1. Preheat the oven to 350°. Spray a mini muffin pan with cooking spray and set aside.

2. Add the graham crackers, sugar and salt to food processor and process until graham crackers are fine crumbs. With the machine running, add the melted butter and mix to combine.

3. Put about 1 Tbs. of the crumb mixture into each mini muffin cup (it will make 16 mini cheesecakes). Press the crumbs into each cup. Bake the crusts for 8 minutes. Remove from oven and let cool on cooling rack while you mix the filling. Reduce the oven temperature to 325°. Bring a pot of water to a boil.

4. Rinse out the food processor. In food processor cream the cream cheese until smooth, scraping down the sides as needed. Add the sugar and cream for another minute or two. Add the egg and mix for another minute or two. Scrape down the sides as needed. Add the vanilla, salt, pumpkin pie spice and pumpkin and mix for another minute to combine. Scrape down the side and the bottom of the bowl and give it one last quick mix.

5. Pour the mixture into the crusts, filling to the top. Place the muffin pan onto a baking sheet. Place in the oven. Carefully pour the water into the baking pan being sure not to let it get into the muffin tin. you want the water to come about halfway up the muffin pan. Bake the cheesecakes at 325° for about 24 minutes. Carefully remove the muffin pan from the baking sheet and let cool on a cooling rack for 20 minutes. Then refrigerate them in the pan for another 30 minutes.

6. Carefully run a small thin knife around the edges of each cheesecake and pop them out the pan. Pour about a teaspoon of ganache (recipe follows) onto each cheesecake and spread if desired. Return to the fridge to let the ganache harden.

Chocolate Ganache

This recipe will make a lot more than you need (about 1 cup) but you can cut the recipe in half or make the entire batch and freeze the leftovers for a cake, truffle or a tart.Kristen's Food October 2008 075

6 oz. (good) semisweet or bittersweet chocolate, like Lindt
6 oz. (¾ cup heavy cream
1 Tbsp. light corn syrup
¾ tsp. vanilla

1. Break the chocolate into 1-inch pieces and place in the basket of a food processor and pulse until finely chopped. Transfer into a medium sized bowl and set aside.

2. Heat the cream and corn syrup in a saucepan, on low, until it reached a gentle boil. Once boiling, immediately and carefully pour over the chocolate. Leave it alone for one minute, then slowly stir and mix the chocolate and cream together until the chocolate is melted and incorporated into the cream. Carefully blend in vanilla. The glaze will thicken, but should still be pourable. If it doesn’t thicken, refrigerate for about 5 minutes, but make sure it doesn’t get too cold!

Thursday, October 9, 2008

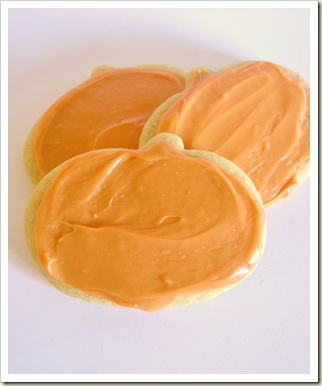
Pumpkin and Spice Sugar Cookies

Kristen's Food October 2008 030

The weather is changing and the cool air has got me thinking pumpkin and spice. I really don't like the cold weather but I do love the warm spices and flavors that come with the season. I love all of the holidays and family get together's. I came from a small family so I love that my husbands family is a bit bigger and has huge family gatherings. I am already thinking of the fall foods like buttered butternut squash and pumpkin spiced cookies.

I was at the store yesterday buying a few ingredients to make cookies when I passed the pumpkin. I couldn't pass it up and knew that I needed to incorporate it somehow into my cookies. I didn't want to make the traditional pumpkin cookies but thought instead that it would be fun to try to incorporate the pumpkin into my buttermilk sugar cookie recipe. It turned out perfectly and in my book, is a total winner. I will be making these cookies again. I was even able to get my picky pumpkin hating husband to try one and actually eat the whole thing. It was pretty funny though, when he got home from work, I kept on asking him to try a cookie and he kept on saying, "I will in a minute" , acting like he was too busy at the moment. After 10 minutes of being too "busy" I stopped him and said, "Knock it off, you just don't want to try them because they have pumpkin in them, just try them!" He reluctantly took a little bite of one, and then another and he actually ate the whole cookie.

Kristen's Food October 2008 029 #2

The pumpkin is very subtle and I didn't put too much of the pumpkin pie spice in them so that it was only a little hint of the fall flavors. If you're a big spice fan then you could definitely add more of the pumpkin pie spice. I topped the cookies with a tangy cream cheese frosting, if you wanted more of the spice, you could even add a dash of the pumpkin pie spice into the frosting.

Pumpkin and Spice Cookies

Kristen's Food October 2008 028

3/4 cup (1 1/2 sticks) butter, softened

2 cups sugar

1 tsp. vanilla

2 eggs

6 cups flour

1 tsp pumpkin pie spice

1 tsp. baking soda

2 tsp. baking powder

1 tsp. salt

1/2 cup pureed pumpkin

1/2 cup buttermilk

1. In the bowl of a mixer fitted with the paddle attachment, cream together the butter and the sugar until light and fluffy, about 5 minutes.

2. Meanwhile, in a large bowl, mix together the flour, pumpkin pie spice, baking soda, baking powder and salt. Whisk until combined. In another small bowl, whisk together the buttermilk and pumpkin. Set both aside.

3. In the mixer, add the eggs, one at a time to the butter and sugar mixture, mixing well after each egg. Add the vanilla and mix until combined.

4. Add 1/3 of the flour mixture, mixing until almost combined. Now add 1/2 of the buttermilk mixture and then another third of the flour. Repeat with the last of the buttermilk and then the flour, mixing until just combined.

5. Divide the dough into thirds, shape into disks and wrap in plastic wrap. Refrigerate for at least an hour to firm the dough up.

6. Preheat the oven to 350°, roll out dough on a well floured counter and cut into desired shape. Bake on a cookie sheet for 8-10 minutes. Let cool for a minute on the cookie sheet and then remove cookies to a cooling rack. Once cooled frost as desired.