Monday, September 22, 2008

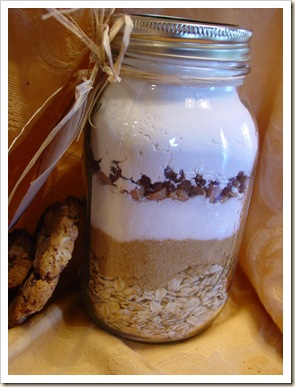
Cookies in a Jar

Kristen's Food September 2008 015

It's the first day of Fall and that means that the holidays are quickly approaching. I really hate saying that already but I know that I need to start getting prepared. Two of my kids have birthdays near the holidays not to mention 6 of their cousins too. I also host Thanksgiving for about 40 people. There is so much for me to get ready. With all of that gift giving, I am usually really strapped for cash but love to give a few gifts to neighbors and teachers. This is a way to give a thoughtful gift without the huge price tag.

Kristen's Food September 2008 021

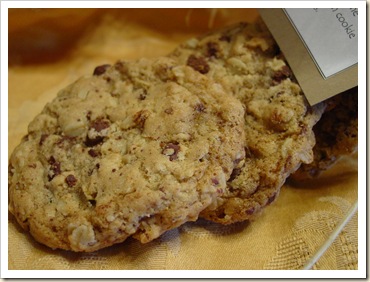
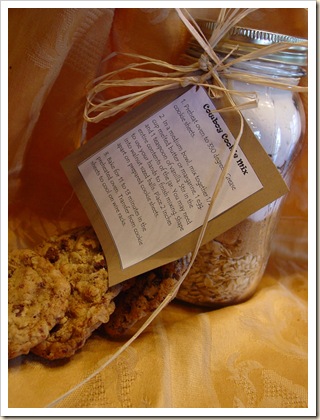
There are a ton of recipes for cookies in a jar and this is just another one. I really like this recipe for several reasons. First off, I love oatmeal cookies, and second, it is very versatile, you can change up a few of the components to make different cookies. The results are a chewy chocolaty cookie that in my opinion is better once it has cooled off. ( I really hate hot, gooey chocolate. I know, I am weird!) I have been eating these for the past 3 days and have been rationalizing them as a good breakfast option because they have oatmeal and walnuts; and dark chocolate is full of antioxidants right?!

Kristen's Food September 2008 016

Cookies in a jar

1 1/3 cups oatmeal

1/2 cup brown sugar

1/2 cup sugar

1 cup chocolate chips, butterscotch chips, M&M's or a combination of them

1/2 cup walnuts (optional)

1 1/3 cup flour

1 tsp. baking powder

1 tsp. baking soda

1/4 tsp. salt

1. Layer the ingredients in the jar in the order listed, packing each layer down tightly.

2. Make a tag with the following instructions: Preheat oven to 350°. Melt 1/2 cup (1 stick) butter and cool slightly. Lightly beat together the melted butter with 1 egg and 1tsp vanilla. Add the contents of the jar and mix to combine. The mixture will be really thick. Spoon by heaping tablespoons onto a greased cookie sheet and bake for about 10 minutes. Remove the cookies from the oven while they look a little doughy as they will really firm up after they cool.

Makes about 2 dozen cookies

Wednesday, September 17, 2008

Cream Cheese filled Rolls

Kristen's Food September 2008 001

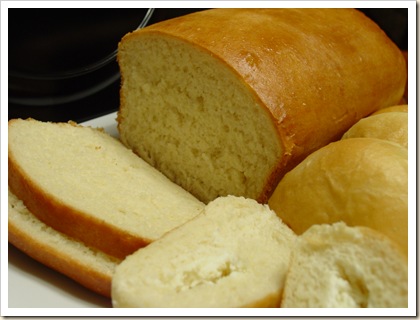
Did you think I wasn't going to come back? I have been out of the kitchen for the last 3 weeks, completely and absolutely sick. I couldn't even eat for the first 2 weeks. I am FINALLY feeling better and have returned to the kitchen. For the last week all I have been able to eat are white starchy foods, like bread and potatoes. I am a huge whole wheat girl so this was totally against the grain for me (gotta love that pun). That's not to say that I don't enjoy the white stuff now and again, I just don't make it a habit. So, as my first time back into the kitchen last night, I decided to make some white bread.

Kristen's Food September 2008 004

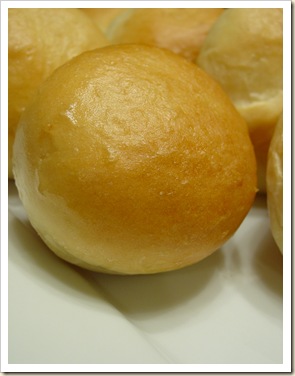
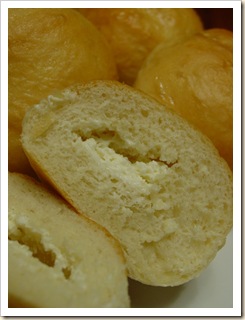
When I finally started feeling better and could really only eat the white starchy stuff, I began to think about these rolls that I would buy when I was away at school in Mexico. I had to catch a "combi" (think VW bus turned into a small scale mass transit system) every morning to get to school and right across the street from where I would catch it was a very large panederia (bread store). They had shelves full of freshly made breads and pastries. I always bought these little breads that were filled with cream cheese. As I was getting my appetite back, this is what I was thinking about eating. Now these aren't replicas of that bread ,as I think that nothing could really match the nostalgia and ambiance that went along with those little breads, but they sure are tasty.

Kristen's Food September 2008 008

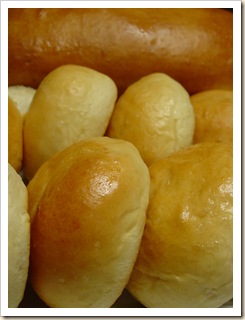
I used Ina Garten's Honey white bread recipe because it is rich, soft and delicious. It is slightly like a brioche dough only a little lighter. It makes a wonderful loaf of bread or soft light rolls. It worked perfectly with these rolls. You could really make these either sweet or savory. I add a little bit of powdered sugar to the cream cheese, not enough to make it too sweet, just enough to take the tangy edge off. You could always add more sugar if you wanted to make it a sweeter bread and then just brush the hot rolls with cinnamon-honey butter. I kept these a little more savory and just brushed them with butter when they came out.

Honey Rolls with Cream Cheese

Kristen's Food September 2008 011

1/2 cup warm water

2 pkg. dry yeast

2 tsp. sugar

1 1/2 cups warm whole milk

6 Tablespoons butter

1 1/2 TBS. honey

2 egg yolks

5 to 6 cups flour

1 TBS. kosher salt

1 egg white, lightly beaten

8 oz. cream cheese

3 Tbs. powdered sugar

1. Heat the milk, butter and honey in a small saucepan until warm and the butter melts. Set aside to cool slightly.

2. Place the water, sugar and yeast in the bowl of mixer and let sit for 5 minutes to allow the yeast to foam and dissolve.

3. Add the milk, butter and honey to the yeast mixture and mix to combine. Add 3 cups of the flour, salt and egg yolks and mix for about 5 minutes to combine.

4. Slowly add more flour until the dough cleans the side of the mixer bowl. Knead or mix for about 10 minutes more.

5. Grease a large bowl. Place the dough into the greased bowl turning to coat all sides of the dough. Cover loosely and allow to rise until doubled in size, about 45 minutes.

6. Mix the cream cheese and powdered sugar until combined. Refrigerate until ready to use.

7. Punch down the dough and divide into 20 rolls (about 60 grams each) or 10 rolls and 1 loaf of bread. Flatten each piece of dough place about 1 Tbs. of the cream cheese mixture into the middle. Fold the edges together and pinch to seal. Roll each ball on the counter pushing it between the palms of your hands to seal the dough and make the round roll shape. Place on a greased cookie sheet and cover lightly. Allow to rise for 30-45 minutes or until doubled in size.

8. Heat the oven to 350°. Brush the tops of the rolls with the beaten egg white. Bake the rolls for 13-15 minutes or until light brown. (Bake the loaf of bread for 35-45 minutes) Brush the tops with butter.

Sunday, August 31, 2008

Eclairs anyone?

DSC04125

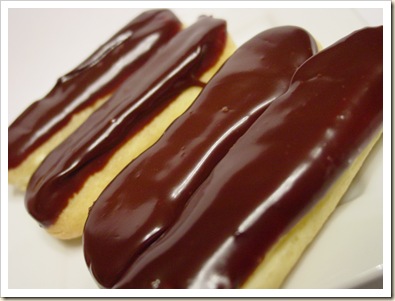
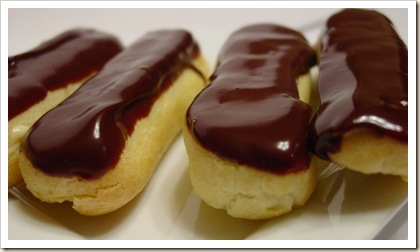
It's the end of the month and time for another Daring Baker's Challenge. I have been a huge procrastinator lately and so of course I didn't even start this challenge until last night. Luckily it was a pretty straight forward and quick one so I wasn't worried about getting it done. This month's recipe was eclairs by Pierre Herme, an amazing french pastry chef.

The recipe called for a basic pate choux dough, a chocolate pastry cream filling and a chocolate glaze. We were allowed to have a little creative leeway. The only rules were that we had to use Pierre Herme's choux dough recipe and we had to use at least one chocolate component. I decided to make the filling a vanilla cream cheese pastry cream and to stick with a chocolate ganache for the glaze. Pretty straight forward and not too creative but that's what you get when you put the challenge off until the last minute. Although not my most creative endeavor, the eclairs were still absolutely delicious, especially as a midnight snack!

Anyone who knows my family knows that they are all huge Simpson's fans. So, when my husband heard that this months challenge was eclairs he had to retrieve this clip from an episode where Homer was a food critic. It's pretty hilarious.


Pierre Hermé’s Chocolate Éclairs
Recipe from Chocolate Desserts by Pierre Hermé
(makes 20-24 Éclairs)
DSC04118


• Cream Puff Dough (see below for recipe), fresh and still warm

1) Preheat your oven to 375 degrees F (190 degrees C). Divide the oven into thirds by
positioning the racks in the upper and lower half of the oven. Line two baking sheets with
waxed or parchment paper.

2) Fill a large pastry bag fitted with a 2/3 (2cm) plain tip nozzle with the warm cream puff dough.
Pipe the dough onto the baking sheets in long, 4 to 41/2 inches (about 11 cm) chubby fingers.
Leave about 2 inches (5 cm) space in between each dough strip to allow them room to puff.
The dough should give you enough to pipe 20-24 éclairs.

3) Slide both the baking sheets into the oven and bake for 7 minutes. After the 7 minutes, slip the
handle of a wooden spoon into the door to keep in ajar. When the éclairs have been in the
oven for a total of 12 minutes, rotate the sheets top to bottom and front to back. Continue
baking for a further 8 minutes or until the éclairs are puffed, golden and firm. The total baking
time should be approximately 20 minutes.

Notes:
1) The éclairs can be kept in a cool, dry place for several hours before filling.

Assembling the éclairs:
• Chocolate glaze (see below for recipe)
• Chocolate pastry cream (see below for recipe)

1) Slice the éclairs horizontally, using a serrated knife and a gently sawing motion. Set aside the
bottoms and place the tops on a rack over a piece of parchment paper.

2) The glaze should be barely warm to the touch (between 95 – 104 degrees F or 35 – 40
degrees C, as measured on an instant read thermometer). Spread the glaze over the tops of
the éclairs using a metal icing spatula. Allow the tops to set and in the meantime fill the
bottoms with the pastry cream.

3) Pipe or spoon the pastry cream into the bottoms of the éclairs. Make sure you fill the bottoms
with enough cream to mound above the pastry. Place the glazed tops onto the pastry cream
and wriggle gently to settle them.

Notes:
1) If you have chilled your chocolate glaze, reheat by placing it in a bowl over simmering water,
stirring it gently with a wooden spoon. Do not stir too vigorously as you do not want to create
bubbles.

2) The éclairs should be served as soon as they have been filled.

Pierre Hermé’s Cream Puff Dough
Recipe from Chocolate Desserts by Pierre Hermé
(makes 20-24 Éclairs)


• ½ cup (125g) whole milk
• ½ cup (125g) water
• 1 stick (4 ounces; 115g) unsalted butter, cut into 8 pieces
• ¼ teaspoon sugar
• ¼ teaspoon salt
• 1 cup (140g) all-purpose flour
• 5 large eggs, at room temperature

1) In a heavy bottomed medium saucepan, bring the milk, water, butter, sugar and salt to the
boil.

2) Once the mixture is at a rolling boil, add all of the flour at once, reduce the heat to medium
and start to stir the mixture vigorously with a wooden spoon. The dough comes together very
quickly. Do not worry if a slight crust forms at the bottom of the pan, it’s supposed to. You
need to carry on stirring for a further 2-3 minutes to dry the dough. After this time the dough
will be very soft and smooth.

3) Transfer the dough into a bowl of a mixer fitted with the paddle attachment, or using your
handmixer or if you still have the energy, continue by hand. Add the eggs one at a time,
beating after each egg has been added to incorporate it into the dough.
You will notice that after you have added the first egg, the dough will separate, once again do
not worry. As you keep working the dough, it will come back all together again by the time you
have added the third egg. In the end the dough should be thick and shiny and when lifted it
should fall back into the bowl in a ribbon.

4) The dough should be still warm. It is now ready to be used for the éclairs as directed above.

Notes:
1) Once the dough is made you need to shape it immediately.
2) You can pipe the dough and the freeze it. Simply pipe the dough onto parchment-lined baking
sheets and slide the sheets into the freezer. Once the dough is completely frozen, transfer the
piped shapes into freezer bags. They can be kept in the freezer for up to a month.

Chocolate Pastry Cream
Recipe from Chocolate Desserts by PierreHermé
• 2 cups (500g) whole milk
• 4 large egg yolks
• 6 tbsp (75g) sugar
• 3 tablespoons cornstarch, sifted
• 7 oz (200g) bittersweet chocolate, preferably Velrhona Guanaja, melted
• 2½ tbsp (1¼ oz: 40g) unsalted butter, at room temperature
1) In a small saucepan, bring the milk to a boil. In the meantime, combine the yolks, sugar and cornstarch together and whisk in a heavy‐bottomed saucepan.
2) Once the milk has reached a boil, temper the yolks by whisking a couple spoonfuls of the hot milk into the yolk mixture.Continue whisking and slowly pour the rest of the milk into the tempered yolk mixture.
3) Strain the mixture back into the saucepan to remove any egg that may have scrambled. Place the pan over medium heat and whisk vigorously (without stop) until the mixture returns to a boil. Keep whisking vigorously for 1 to 2 more minutes (still over medium heat).Stir in the melted chocolate and then remove the pan from the heat.
4) Scrape the pastry cream into a small bowl and set it in an ice‐water bath to stop the cooking process. Make sure to continue stirring the mixture at this point so that it remains smooth.
5) Once the cream has reached a temperature of 140 F remove from the ice‐water bath and stir in the butter in three or four installments. Return the cream to the ice‐water bath to continue cooling, stirring occasionally, until it has completely cooled. The cream is now ready to use or store in the fridge.

Notes

1) The pastry cream can be made 2‐3 days in advance and stored in the refrigerator.
2) In order to avoid a skin forming on the pastry cream, cover with plastic wrap pressed onto the cream.
3) Tempering the eggs raises the temperature of the eggs slowly so that they do not scramble.
Chocolate Glaze
Recipe from Chocolate Desserts by Pierre Hermé
(makes 1 cup or 300g)
• 1/3 cup (80g) heavy cream
• 3½ oz (100g) bittersweet chocolate, finely chopped
• 4 tsp (20 g) unsalted butter, cut into 4 pieces, at room temperature
• 7 tbsp (110 g) Chocolate Sauce (recipe below), warm or at room temperature
1)In a small saucepan, bring the heavy cream to a boil. Remove from the heat and slowly begin to add the chocolate, stirring with a wooden spoon or spatula.
2) Stirring gently, stir in the butter, piece by piece followed by the chocolate sauce.

Notes:
1) If the chocolate glaze is too cool (i.e. not liquid enough) you may heat it briefly in the microwave or over a double boiler. A double boiler is basically a bowl sitting over (not touching) simmering water.
2) It is best to glaze the eclairs after the glaze is made, but if you are pressed for time, you can make the glaze a couple days ahead of time, store it in the fridge and bring it up to the proper temperature (95 to 104 F) when ready to glaze.

Chocolate Sauce
Recipe from Chocolate Desserts by Pierre Hermé
(makes 1½ cups or 525 g)


• 4½ oz (130 g) bittersweet chocolate, finely chopped
• 1 cup (250 g) water
• ½ cup (125 g) crème fraîche, or heavy cream
• 1/3 cup (70 g) sugar
1) Place all the ingredients into a heavy‐bottomed saucepan and bring to a boil, making sure to stir constantly. Then reduce the heat to low and continue stirring with a wooden spoon until the sauce thickens.
2) It may take 10‐15 minutes for the sauce to thicken, but you will know when it is done when it coats the back of your spoon.
Monday, August 25, 2008

Chocolate Peanut Butter Cookies

Kristen's Food August 2008 030 

Well,  school started back up last week and my house has quieted down significantly.  I didn't really realize how crazy it had gotten during the summer until now when we are back on a regular schedule.  While it's hard to have my kids in school it has also allowed me to get more things done around the house.  I actually haven't baked anything for awhile but I have made a few ice creams that I hope to post soon.  I plan on having more time to bake now that school is in.

When I was a kid, I always had to go to daycare right after school and then when I finally got old enough I was a latch-key kid.  Because of that I always envied the kids whose parents were at home waiting for them with freshly baked cookies or an after school snack.  I think because of that, I am so grateful that I am able to stay home with my kids.  I also overcompensate by having something freshly baked nearly everyday.  I am trying to come up with some healthy recipes so that I don't inadvertently make my kids unhealthy with all of my mothering.  There really isn't anything more comforting after a long day at school then a freshly baked treat.

Today's treat, that miraculously came out of the oven just as the kids were getting off the bus, was not really a healthy one but one that I made with what I had on hand (I really need to go to the grocery store!).   I had some peanut butter and a little bit of chocolate so I flipped through my favorite baking book (Dorie Greenspan's, Baking From my Home to Yours) and looked through the peanut butter section in the index.  I noticed the chocolate peanut butter cookies and thought that they would be a great hit in my house.  I was right, they were pretty darn good.  Although, I think that they'd be better sandwiched with some of the fresh vanilla ice cream I made a few weeks ago, too bad it was gone in one night!

Chocolate Peanut Butter Crisscrosses

Kristen's Food August 2008 033

2 cups flour

1/2 cup cocoa powder

1 tsp. baking soda

1/2 tsp. baking powder

1/4 tsp. salt

1 tsp. cinnamon (optional)

2 sticks (1 cup) butter, softened

1 cup peanut butter

1 cup packed light brown sugar

3/4 cup sugar

1/2 tsp vanilla

2 large eggs

1/3 cup chopped bittersweet chocolate

about 1/2 cup sugar, for rolling

1.  Preheat the oven to 350°.   In a large bowl, combine the flour, cocoa powder, salt, baking powder, baking soda, and cinnamon (if using) and whisk to combine.

2.  In the bowl of a mixer fitted with the paddle attachment, cream the butter for 1-2 minutes or until smooth.  Add the peanut butter and beat for another minute.  Add both of the sugars and beat for about 3 minutes until light and fluffy.  With the mixer running add the eggs, one at a time mixing until each is combined, then add the vanilla.

3.  With the mixer on low, slowly add the flour mixture a little at a time.   Mix until just combined.  Add the chopped chocolate and mix to combine.

4.  In a shallow bowl add the 1/2 cup flour.  Scoop the cookie dough (which will be soft) into heaping tablespoons and roll into a ball.  Drop the rolled balls into the sugar and roll to coat all sides.  Place on cookie sheets leaving about 2 inches of space between each cookie.  Dip the tines of a fork into the sugar and make the crisscross pattern into each cookie.  Bake the cookies for about 11-12 minutes.  the cookies will be soft but will firm up as they sit out.  Remove the cookies to a cooling rack.

Thursday, August 14, 2008

Caramelized Onion, Mushroom and Gorgonzola Pizza

Kristen's Food July 2008 086

I know That usually all of my posts are desserts but I just couldn't resist posting this delicious pizza I made the other night.  My husband was gone and so the kids and I had dinner by ourselves.  We had been out running errands so it was almost bed time when we got around to eating dinner.  I realized  that I needed to make them a quick dinner and get them to bed.  I got them all fed and into bed and decided that I should make myself a nice dinner.  This is what I came up with.  I must admit that I really love to eat by myself and actually prefer it to eating with everyone else.  There will be many night where I make the family dinner and then I make myself something when the kids are in bed.  I like to be able to enjoy making my own food and then be able to eat it in peace.  This night was no exception.  I took the time to make myself a nice meal and then sat down and enjoyed it in silence.

This pizza is really simple to make it just takes a little time.  Caramelizing the onions takes about 30-40 minutes but is well worth the wait.  I usually will make some extra and keep them in the fridge.  I love how the onions become sweet and soft, almost like a jam.  The  onions are the sauce to the pizza so don't skimp on the olive oil.  You need to olive oil to properly caramelize the onions plus it keeps the crust moist as it bakes.  If you think that you don't like blue cheese, you've have got to try it on this pizza.  The tanginess of the gorgonzola balances out the sweetness of the onions and they just taste so perfect together.

Caramelized Onion, Mushroom and Gorgonzola Pizza

Kristen's Food July 2008 094

1 large sweet onion, thinly sliced

2 Tbs. Olive oil, divided

1/2 tsp kosher salt

about 5 Crimini mushrooms ( button would work too), sliced

1/2 pound pizza dough

1/4 cup gorgonzola cheese

1/4 cup fresh parmesan cheese

fresh parsley, chopped, (for garnish)

1.  Heat a large skillet over medium heat.  Add 1 1/2 Tbs. of olive oil and heat for a minute.  Add the sliced onions and salt and stir to coat with the oil.  Reduce heat to medium-low and cook stirring occasionally until the onions turn a caramel brown color, about 30-40 minutes.

2.  Heat the remaining oil in the pan and quickly saute the mushrooms until cooked and brown.  Salt to taste

3.  Place a pizza stone on the middle rack of the oven and heat to 450°.  Roll out pizza dough to desired shape and place on a pizza peel that has been dusted with cornmeal.  Spread the pizza dough with the caramelized onions.  Cover with the mushrooms and then sprinkle with the gorgonzola and parmesan cheeses.

4.  Slide the pizza off the peel and onto the baking stone and bake for about 7-10 minutes or until the crust is baked through and the cheese has melted.  Sprinkle with parsley, if using.

Thursday, August 7, 2008

Peach and Custard Tart with Almonds

Kristen's Food August 2008 012 #2jpg

As a kid,  my favorite dessert hands down was and probably still is my mom's peach pie.   Every Thanksgiving, instead of the traditional pumpkin pie, we would have peach.  On my birthday instead of the traditional birthday cake I would always request peach pie.  I have a very soft spot in my heart for that delicious dessert and it is darn near impossible for something to take it's place.

I have been eyeing this tart for awhile and was weary of anything peach since it would be up against my Mom's killer peach pie.  I finally hunkered down and made this one with some of those delicious fresh peaches that are in season right now.  I will admit that it still wasn't as delicious as my Mom's wonderful pie but it was a close second.  This tart has a nutty shortbread like crust topped with sweet peaches and then covered in a sweet custard of cream, sugar and eggs.  The whole thing is then sprinkled with an almond and brown sugar streusel.  It was so rich that I really could settle for just a little slice.  If you're intimidated by pies, try the easier tart and enjoy the delicious results.

Peach and Custard Tart

Form Dorie Greenspan's,  Baking From My Home to Yours

Pate sable(Sweet tart dough) with nuts

1 1/4 cups flour

1/4 cup ground almonds

1/2 cup powdered sugar

1/4 tsp salt

1 stick plus 1 Tbs. (9Tbs.) very cold butter, cut into small pieces

1 large egg yolk, lightly beaten

1.  Put the flour, nuts, sugar and salt in to a food processor and pulse to combine.  Scatter the butter throughout and pulse until mixture resembles small peas.  Add a little of the egg and then pule and continue the process until all the yolk is incorporated.  Then process in a few long pulses, about 10 seconds each, until the dough forms clumps and starts to come together. Pour the mixture out onto the counter and knead lightly to incorporate all of the dry ingredients.

2. Preheat the oven to 375°.   Butter a 9 inch tart pan.  Press the dough evenly on the bottom and up the sides of the pan.  Freeze the crust for at least 30 minutes.

3.  Place the frozen tart pan onto a cookie sheet and cover with butter aluminum foil, pressing it directly onto the surface of the dough.  Bake for 25 minutes.  Remove the foil and press down any dough that has puffed up.

Streusel

2 Tbs. Flour

2 Tbs packed light brown sugar

2 Tbs. Chopped almonds

2 Tbs. cold unsalted butter , cut into pieces

Working with your fingers, blend all the ingredients together in a small bowl until evenly combined.  Cover and refrigerated.

Filling

3 large ripe peaches peeled, halved and pitted and thinly sliced

1/2 cup heavy cream

1 large egg

1/4 cup sugar

1/8 tsp. almond extract

1.  Preheat oven to 425°.  Arrange sliced peaches decoratively in the tart pan over the partially baked crust.  Mix the cream, egg, sugar and extract together and pour over the peaches.

2.  Bake the tart for 10 minutes then lower to oven temperature to 375° and bake for an additional 20 minutes.  Pull the tart form the oven and sprinkle with the streusel mixture breaking up any big pieces.  bake the tart for an additional 20-25 minutes or until the filling is set and the streusel is golden.

Check This Out

I know that this isn't food related but I just had to share. My oldest daughter is a huge video gamer just like her dad. She has amazing hand-eye-coordination and can kick my butt at any video game. She loves to play Guitar Hero and is really pretty amazing at it for her age, she's already better than me. My husband made a video of her playing it and put it on YouTube, it is so cute. It is amazing when it gets to the solo and gets pretty tough to see her little fingers hitting all the keys. I really need get her a real musical instrument!


P.S. I'll be back tomorrow with a great peach tart recipe.