Monday, April 27, 2009

The Daring Bakers and Cheesecake: Take Two

Kristen's Food April 2009 009 #2


It's the end of the month and time for another Daring Bakers Challenge. 

The April 2009 challenge is hosted by Jenny from Jenny Bakes. She has chosen Abbey's Infamous Cheesecake as the challenge.

Can I just preface this post with the fact that I love cheesecake.  It is the one dessert that I will hoard and eat the entire pan of by myself.  I'm not sure that I should admit this but, I made these cheesecakes on Friday and I didn't let my kids have one until last night.  Sad, huh?

Kristen's Food April 2009 012 #2

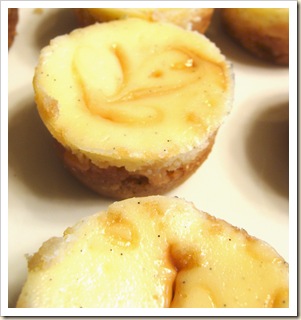
We were given a basic cheesecake recipe and were given free reign with our creativity.   When I announced this months challenge to my husband, he said, "can't you just make a plain cheesecake?".  He is a very plain kinda guy, he won't eat anything mixed and doesn't like his foods to even touch on his plate.  So, to appease him, I made a batch of plain vanilla bean cheesecake and then made them in my mini muffin tin so that I could change up a few of the flavors.  I made some caramel to swirl through a few, added some chocolate chunks and caramel to others, and made a berry coulis to swirl in the rest.  Of course I left several plain for the hubby.  I also used a ginger and cinnamon cookie for the crust which gave the cookies a little something extra.  Not very creative I know but it is cheesecake none-the-less and so I am happy.  I really did want to be more creative but I decided that this month I would only use ingredients that I already had a home, no trips to the store just for the challenge.  All in all, this was a fun challenge, it's always nice to enjoy what you bake, and this month I did.

 Kristen's Food April 2009 017 #2

Don't forget to check out all of the amazing Daring Bakers with their unlimited creativity, you will see some absolutely amazing cheesecakes.  Also, the Daring Bakers have a new home, so check out the new site while you're at it.


Abbey's Infamous Cheesecake:

Kristen's Food April 2009 011

crust:
2 cups / 180 g graham cracker crumbs
1 stick / 4 oz butter, melted
2 tbsp. / 24 g sugar
1 tsp. vanilla extract

cheesecake:
3 sticks of cream cheese, 8 oz each (total of 24 oz) room temperature
1 cup / 210 g sugar
3 large eggs
1 cup / 8 oz heavy cream
1 tbsp. lemon juice
1 tbsp. vanilla extract (or the innards of a vanilla bean)
1 tbsp liqueur, optional, but choose what will work well with your cheesecake

DIRECTIONS:
1. Preheat oven to 350 degrees F (Gas Mark 4 = 180C = Moderate heat). Begin to boil a large pot of water for the water bath.

2. Mix together the crust ingredients and press into your preferred pan. You can press the crust just into the bottom, or up the sides of the pan too - baker's choice. Set crust aside.

3. Combine cream cheese and sugar in the bowl of a stand-mixer (or in a large bowl if using a hand-mixer) and cream together until smooth. Add eggs, one at a time, fully incorporating each before adding the next. Make sure to scrape down the bowl in between each egg. Add heavy cream, vanilla, lemon juice, and alcohol and blend until smooth and creamy.

4. Pour batter into prepared crust and tap the pan on the counter a few times to bring all air bubbles to the surface. Place pan into a larger pan and pour boiling water into the larger pan until halfway up the side of the cheesecake pan. If cheesecake pan is not airtight, cover bottom securely with foil before adding water.

5. Bake 45 to 55 minutes, until it is almost done - this can be hard to judge, but you're looking for the cake to hold together, but still have a lot of jiggle to it in the center. You don't want it to be completely firm at this stage. Close the oven door, turn the heat off, and let rest in the cooling oven for one hour. This lets the cake finish cooking and cool down gently enough so that it won't crack on the top. After one hour, remove cheesecake from oven and lift carefully out of water bath. Let it finish cooling on the counter, and then cover and put in the fridge to chill. Once fully chilled, it is ready to serve.

Pan note: The creator of this recipe used to use a springform pan, but no matter how well she wrapped the thing in tin foil, water would always seep in and make the crust soggy. Now she uses one of those 1-use foil "casserole" shaped pans from the grocery store. They're 8 or 9 inches wide and really deep, and best of all, water-tight. When it comes time to serve, just cut the foil away.

Prep notes: While the actual making of this cheesecake is a minimal time commitment, it does need to bake for almost an hour, cool in the oven for an hour, and chill overnight before it is served. Please plan accordingly!

Saturday, March 28, 2009

The Daring Bakers go Italian

Kristen's Food March 2009 050

It's the end of another month and time once again for another Daring Bakers challenge.  This months challenge was definitely out of the ordinary.  Never before have the Daring Bakers wandered into the dinner scene, until now.  March's challenge was to make super thin sheets of pasta for a homemade lasagne.  Not the usual cake, tart or pie but a challenge none the less.

The March 2009 challenge is hosted by Mary of Beans and Caviar, Melinda of Melbourne Larder and Enza of Io Da Grande. They have chosen Lasagne of Emilia-Romagna from The Splendid Table by Lynne Rossetto Kasper as the challenge.

I have to admit, I had never made homemade pasta until this month, but that's what being a Daring Baker is all about, challenging yourself to try new things and improve your baking skills.  After the challenge was issued,I jumped right in and tried a few things.   I made delicious fettuccini noodles and strawberry ravioli to try my hand at pasta making and was surprised to find out that it really wasn't that hard at all.

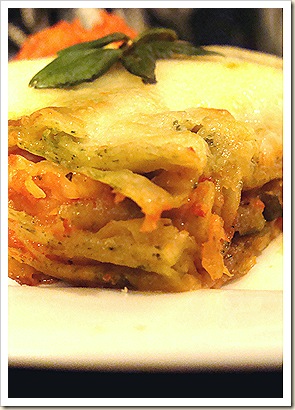
Of course the month got away with me and I found myself rushing to complete this challenge at the last minute.  I knew I would have to make a few modifications to the recipe.  Firstly, two versions were needed.  One for my vegetarian self and one for the rest of the family.  I decided for the vegetarian version that I would make a roasted vegetable ragu in place of the meaty one.  I used my own sauce recipe for both of the lasagnas because frankly, I love it.  I also substituted some whole milk mozzarella for the parmigiano  as I only had a little chunk left and really didn't want to run out to the store.  Aside from the sauce, I only made one change in the meaty version.  My husband prefers only beef in his lasagna so I left out the veal and other meats.  The meat version must have been as good as mine or better because the family ate it all up before I could even snap a picture.

This lasagne was one of the best lasagnas that I have ever eaten.  The layers were paper thin with just a little sauce and cheese in between.  I think that each of the lasagnas had eight delectable layers.  The only difficulty I had in making this lasagna was keeping the noodles from tearing after boiling them.  they were so thin that I could probably read a book through the layers.  I have to admit, I didn't roll the pasta by hand but instead used a pasta roller which made life a whole lot easier.

I look forward to making this again and trying different variations, although this original is absolutely delicious.  Don't be put off by the length of the recipe.  As long as you make the sauce and pasta ahead, the assembly and cooking is a cinch.

Lasagne of Emilia-Romagna (Lasagne Verdi al Forno)
(Serves 8 to 10 as a first course, 6 to 8 as a main dish)

Preparation Time: 15 minutes to assemble and 40 minutes cooking time

10 quarts (9 litres) salted water
1 recipe Spinach Pasta cut for lasagna (recipe follows)#1
1 recipe Bechamel Sauce (recipe follows)#2
1 recipe Country Style Ragu (recipe follows)#3
1 cup (4 ounces/125g) freshly grated Parmigiano-Reggiano

Method
Working Ahead:
The ragu and the béchamel sauce can be made up to three days ahead. The ragu can also be frozen for up to one month. The pasta can be rolled out, cut and dried up to 24 hours before cooking. The assembled lasagne can wait at room temperature (20 degrees Celsius/68 degrees Fahrenheit) about 1 hour before baking. Do not refrigerate it before baking, as the topping of béchamel and cheese will overcook by the time the center is hot.

Assembling the Ingredients:
Have all the sauces, rewarmed gently over a medium heat, and the pasta at hand. Have a large perforated skimmer and a large bowl of cold water next to the stove. Spread a double thickness of paper towels over a large counter space. Preheat the oven to 350 degrees Fahrenheit (180 degrees Celsius). Oil or butter a 3 quart (approx 3 litre) shallow baking dish.

Cooking the Pasta:
Bring the salted water to a boil. Drop about four pieces of pasta in the water at a time. Cook about 2 minutes. If you are using dried pasta, cook about 4 minutes, taste, and cook longer if necessary. The pasta will continue cooking during baking, so make sure it is only barely tender. Lift the lasagne from the water with a skimmer, drain, and then slip into the bowl of cold water to stop cooking. When cool, lift out and dry on the paper towels. Repeat until all the pasta is cooked.

Assembling the Lasagne:
Spread a thin layer of béchamel over the bottom of the baking dish. Arrange a layer of about four overlapping sheets of pasta over the béchamel. Spread a thin layer of béchamel (about 3 or 4 spoonfuls) over the pasta, and then an equally thin layer of the ragu. Sprinkle with about 1&1/2 tablespoons of the béchamel and about 1/3 cup of the cheese. Repeat the layers until all ingredients are used, finishing with béchamel sauce and topping with a generous dusting of cheese.

Baking and Serving the Lasagne:
Cover the baking dish lightly with foil, taking care not to let it touch the top of the lasagne. Bake 40 minutes, or until almost heated through. Remove the foil and bake another 10 minutes, or until hot in the center (test by inserting a knife – if it comes out very warm, the dish is ready). Take care not to brown the cheese topping. It should be melted, creamy looking and barely tinged with a little gold. Turn off the oven, leave the door ajar and let the lasagne rest for about 10 minutes. Then serve. This is not a solid lasagne, but a moist one that slips a bit when it is cut and served.

#1 Spinach Egg Pasta (Pasta Verde)

Preparation: 45 minutes

Makes enough for 6 to 8 first course servings or 4 to 6 main course servings, equivalent to 1 pound (450g) dried boxed pasta.

2 jumbo eggs (2 ounces/60g or more)
10 ounces (300g) fresh spinach, rinsed dry, and finely chopped; or 6 ounces (170g) frozen chopped spinach, defrosted and squeezed dry
3&1/2 cups (14 ounces/400g) all purpose unbleached (plain) flour (organic stone ground preferred)

Working by Hand:

Equipment

A roomy work surface, 24 to 30 inches deep by 30 to 36 inches (60cm to 77cm deep by 60cm to 92cm). Any smooth surface will do, but marble cools dough slightly, making it less flexible than desired.

A pastry scraper and a small wooden spoon for blending the dough.

A wooden dowel-style rolling pin. In Italy, pasta makers use one about 35 inches long and 2 inches thick (89cm long and 5cm thick). The shorter American-style pin with handles at either end can be used, but the longer it is, the easier it is to roll the pasta.
Note: although it is not traditional, Enza has successfully made pasta with a marble rolling pin, and this can be substituted for the wooden pin, if you have one.

Plastic wrap to wrap the resting dough and to cover rolled-out pasta waiting to be filled. It protects the pasta from drying out too quickly.

A sharp chef’s knife for cutting pasta sheets.

Cloth-covered chair backs, broom handles, or specially designed pasta racks found in cookware shops for draping the pasta.

Mixing the dough:
Mound the flour in the center of your work surface and make a well in the middle. Add the eggs and spinach. Use a wooden spoon to beat together the eggs and spinach. Then gradually start incorporating shallow scrapings of flour from the sides of the well into the liquid. As you work more and more flour into the liquid, the well’s sides may collapse. Use a pastry scraper to keep the liquids from running off and to incorporate the last bits of flour into the dough. Don’t worry if it looks like a hopelessly rough and messy lump.

Kneading:
With the aid of the scraper to scoop up unruly pieces, start kneading the dough. Once it becomes a cohesive mass, use the scraper to remove any bits of hard flour on the work surface – these will make the dough lumpy. Knead the dough for about 3 minutes. Its consistency should be elastic and a little sticky. If it is too sticky to move easily, knead in a few more tablespoons of flour. Continue kneading about 10 minutes, or until the dough has become satiny, smooth, and very elastic. It will feel alive under your hands. Do not shortcut this step. Wrap the dough in plastic wrap, and let it relax at room temperature 30 minutes to 3 hours.

Stretching and Thinning:
If using an extra-long rolling pin work with half the dough at a time. With a regular-length rolling pin, roll out a quarter of the dough at a time and keep the rest of the dough wrapped. Lightly sprinkle a large work surface with flour. The idea is to stretch the dough rather than press down and push it. Shape it into a ball and begin rolling out to form a circle, frequently turning the disc of dough a quarter turn. As it thins outs, start rolling the disc back on the pin a quarter of the way toward the center and stretching it gently sideways by running the palms of your hands over the rolled-up dough from the center of the pin outward. Unroll, turn the disc a quarter turn, and repeat. Do twice more.

Stretch and even out the center of the disc by rolling the dough a quarter of the way back on the pin. Then gently push the rolling pin away from you with one hand while holding the sheet in place on the work surface with the other hand. Repeat three more times, turning the dough a quarter turn each time.

Repeat the two processes as the disc becomes larger and thinner. The goal is a sheet of even thickness. For lasagne, the sheet should be so thin that you can clearly see your hand through it and see colours. Cut into rectangles about 4 by 8 inches (10 x 20 cm). Note: Enza says that transparency is a crucial element of lasagne pasta and the dough should be rolled as thinly as possible. She says this is why her housekeeper has such strong arms!

Dry the pasta at room temperature and store in a sealed container or bag.

#2 Bechamel

Preparation Time: 15 minutes

4 tablespoons (2 ounces/60g) unsalted butter
4 tablespoons (2 ounces/60g) all purpose unbleached (plain) flour, organic stone ground preferred
2&2/3 cups (approx 570ml) milk
Salt and freshly ground pepper to taste
Freshly grated nutmeg to taste

Using a medium-sized saucepan, melt the butter over low to medium heat. Sift over the flour, whisk until smooth, and then stir (without stopping) for about 3 minutes. Whisk in the milk a little at a time and keep the mixture smooth. Bring to a slow simmer, and stir 3 to 4 minutes, or until the sauce thickens. Cook, stirring, for about 5 minutes, until the sauce thickens. Season with salt, pepper, and a hint of nutmeg.

#3 Country Style Ragu’ (Ragu alla Contadina)

Preparation Time: Ingredient Preparation Time 30 minutes and Cooking time 2 hours

Makes enough sauce for 1 recipe fresh pasta or 1 pound/450g dried pasta)

3 tablespoons extra virgin olive oil (45 mL)
2 ounces/60g pancetta, finely chopped
1 medium onion, minced
1 medium stalk celery with leaves, minced
1 small carrot, minced
4 ounces/125g boneless veal shoulder or round
4 ounces/125g pork loin, trimmed of fat, or 4 ounces/125g mild Italian sausage (made without fennel)
8 ounces/250g beef skirt steak, hanging tender, or boneless chuck blade or chuck center cut (in order of preference)
1 ounce/30g thinly sliced Prosciutto di Parma
2/3 cup (5 ounces/160ml) dry red wine
1 &1/2 cups (12 ounces/375ml) chicken or beef stock (homemade if possible)
2 cups (16 ounces/500ml) milk
3 canned plum tomatoes, drained
Salt and freshly ground black pepper to taste

Working Ahead:
The ragu can be made 3 days ahead. Cover and refrigerate. It also freezes well for up to 1 month. Skim the fat from the ragu’ before using it.

Browning the Ragu Base:
Heat the olive oil in a 12 inch (30cm) skillet (frying pan) over medium-high heat. Have a large saucepan handy to use once browning is complete. Add the pancetta and minced vegetables and sauté, stirring frequently with a wooden spoon, 10 minutes, or until the onions barely begin to color. Coarsely grind all the meats together, including the prosciutto, in a food processor or meat grinder. Stir into the pan and slowly brown over medium heat. First the meats will give off a liquid and turn dull grey but, as the liquid evaporates, browning will begin. Stir often, scooping under the meats with the wooden spatula. Protect the brown glaze forming on the bottom of the pan by turning the heat down. Cook 15 minutes, or until the meats are a deep brown. Turn the contents of the skillet into a strainer and shake out the fat. Turn them into the saucepan and set over medium heat.

Reducing and Simmering: Add the wine to the skillet, lowering the heat so the sauce bubbles quietly. Stir occasionally until the wine has reduced by half, about 3 minutes. Scrape up the brown glaze as the wine bubbles. Then pour the reduced wine into the saucepan and set the skillet aside.

Stir ½ cup stock into the saucepan and let it bubble slowly, 10 minutes, or until totally evaporated. Repeat with another ½ cup stock. Stir in the last 1/2 cup stock along with the milk. Adjust heat so the liquid bubbles very slowly. Partially cover the pot, and cook 1 hour. Stir frequently to check for sticking.

Add the tomatoes, crushing them as they go into the pot. Cook uncovered, at a very slow bubble for another 45 minutes, or until the sauce resembles a thick, meaty stew. Season with salt and pepper
Saturday, March 14, 2009

Baked Pear and Cinnamon Doughnuts

Kristen's Food March 2009 020

I first saw a rendition of this recipe in Martha Stewart Baby several years ago, I mean it was like 6 or so years ago.  I remember wanting to try it out but never really getting around to it.  It was a delicious looking recipe with apples and cinnamon and supposed to be a healthier alternative to the fried versions  .  Back then, I really wasn't much of a baker and hadn't really got the knack for all things yeast so I was a little intimidated.  I wish I had known back then how easy and unintimidating yeast really was because I would have had that much more time to enjoy this delicious treat.

The original recipe called for an apple, but today I had pears lying around so that is what I used and I went with butter in place of the oil.  I mean, if I am going for fat, I would much rather have butter than oil any day.  I also used cake flour hoping that the lower amount of gluten would result in a softer, lighter dough.  You could use all-purpose flour you'll probably just need a little less.  Another measure I took to ensure a soft delicate doughnut was to use buttermilk in place of the milk.  I love buttermilk.  My fridge would feel bare without the stuff and inevitably when I run out I am scrambling back to the store to get some more.

To top the doughnuts off, I used some leftover caramel that I thinned with some heavy cream and then walnuts.  I could not live without walnuts either although the rest of my family would disagree with that one.  I left some nut free for them but also dipped half the batch in some melted butter and then into powdered sugar, another favorite.

These doughnuts were delicious and were best eaten hot.  I am hoping that they will still be good for breakfast tomorrow, that is if there are any left.

Baked Pear and Cinnamon Doughnuts

Kristen's Food March 2009 015

1 cup warm buttermilk

1 TBS SAF instant yeast

1/4 cup sugar

3 TBS butter, melted

1 large pear, peeled and grated

1 egg

1 TBS. Cinnamon

2 tsp. vanilla

1/4 cup wheat germ

1 tsp. salt

4 1/2 cups cake flour, sifted


melted butter for dipping

powdered sugar

caramel

walnuts, chopped

1.  In the bowl of a mixer, combine the buttermilk, yeast and sugar.  Let sit for about 10 or until foamy.  Add the butter, pear, egg, cinnamon, vanilla and wheat germ and mix to combine.

2.  Add a cup or two of the flour and the salt and mix to combine.  Continue adding the flour in batches with the mixer running until the dough starts to clean the sides of the bowl but is still a little sticky.  With greased hands, remove dough from mixing bowl and into a clean greased bowl.  Cover and let rise for about 45 minutes or until doubled and puffy.

3.  Dump the dough onto a well floured surface.  Knead a few times to make a little less sticky and to make a smooth dough.  Roll out the dough to about 1/2 inch thick.  Cut out into doughnuts and place onto a greased baking sheet.

4.  Cover the doughnuts and preheat the oven to 350 degrees.  Let the doughnuts raise for about 45 minutes or until puffy and well risen.  Bake the doughnuts for 7-9 minutes or until just cooked.  You do not want to overbake these.

5.  Remove the doughnuts from the oven and either brush or dip into the butter and then into the powdered sugar.  Alternatively, dip into the caramel and then into the chopped walnuts (you do not need to dip the caramel ones in butter).  Eat while warm!

Thursday, March 5, 2009

Almond Joy Bonbons


Kristen's Food March 2009 007

I can remember as a kid a commercial for a bite-sized scoop of ice cream covered in chocolate called a bonbon.  I remember begging my mom to buy them for me.  But of course, they were too unhealthy and way too expensive.  If only I would have known how easy they were to make.

These little gems are made with some of the leftover coconut ice cream.  I thought of the almond joy candy bars when making these.  The creamy coconut ice cream is rolled in chopped toasted almonds and then drizzled in chocolate.  I really would have liked to dip them in the chocolate first but after that flourless chocolate cake I was left with very little chocolate.  Either way these are delicious bite size morsels.

The recipe is really very simple.

1.   Make small scoops of the ice cream and freeze until solid.      2.  Roll in chopped toasted almonds and freeze again until firm.  3.  Drizzle with the melted chocolate and freeze again until firm.

Super simple and delicious.

Saturday, February 28, 2009

The Daring Bakers make Chocolate Valentino Cake

Kristen's Food February 2009 058 #2

It's the end of another month and time once again for another Daring Baker's challenge.  Being the month of love it was fitting that chocolate be the star of this months challenge.

The February 2009 challenge is hosted by Wendy of WMPE's blog and Dharm of Dad ~ Baker & Chef.  We have chosen a Chocolate Valentino cake by Chef Wan; a Vanilla Ice Cream recipe from Dharm and a Vanilla Ice Cream recipe from Wendy as the challenge.

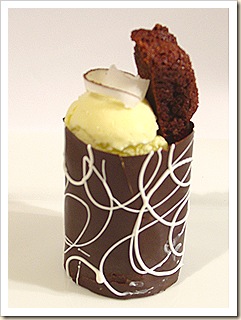
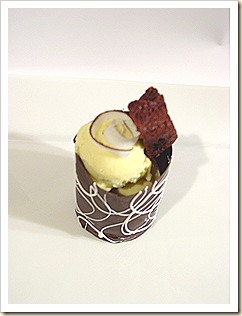
We have had so many sweets around here that I chose to halve the recipe for the valentino cake and bake them in my muffin tin.  For the ice cream I decided to go my own way and make up my own recipe.  I ended up with a deliciously creamy coconut ice cream, which is definitely for coconut lovers only.  Since the valentino recipe wasn't all that challenging I also decided to make these little chocolate cups which was a first for me.  I was so excited with how they came out.  They looked so fancy that I really didn't want to eat them.

  I put one of the small valentino cakes in the bottom of the chocolate cup and then topped it with the creamy coconut ice cream and then added another sliver of the cake as an accent and to let you know what was inside.   All in all a fun and delicious challenge.

My sentiment on the cake is that it was very similar to my rich chocolate brownies with a little silkier texture,  like a mix between an deeply chocolaty brownie and a silky smooth mouse.  A little of this cake definitely goes a long way.

Chocolate Valentino
Preparation Time:  20 minutes

Kristen's Food February 2009 060

16 ounces (1 pound) (454 grams) of semisweet chocolate, roughly chopped
½ cup (1 stick) plus 2 tablespoons (146 grams total) of unsalted butter
5 large eggs separated


1. Put chocolate and butter in a heatproof bowl and set over a pan of simmering water (the bottom of the bowl should not touch the water) and melt, stirring often.

2. While your chocolate butter mixture is cooling. Butter your pan and line with a parchment circle then butter the parchment.

3. Separate the egg yolks from the egg whites and put into two medium/large bowls.

4. Whip the egg whites in a medium/large grease free bowl until stiff peaks are formed (do not over-whip or the cake will be dry).

5. With the same beater beat the egg yolks together.

6. Add the egg yolks to the cooled chocolate.

7. Fold in 1/3 of the egg whites into the chocolate mixture and follow with remaining 2/3rds. Fold until no white remains without deflating the batter. {link of folding demonstration}

8. Pour batter into prepared pan, the batter should fill the pan 3/4 of the way full, and bake at 375F/190C

9. Bake for 25 minutes until an instant read thermometer reads 140F/60C.

Note – If you do not have an instant read thermometer, the top of the cake will look similar to a brownie and a cake tester will appear wet.

10. Cool cake on a rack for 10 minutes then unmold.

Coconut Ice Cream

1 can coconut milk

1/3 cup heavy cream

1 cup milk

5 egg yolks

3/4 cup sugar

1 tsp. coconut extract

1.  Heat the coconut milk, cream and milk until it just begins to from bubbles around the edges.

2.  Meanwhile, in the bowl of a mixer with the whisk attachment, beat the egg yolks and sugar together until light and pale and the mixture falls back on itself and forms ribbons.

3.  With the mixer on low,  slowly drizzle in a ladle full of the warm milk mixture.  Continue adding the milk mixture in ladle-fulls until you've add about 1/2 of the milk mixture.  Then pour the egg yolk  mixture back into the pan with the rest of the milk mixture.

4.  Put the mixture back over medium-low to medium heat and heat stirring constantly until the mixture begins to thicken and coats the back of a spoon.  Do not let it boil.

5.  Pour the thickened mixture through a sieve into a medium bowl.  Stir in the extract and let the mixture sit out to cool.  Once cooled, cover and refrigerate until well chilled preferably overnight.

6.  Freeze in ice cream maker according to the manufacturers instructions.

Saturday, February 14, 2009

A Little Hot Apple Love

Kristen's Food February 2009 036 

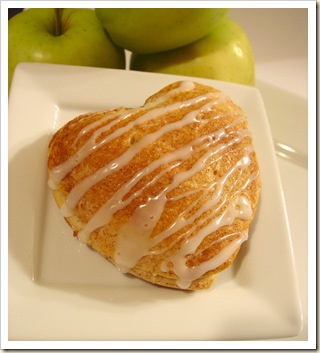
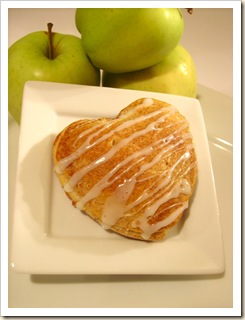
The other day my 5 year old came to me and asked me what we you do on Valentines day.  She wanted to know if we could go out an buy presents for each other like Christmas.  I explained that daddy and I would probably go out but besides that we wouldn't be doing much.  She then requested that we make heart shaped chocolate chip pancakes for breakfast and then tacos for dinner.  She then asked what we would have for dessert.  I knew she would love anything that we could make together and so these little heart shaped apple pastries came to be. 

These are so easy and the kiddos can help out.  All you need is an apple some cinnamon and sugar and some biscuit dough.

Heart Shaped Apple Pastries

Kristen's Food February 2009 033

1 medium golden delicious or granny smith apple, peeled and diced

2 1/2 Tbs. sugar

1 tsp cinnamon

1 can Grands biscuit dough (I used the flaky layers ones)

1 Tbs cream or milk

1 Tbs sugar

1/2 tsp. cinnamon

1.  Preheat the oven to 350° and grease a cookie sheet.  Mix together the apples, sugar and cinnamon.

2.  Separate the biscuits, roll out and cut with a heart shaped cutter.  Place a heaping spoonful of the apples on top the half of the hearts and cover with another heart shaped biscuit.  Crimp the edges with a fork.

3.  Mix together the remaining sugar and cinnamon.  Brush the top of the hearts with the cream or milk and sprinkle with the cinnamon and sugar mixture.  Poke a few slits in the top with a knife.

4.  bake for about 20 minutes or until the biscuits are browned and cooked all the way through.  Drizzle with the glaze**.

**To make the powdered sugar glaze, mix together 3/4 cup powdered sugar with 1-2 Tbs cream or milk.  Drizzle over hearts with a fork.**

Tuesday, February 10, 2009

Brownie Truffle Bites

Kristen's Food February 2009 029

This is a super easy recipe that would be great for your sweetie this Valentines day.  All you need is a pan of brownies, some white chocolate or almond bark and some red or pink candy melts.

I made a pan of my peanut butter brownies for this one but any brownie would work, even a mix.  Using a small scoop, make balls out of the brownies.  Chill or freeze until firm.  Melt some almond bark or white chocolate (almond bark will cover the chocolate better).  Dip the brownie balls into the chocolate and lay on a parchment lined tray to set.  Drizzle with some melted red or pink candy melts and viola.  East peasy lemon squeezy.

You could also roll the ball into powdered sugar, cocoa powder or coconut for an even easier little treat.  These are so easy that you've gotta try them.

Monday, February 2, 2009

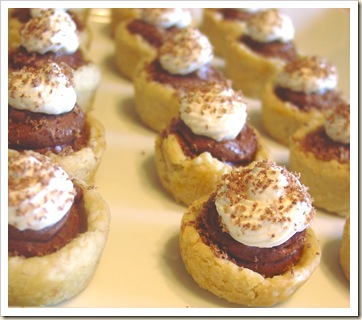
Mini Chocolate Cream Pies


Kristen's Food January 2009 459

Today my kids and I wanted to make a desert for family night but were running low on supplies.  No chocolate chips for cookies, very little brown sugar or nuts.  What we did find on the other hand was some leftover pie dough in the freezer, a package of chocolate pudding (yes a mix), and some whipping cream.

We could have made  regular chocolate cream pie, but I love small treats.  I think that's because I don't feel so guilty eating them.  These were great because they were so easy that the kids could help out but they look so cute too.  After finishing these, my kids were covered with chocolate pudding and whipped cream, it was even in their hair.  It was pretty cute!

Mini Chocolate Cream Pie

Kristen's Food January 2009 457

3 cups flour

1/2 tsp. salt

3  Tbs. Sugar

1/2 cup cold butter, cut in to pieces

1/2 cup shortening

about 1/2 cup ice water

1 large pkg. (2.1 oz) Chocolate pudding

1 1/2 cups cold milk

1 cup cold whipping cream

Grated Chocolate for garnish (optional)

1.  In a large bowl, mix together the flour salt and sugar.  Cut in the butter an d shortening until the fat has irregular pieces about the size of peas.

2.  Slowly add a tablespoon of water at a time carefully mixing the water into the dough.  Add enough water so that the dough forms  a ball when pressed together.  Do not overmix.  Form the dough into two discs and wrap in plastic wrap and chill for at least one hour to let the gluten relax.

3.  Preheat the oven to 350°.  Grease a mini muffin tin.  Place a tablespoon of dough into each cup.  Using a mini tart shaper press the dough to form a mini pie shell.  Bake for about 15 minutes or until baked through.  Remove baked shells from pan and cool.

4.  Meanwhile, in a large mixing bowl, whip the cream until it forms stiff peaks.  Put the whipped cream into another bowl.  Empty the pudding mix and milk into the mixing bowl, whip together until thickened and well mixed.  Fold in 2/3 of the whipped cream in small batches into the pudding.  Be sure to fold and not mix as you don't want to deflate the whipped cream.

4.  Place the pudding mixture into a ziploc bag and snip the corner.  Pipe the pudding into the premade cooled shells.  Place the remaining whipped cream into another ziploc bag and pie the cream on top of the pies.  Garnish with some grated chocolate if desired.  Store the pies in the fridge to set.

Saturday, January 31, 2009

Tuiles with the Daring Bakers

Kristen's Food January 2009 454

I was really bummed that I wasn't able to complete last months challenge.  December was just a crazy month in more ways than one and the Daring Bakers Challenge was pushed to the back burner.  I am back this month, albeit a day late. 

This month's challenge is brought to us by Karen of Bake My Day and Zorra of 1x umruehren bitte aka Kochtopf. They have chosen Tuiles from The Chocolate Book by Angélique Schmeink and Nougatine and Chocolate Tuiles from Michel Roux.

I had never made tuiles, a thin crispy, traditionally almond, cookie that is shaped after baking, and so was very excited to jump right in and try this months challenge.  I loved that the list of ingredients wasn't a mile long or weighed down with ingredients that were pricey or over the top.  Just simple ingredients that I already had in my kitchen.

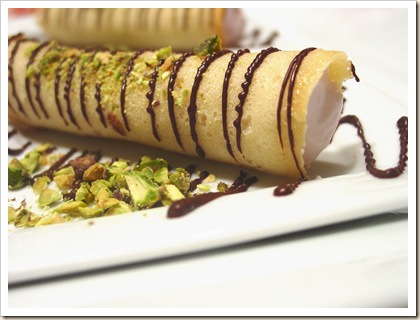
The tuiles were also fairly quick and easy, the hardest part being spreading them onto the pan in an even shape.  We were asked to pair our tuiles with something light and fruity.  I had several ideas but my procrastination shortened that list considerably.  I decided to go for a easy but fancy looking (think Valentines Day) dessert that was part cannoli and part blintz. 

I made a ricotta, cream cheese and raspberry filling for the tuiles which I shaped into tubes around my whisk.  I then drizzled them with dark chocolate and sprinkled them with a few pistachios for crunch and color.  These tuiles were putting on heirs as they donned this fancy look but were so simple to make.  It was fun to put these together and there are so many more possibilities in my head that I am going to have to make these again.

TuilesKristen's Food January 2009 450

Following is a recipe taken from a book called “The Chocolate Book”, written by female Dutch Master chef Angélique Schmeinck.

Recipe:
Yields: 10 cannoli tuiles

Preparation time batter 10 minutes, waiting time 30 minutes, baking time: 5-10 minutes per batch

65 grams / ¼ cup / 2.3 ounces softened butter (not melted but soft)
60 grams / ½ cup / 2.1 ounces sifted confectioner’s sugar
1 sachet vanilla sugar (7 grams or substitute with a dash of vanilla extract)
2 large egg whites (slightly whisked with a fork)
65 grams / 1/2 cup / 2.3 ounces sifted all purpose flour
1 table spoon cocoa powder/or food coloring of choice
Butter/spray to grease baking sheet

Oven: 180C / 350F

Using a hand whisk or a stand mixer fitted with the paddle (low speed) and cream butter, sugar and vanilla to a paste. Keep stirring while you gradually add the egg whites. Continue to add the flour in small batches and stir to achieve a homogeneous and smooth batter/paste. Be careful to not over mix.

Cover the bowl with plastic wrap and chill in the fridge for at least 30 minutes to firm up. (This batter will keep in the fridge for up to a week, take it out 30 minutes before you plan to use it).
Line a baking sheet with parchment paper or grease with either butter/spray and chill in the fridge for at least 15 minutes.

Use an off sided spatula to spread batter in circles on greased baking sheet.  Leave some room in between your shapes.

Bake tuiles in a preheated oven (180C/350F) for about 5-10 minutes or until the edges turn golden brown. Immediately release from baking sheet and proceed to shape/bend the cookies in the desired shape. These cookies have to be shaped when still warm, you might want to bake a small amount at a time or maybe put them in the oven to warm them up again.


If you don’t want to do stencil shapes, you might want to transfer the batter into a piping bag fitted with a small plain tip. Pipe the desired shapes and bake. Shape immediately after baking using for instance a rolling pin, a broom handle, cups, cones….

Friday, January 23, 2009

Almond Ricotta Muffins

Kristen's Food January 2009 424  

Last week I received an e-mail from the crew at Desserts Magazine letting me know that I had won the giveaway for a new super awesome kitchen scale, the Escali Pana Scale to be exact.  I love my old one but it is jut your average run of the mill kitchen scale but this one has a new amazing feature.  You can measure out cups or tablespoons of flour or 98 other ingredients without lifting a spoon, or should I say a measuring spoon.  With this scale, you push the volume button, enter in the number of the ingredient on the numeric keypad, watch the display until you get the correct number of cups or tablespoons.  No more spooning and leveling, easy peasy lemon squeezy.

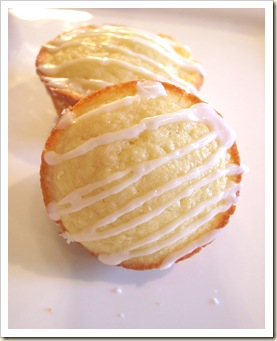
I have been dying to bake something since last night when the UPS man delivered my new kitchen scale.  So, after I finished some much needed house cleaning, I looked through my fridge and pantry to see what I could put together.  I found a large container of  ricotta and a partial bag of almonds.  I decided to see what I could throw together in muffin form with these ingredients and came up with these muffins.

The ground almonds give the muffins a little chewiness while the buttermilk and ricotta add the tenderness.  The muffins aren't really that sweet, which is the way I like things.  The almond glaze on top is what gives them most of their sweetness.  You could add a few more Tablespoons of sugar if you really wanted a sweeter muffin but I think that combination of the lightly sweet muffins and the super sweet glaze really balance out the whole muffin.

Almond Ricotta Muffins

Kristen's Food January 2009 426

1 1/4 cups Flour

1/2 cups Almond meal** (See notes below on how to make your own)

1/2 cup Sugar

1 Tbs. Baking Powder

1/2 tsp. Salt

2 Eggs

1/2 cup Ricotta

1/2 cup Buttermilk

1 TBS. Milk

1/4 cup (4TBS. , 1/2 stick) Butter, melted

1/2 tsp. Almond extract

1/2 tsp. Vanilla extract

Glaze (recipe Follows)

1. Preheat oven to 350° and grease muffin pan, set aside.

2.  In a large bowl, mix together the dry ingredients and whisk to combine.

3.  In a separate bowl combine the eggs, ricotta, buttermilk, milk, butter and extracts, stirring to combine.

4.  Dump the dry ingredients into the wet and stir until just combined.  Scoop mixture into the muffin pan and bake for about 15 minutes or until the edges are golden and the tip of a toothpick comes out clean when inserted into the center of the muffin.  Remove from pans to a cooling rack and let cool.

Almond Glaze

3/4 cup powdered sugar

1/4 tsp. almond extract

1 Tbs. Milk

1.  In a bowl combine all ingredients adding the milk slowly  to form a glaze that is thick enough to drizzle.  Drizzle over the cooled muffins.

Kristen's Food January 2009 413

**Making your own almond meal is easy and a lot cheaper than buying it in the store.  Just take a small saucepan and fill with water.  Heat to boiling.  Throw a few handfuls of almonds into the boiling water and boil for a minute or two.  Turn the heat off and let sit for another minute.  Pour the almonds through a strainer.  Take the skins off each almond by lightly squeezing them, the skins should just pop off.  Return the almonds to the pan and turn the heat back on for another minute just to dry the almonds off.  Stir them and watch them carefully, you don't want burnt almonds!  Put the almonds into a food processor or blender with 2 TBS. of powdered sugar and process until it is finely ground.  Be careful not to over process, you don't want a paste, the powdered sugar should help to prevent that.  Measure and use as needed.**

Wednesday, January 21, 2009

English Muffin Bread

Kristen's Food January 2009 411

This morning as I was surfing the Internet,  I checked one of my favorite sites, King Arthur Flour and came across this recipe for English Muffin bread.  They have so many recipes and many of them are guaranteed to work (if they don't they will actually send you a $5 gift certificate).  I have tried several of them and have been pleased with  them all.  This recipe was so quick and easy that I decided to make it to make it this morning and had it ready for breakfast.  This is a bread for those of you who are just starting out with bread making or are looking for something quick and easy. It is so easy that it requires no kneading.  It is a great mix between a yeast bread and a quick bread and only takes about 1 1/2 hours from start to finish.

The bread has a chewy texture with great air pockets and makes a delicious toast especially when covered in jam.  It is so good that while I was trying to take pictures this morning, my son kept sneaking slices that I had cut ( I lost count after three).


English Muffin Bread

from King Arthur Flour

Directions

1) Whisk together the flour, sugar, salt, baking soda, and instant yeast in a large mixing bowl.

2) Combine the milk, water, and oil in a separate, microwave-safe bowl, and heat to between 120°F and 130°F. The liquid will feel very hot (hotter than lukewarm), but not so hot that it would scald you. As a reference point, the hottest water from your kitchen tap is probably around 120°F (unless your tap water is so hot that it burns you).

3) Pour the hot liquid over the dry ingredients in the mixing bowl.

4) Beat at high speed for 1 minute. The dough will be very soft.

5) Lightly grease an 8 1/2" x 4 1/2" loaf pan, and sprinkle the bottom and sides with cornmeal.

6) Scoop the soft dough into the pan, leveling it in the pan as much as possible.

7) Cover the pan, and let the dough rise till it's just barely crowned over the rim of the pan. When you look at the rim of the pan from eye level, you should see the dough, but it shouldn't be more than, say, 1/4" over the rim. This will take about 45 minutes to 1 hour, if you heated the liquid to the correct temperature and your kitchen isn't very cold. While the dough is rising, preheat the oven to 400°F.

8) Remove the cover, and bake the bread for 20 to 22 minutes, till it's golden brown and its interior temperature is 190°F.

9) Remove the bread from the oven, and after 5 minutes turn it out of the pan onto a rack to cool. Let the bread cool completely before slicing.

Thursday, January 15, 2009

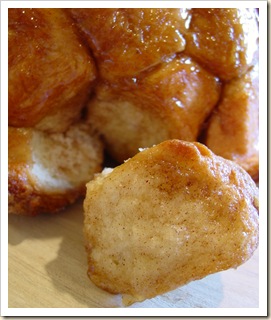
Monkey Bread

Kristen's Food January 2009 037

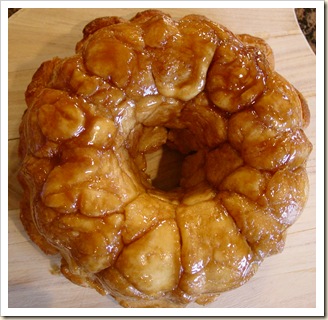
I'm sure that everyone has their  own recipe for monkey bread but my preschool kids made this one with me today and they were so proud of it I thought that I would post the recipe here and show off their cooking skills. 

I really love to cook with kids in the kitchen, they love to help out and see the results.   The preschoolers eyes were huge when this came out of the oven.  My kids are always begging me to cook all of our meals and desserts together.   Saturday is our big breakfast day and my 7 year old makes the pancakes while my 5 year old makes the eggs and my 2 1/2 year old flips the sausages.  It can be a little crazy and there are times where I just have to ask them to let me cook on my own, but they would be in the kitchen making every meal with me if I let them. I also notice that my kids are a lot more willing to try something new if they have had a hand in making it.

This is such a fun snack to make with your kids and it is so delicious you'll want to make it again and again.

Monkey Bread

Kristen's Food January 2009 051

Dough

2 cups warm water

4 tsp. yeast

1/4 cup sugar

1 1/2 tsp. vanilla

1/4 cup oil

2 tsp salt

5-7 cups flour

1 cup sugar

1 1/2 TBS cinnamon

1 stick (1/2 cup) butter

1 cup packed light brown sugar

1.  In the bowl of a mixer, combine the water, yeast,  sugar and vanilla.   Allow to sit for about 10 minutes or until foamy.

2.  Add the oil, salt and 3 cups of the flour.  Mix with the dough hook until combined.  Slowly add more flour until the dough clears the side of the bowl but still sticks to the bottom.  The dough will be a little sticky but will handle well with floured hands.  Spray the top of the dough with a little spray oil and cover with a cloth.  Allow to rise for about 1/2 an hour or until puffy.

3.  Remove dough from bowl onto a floured surface and give it a quick knead.  Cut the dough into small pieces.  ( I weighed mine at about 30 grams or a little over 1/2 an ounce each.)

4.  Preheat the oven to 350° and grease a 12 cup bundt pan.  In a small sauce pan combine the butter and brown sugar.  heat over low heat stirring until the mixture is melted together.

5.  Combine the sugar and cinnamon, roll the dough pieces into little balls and roll into the sugar and cinnamon mixture coating them well with the mixture.  Drop them into the greased pan, fillinf 1/4 pan full.

6.  Once pan is 1/4 full ( about half of the dough)  pour half of teh brown sugar and butter mixture over the coated dough pieces.  Repeat with the remainder of the dough and then pour teh rest of the syrup over the top.  The pan should be 1/2 to 2/3 full.  Do not over fill the pan with dough or the syrup and dough will spill out of the pan as it bakes.

7.  Set the pan on top of the warm oven and let rise for about 15 minutes or until puffy.  Bake at 350° for about 30 -40 minutes or until the top is golden and the syrup is bubbling.   Remove from oven and let cool for 5 minutes then cover with a large plate or platter and turn the pan over and let the bread fall from the pan.  Eat while warm.

Sunday, January 4, 2009

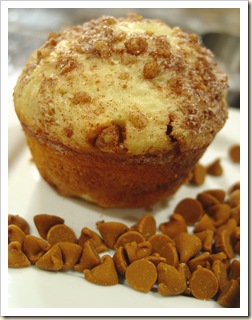
Cinnamon Chip Coffee Cake Muffins

Kristen's Food January 2009 012   

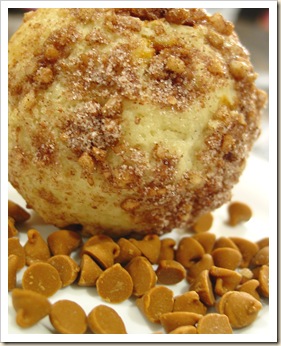
The other day while I was at the store I noticed that they were finally carrying the Hershey's Cinnamon Chips.  I have been looking for these for the past year and had previously been unsuccessful in finding them, until now.   If you haven't seen these they look like butterscotch chips but have a strong cinnamony (is that even a word?) flavor.  If you tasted them alone you might think that they are too strong, but combine them with a cookie or a muffin and they are absolutely delicious.

While trying to come up with this recipe, I instantly thought of the coffee cake that I used to eat every morning in middle school.  We had these really amazing bakers and they made these huge pans full of buttery cake that was topped with plenty of brown sugar and cinnamon.  They would sell a humongous  slice for 35 cents.  Ah, those were the days, when I could eat buttery coffee cake everyday without any consequences. Well, now I have these muffins which by the way are lot healthier than that buttery coffee cake but they may have the one-up on flavor.  If you can find these cinnamon chips try a bag.  They are great in oatmeal cookies and about a billion other things.

Cinnamon Chip Coffee Cake Muffins

Kristen's Food January 2009 014

1 cup cake flour

1 cup minus 2 Tbs. all purpose flour

1 Tbs. Baking powder

1/2 tsp. salt

1/2 cup sugar

2 eggs

1/2 cup sour cream (I used light)

1/2 cup milk

4 Tbs. melted butter,cooled

1 tsp. vanilla

5 oz. cinnamon chips (1/2 a bag)

For topping

1/2 cup finely chopped walnuts

1 Tbs. cinnamon

1/3 cup sugar

1.  Preheat oven to 375 ° and grease muffin pan.  In a large bowl mix together the flours, baking powder, salt and sugar.  In a separate bowl combine the eggs, sour cream, milk, butter and vanilla.  Add the wet ingredients to the dry mixing until just combined.  Stir in the cinnamon chips.

2.  In a small bowl, mix together the topping ingredients.

3.  Drop heaping Tablespoons into each of the 12 muffin cups.  Top with 1/2 Tbs. of the topping.  Cover with the rest of the muffin batter.  Slightly wet fingers and smooth the tops of the muffins.  Top each muffin with a teaspoon of the topping.

4.  Bake the muffins at 375° for about 15 minutes.