Sunday, June 29, 2008

The Daring Bakers take on Danish Pastry

Kristen's Food June 2008 080

Yep, it's that time of the month again. Time for another Daring Baker's challenge. When I looked at the challenge this month, I was so excited. I had never made a laminate dough before but had been wanting to for awhile. Leave it up to the Daring Baker's to make it happen sooner rather than later. This months challenge was Danish pastry.

The Danish pastry dough is a mix between a yeasty sweet dough and a puff pastry. The sweet yeast dough is rolled out and spread with a mixture of butter and flour. Then it is folded into thirds and refrigerated. The rolling and folding is repeated 3 more times and then the dough must rest in the refrigerator for several hours. This process creates thin layers of butter all throughout the dough which result in that deliciously light and flaky pastry. The dough usually contains cardamom and orange both of which I left out. I substituted extra milk for the orange juice and added some almond extract to the dough for extra flavor.

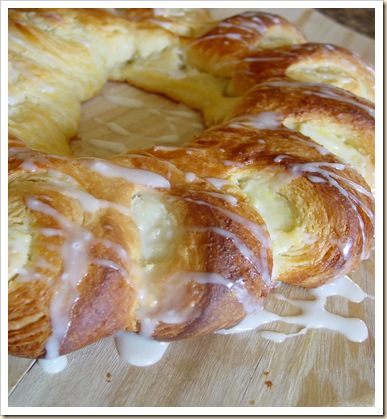
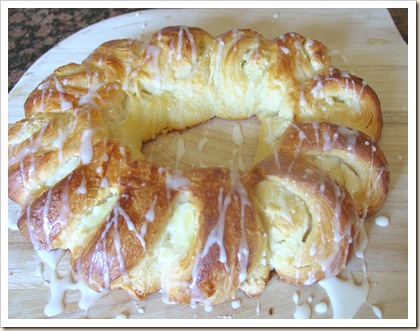
We were given a choice of fillings and it was so hard to pick. First I made a ring shaped pastry filled with a mixture of homemade almond paste, cream cheese and powdered sugar. I then topped the ring with a lemony powdered sugar glaze. This one was so delicious. The pastry was flaky just as I had hoped it would be and the filling was absolutely delicious. I really liked the tang that the lemon and powdered sugar glaze gave, it really helped to balance all of the other sweet flavors.

Kristen's Food June 2008 084

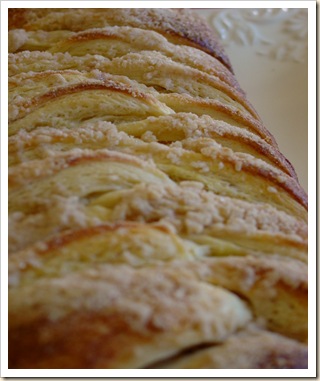
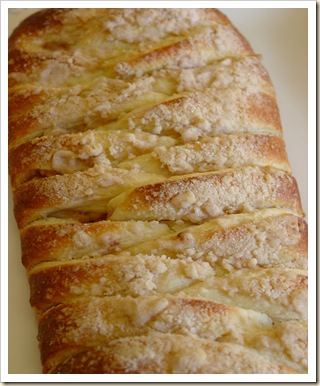
For my second pastry I made the traditional braid shape and filled it with a light layer of the almond and cream cheese mixture followed by some cinnamon apples. I then topped the braid with a crumb topping. The smell as it baked was heavenly, you could smell the yeast dough with hints of cinnamon. If the smell was good, the taste was even better. The almond mixture puffed up slightly and mixed with the cinnamon apples and the dough was perfectly flaky and buttery. I can't believe that I've never made this before. It was surprisingly easy and may only be thought as difficult due to the time involved in making it, most of which is the dough resting.

Kristen's Food June 2008 103

If you want to be daring too, give this on a try, it was delicious. Check out what all of the other Daring Bakers have made. A big thanks to Kelly of Sass & Veracity and Ben from What's Cookin'? for hosting this wonderful challenge. It was a lot of fun and delicious to boot.

DANISH DOUGH
Kristen's Food June 2008 105
Makes 2-1/2 pounds dough
Ingredients
For the dough (Detrempe)
1 ounce fresh yeast or 1 tablespoon active dry yeast
1/2 cup whole milk
1/3 cup sugar
Zest of 1 orange, finely grated
3/4 teaspoon ground cardamom
1-1/2 teaspoons vanilla extract
1/2 vanilla bean, split and scraped
2 large eggs, chilled
1/4 cup fresh orange juice
3-1/4 cups all-purpose flour
1 teaspoon salt
For the butter block (Beurrage)
1/2 pound (2 sticks) cold unsalted butter
1/4 cup all-purpose flour

DOUGH
Combine yeast and milk in the bowl of a mixer fitted with the paddle attachment and mix on low speed. Slowly add sugar, orange zest, cardamom, vanilla extract, vanilla seeds, eggs, and orange juice. Mix well. Change to the dough hook and add the salt with the flour, 1 cup at a time, increasing speed to medium as the flour is incorporated. Knead the dough for about 5 minutes, or until smooth. You may need to add a little more flour if it is sticky. Transfer dough to a lightly floured baking sheet and cover with plastic wrap. Refrigerate for 30 minutes.
Without a standing mixer: Combine yeast and milk in a bowl with a hand mixer on low speed or a whisk. Add sugar, orange zest, cardamom, vanilla extract, vanilla seeds, eggs, and orange juice and mix well. Sift flour and salt on your working surface and make a fountain. Make sure that the “walls” of your fountain are thick and even. Pour the liquid in the middle of the fountain. With your fingertips, mix the liquid and the flour starting from the middle of the fountain, slowly working towards the edges. When the ingredients have been incorporated start kneading the dough with the heel of your hands until it becomes smooth and easy to work with, around 5 to 7 minutes. You might need to add more flour if the dough is sticky.
BUTTER BLOCK
1. Combine butter and flour in the bowl of a mixer fitted with a paddle attachment and beat on medium speed for 1 minute. Scrape down the sides of the bowl and the paddle and then beat for 1 minute more, or until smooth and lump free. Set aside at room temperature.
2. After the detrempe has chilled 30 minutes, turn it out onto a lightly floured surface. Roll the dough into a rectangle approximately 18 x 13 inches and ¼ inch thick. The dough may be sticky, so keep dusting it lightly with flour. Spread the butter evenly over the center and right thirds of the dough. Fold the left edge of the detrempe to the right, covering half of the butter. Fold the right third of the rectangle over the center third. The first turn has now been completed. Mark the dough by poking it with your finger to keep track of your turns, or use a sticky and keep a tally. Place the dough on a baking sheet, wrap it in plastic wrap, and refrigerate for 30 minutes.
3. Place the dough lengthwise on a floured work surface. The open ends should be to your right and left. Roll the dough into another approximately 13 x 18 inch, ¼-inch-thick rectangle. Again, fold the left third of the rectangle over the center third and the right third over the center third. No additional butter will be added as it is already in the dough. The second turn has now been completed. Refrigerate the dough for 30 minutes.
4. Roll out, turn, and refrigerate the dough two more times, for a total of four single turns. Make sure you are keeping track of your turns. Refrigerate the dough after the final turn for at least 5 hours or overnight. The Danish dough is now ready to be used. If you will not be using the dough within 24 hours, freeze it. To do this, roll the dough out to about 1 inch in thickness, wrap tightly in plastic wrap, and freeze. Defrost the dough slowly in the refrigerator for easiest handling. Danish dough will keep in the freezer for up to 1 month.

APPLE FILLING
Makes enough for two braids
Ingredients
4 Fuji or other apples, peeled, cored, and cut into ¼-inch pieces
1/2 cup sugar
1 tsp. ground cinnamon
1/2 vanilla bean, split and scraped
1/4 cup fresh lemon juice
4 tablespoons unsalted butter
Toss all ingredients except butter in a large bowl. Melt the butter in a sauté pan over medium heat until slightly nutty in color, about 6 - 8 minutes. Then add the apple mixture and sauté until apples are softened and caramelized, 10 to 15 minutes. If you’ve chosen Fujis, the apples will be caramelized, but have still retained their shape. Pour the cooked apples onto a baking sheet to cool completely before forming the braid. (If making ahead, cool to room temperature, seal, and refrigerate.) They will cool faster when spread in a thin layer over the surface of the sheet. After they have cooled, the filling can be stored in the refrigerator for up to 3 days. Left over filling can be used as an ice cream topping, for muffins, cheesecake, or other pastries.

DANISH BRAID
Makes enough for 2 large braids
Ingredients
1 recipe Danish Dough (see below)
2 cups apple filling, jam, or preserves (see below)
For the egg wash: 1 large egg, plus 1 large egg yolk
1. Line a baking sheet with a silicone mat or parchment paper. On a lightly floured surface, roll the Danish Dough into a 15 x 20-inch rectangle, ¼ inch thick. If the dough seems elastic and shrinks back when rolled, let it rest for a few minutes, then roll again. Place the dough on the baking sheet.
2. Along one long side of the pastry make parallel, 5-inch-long cuts with a knife or rolling pastry wheel, each about 1 inch apart. Repeat on the opposite side, making sure to line up the cuts with those you’ve already made.
3. Spoon the filling you’ve chosen to fill your braid down the center of the rectangle. Starting with the top and bottom “flaps”, fold the top flap down over the filling to cover. Next, fold the bottom “flap” up to cover filling. This helps keep the braid neat and helps to hold in the filling. Now begin folding the cut side strips of dough over the filling, alternating first left, then right, left, right, until finished. Trim any excess dough and tuck in the ends.
Egg Wash
Whisk together the whole egg and yolk in a bowl and with a pastry brush, lightly coat the braid.
Proofing and Baking
1. Spray cooking oil (Pam…) onto a piece of plastic wrap, and place over the braid. Proof at room temperature or, if possible, in a controlled 90 degree F environment for about 2 hours, or until doubled in volume and light to the touch.
2. Near the end of proofing, preheat oven to 400 degrees F. Position a rack in the center of the oven.
3. Bake for 10 minutes, then rotate the pan so that the side of the braid previously in the back of the oven is now in the front. Lower the oven temperature to 350 degrees F, and bake about 15-20 minutes more, or until golden brown. Cool and serve the braid either still warm from the oven or at room temperature. The cooled braid can be wrapped airtight and stored in the refrigerator for up to 2 days, or freeze for 1 month.

Homemade Almond Paste

5 oz. blanched almonds

5 oz. powdered sugar

2 1/2 oz. granulated sugar

2 TBS. corn syrup

1/2 cup water

1/4 tsp almond extract

1. In a small sauce pan combine the granulated sugar, the corn syrup, the extract and the water. Bring the mixture to a boil and simmer for a few minutes to make sure all of the sugar is dissolved. Let cool slightly.

2. In the bowl of a food processor mix together the almonds and the powdered sugar until the mixture is ground into a semi-fine powder. With the machine running, slowly add the syrup and mix until it forms a paste.

3. Almond paste can be kept at room temperature for a day or two but if it will be longer refrigerate or freeze.

Makes about 13 oz. of almond paste

Almond Cream Cheese Filling

7 oz. almond paste

4 oz. cream cheese

1/2 cup powdered sugar

1. In the bowl of mixer fitted with the paddle attachment, mix all of the ingredients together until well mixed.
Saturday, June 28, 2008

Honey and Vanilla Frozen Yogurt

Kristen's Food June 2008 027 #2

It has been quite awhile since I have posted but I have been so busy. I just got back from taking 12 girls ages 12-18 camping for 4 days. It was a lot fun and a lot of hormones. They sure kept me busy; I am still so young and I already feel like I don't have the energy I once had. Now that I've showered and washed several loads of clothes and blankets it's time to begin cooking or in this case freezing something

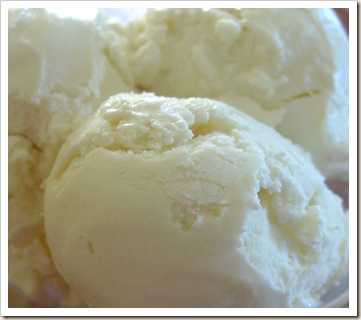
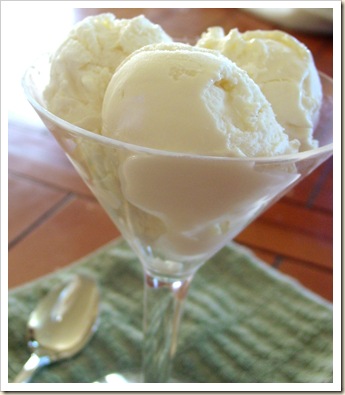
It has finally started to get hot here and it kind of hit us all of a sudden. We were never really able to enjoy the temperate weather that late spring and early summer usually brings. We went right from cold to screaming hot in a matter of days. So jumping into summer with both feet forward, I decided to make some tangy frozen yogurt. It is so easy to make and lends itself well to many flavors. The batch that I made I consider my base, it can be eaten alone or made into a variety of flavors. Make strawberry frozen yogurt by adding pureed strawberries or any other fruit that you'd like.

This recipe is adapted from David Lebowitz's book The Perfect Scoop. If you love ice cream and particularly making your own, then this is the book for you. There are so many pictures of the delicious ice cream that it's hard to decide which to try first. You really won't be disappointed with this recipe. It is so easy and you won't believe how creamy it is even though it's frozen yogurt.

Honey and Vanilla Frozen Yogurt

Kristen's Food June 2008 026

2 (32 oz) container of plain yogurt, preferably not low fat or nonfat

about 3/4 cup of honey

3/4 tsp vanilla extract

1. Line a colander with a few layer of cheese clothe and place over a bowl. Pour both containers of the yogurt onto the cheesecloth. Pull the edges up to cover. Refrigerate and allow to drain for 8 hours or overnight.

2. Stir together the thickened yogurt and a 1/2 cup of the honey. Check for sweetness and add more until desired sweetness (I like mine a little tart so I only used a little more than 1/2 cup). Stir in the vanilla.

3. Pour into an ice cream maker and freeze according to the instructions included with your ice cream maker.

Variations: Add 1 cup of pureed and strained strawberries or other fruits for delicious fruity frozen yogurt.

Tuesday, June 17, 2008

Brownies 3 Ways

Kristen's Food June 2008 075 #2

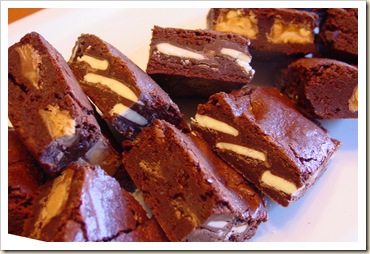
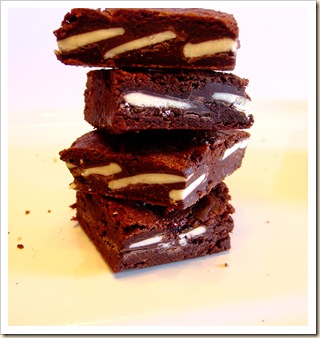
I hope that everyone had a good Father's Day. I had a great weekend spending time with family and friends. On Saturday we had a big pre-Father's Day BBQ and pool party and then on Sunday we were able to just spend time together as a family. My girls loved making breakfast for their daddy in the morning and taking care of him all day. For dinner we had a big "meaty" meal and when I asked my husband if he had eaten any of the vegetables that I had made he said, "It's Father's Day, I should at least get one day off". I thought that it was so cute that I didn't even say another word. I guess that he can have a day off once a year if he wants. To put the icing on the cake, so to speak, here is a great dessert for that father in your life. Who doesn't love a rich fudgy brownie with a candy bar inside?

When you look at the amounts of the ingredients in this recipe don't freak out. It is enough to bake in a cookie sheet and can accommodate all three kinds into one pan. This is great if you have a big family get together or party to bring them to. The recipe makes about 40 good sized brownies and they are so rich and fudgy that you could probably cut them in half and still be satisfied. If you want to make less, you can halve the recipe and bake it in a 9 x13 or use 1/3 of the recipe for an 8 x 8.


Kristen's Food June 2008 065.#2 jpg

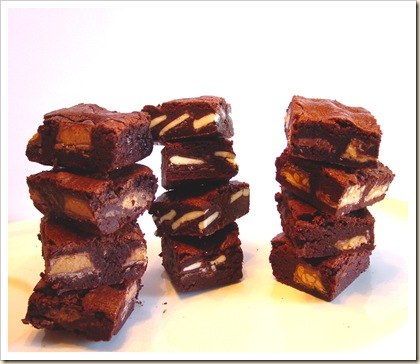
I used three different candy bars, Snickers minis, the miniature Reeses Peanut Butter Cups and the small York Peppermint patties. These were all so good I am not sure that I could pick a favorite but my husbands favorite definitely was the Reeses, which is his favorite candy bar. I am sure that you could make these with any of your favorite candy bars. As a word of advise, these need to cool for a long period of time and it is best if they sit in the refrigerator before cutting. This will help you get that crisp clean cut. I brought some of them to a lunch at the park today and unfortunately they hadn't cooled all the way before I cut them and the hot weather outside didn't help much either so they looked like a mess and were quite melted (sorry ladies!!!). These are best served right out of the refrigerator which consequently is also the best place to store them. So if you have a hankering for a great fudgy snack, whip up a batch of these and you won't be disappointed.

Candy Bar Brownies

(Adapted form a Martha Stewart recipe)

Kristen's Food June 2008 070

3 sticks of unsalted butter(1 1/2 cups)

3 cups all-purpose flour

3/4 cups cocoa powder

1 1/2 tsp baking powder

1 1/2 tsp salt

24 ounces chocolate chips (2 bags, I use the 60% cocoa ones)

1 Tbs. Vanilla

3 3/4 cups sugar

9 large eggs

about 40 each of York peppermint patties, Snickers minis and miniature Reeses Peanut butter cups (have them unwrapped and ready to use)

1. Preheat the oven to 350°. Line a cookie sheet with foil and spray with nonstick cooking spray. In a bowl mix together the dry ingredients and whisk to combine; Set aside.

2. Place the butter and chocolate chips in a large bowl set over a pan of simmering water (make sure the bowl in not touching the water). Heat stirring occasionally until the butter and the chocolate chips are melted. Remove from heat and add in the sugar and vanilla. Stir until combined. Add in the eggs a few at a time mixing well after each addition. Add the flour mixture 1/3 at a time stirring until just combined. Do not over mix.

3. Spread about half of the batter onto the bottom of the pan using an offset spatula to spread evenly ( it helps to warm the spatula by running it under hot water). Using three different sections make rows of the candy bars. Over lap just the peppermint patties (like shingles on a roof). Leave a little border around the edges of the pan and between the different sections. (I made 3 rows of 12 of each the peppermint patties and the snickers and 4 rows of the Reeses). Carefully spread the remaining batter over the top of the candy bars using the offset spatula. Tap the pan on the counter to help even the batter and remove any air bubbles.

4. Bake for about 40-45 minutes or until the brownies are set and the edges are crisp. Cool in the pan for several hours and then move to the fridge to cool and set completely. Slice them with a sharp damp knife, rinsing between cuts. Store in the refrigerator.

Friday, June 13, 2008

Ginger Almond Biscotti

Kristen's Food June 2008 056 #2

I know that I have been gone for a little while. I had to have a colonoscopy at the beginning of this week thus inhibiting me to eat for a few days. Why am I telling you this? I am hoping to get a little more awareness out there for colon cancer and colon cancer screenings. My dad was diagnosed at39 with 2 large tumors in his colon. It was so far advanced that he died 2 years later. Colon cancer has a really high survival rate, like 90%, if detected early through regular screenings. I was supposed to have a colonoscopy several years ago but I kept putting it off. You know, it doesn't sound too fun and, after all, I am pretty young. Finally after a little coercion from my doctor I scheduled one. How grateful I am too. The doctor found one precancerous polyp and because of my early screening, I was able to have it removed. In all honesty, the colonoscopy wasn't so bad and the alternative would have been much worse. So, if you are over the age of 50 or know someone who is, urge them to get their colonoscopy. If you have a family history of colon cancer you need to get checked earlier and possibly more frequently. Ok, now that my 2 cents on the matter is through, I will get back to the food!

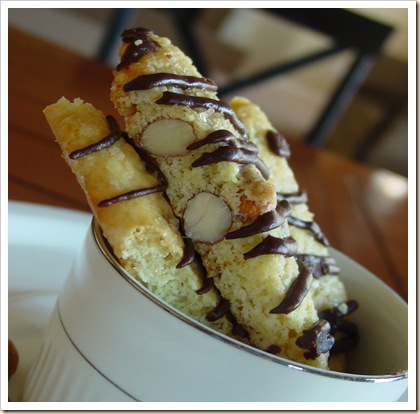
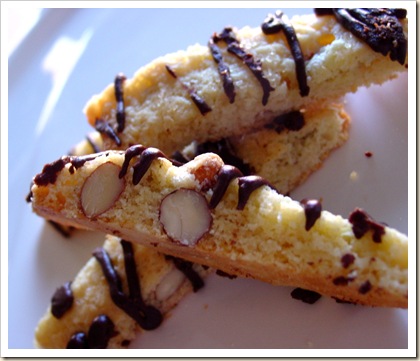
I was looking through my pantry yesterday trying to come up with something to make. I found a small bag of almond meal that I had left over from the opera cakes and also a large bag of almonds. As soon as I saw the almonds my mind drifted back to my college days when I would grab a hot chocolate and an almond biscotti almost daily from the coffee shop on campus. I loved biting into the crunchy cookie and getting a bite of the toasty almonds inside. Normally I like to use almond extract in my biscotti to bring out the almond flavor but a check in my pantry and I was all out. I searched through my spices thinking maybe about anise, but I was all out of it too. So now it was off to my fridge where I discovered a small piece of ginger leftover from the previous nights dinner. This was it, I love that little hint of flavor that ginger brings to desserts. It's a very subtle taste when used in small amounts and makes others wonder what it is that you put in there. When using ginger in desserts I like to grate it over a microplane to insure that there are no large pieces. As mentioned before, I had some almond meal (ground blanched almonds) leftover that I wanted to use up so I threw that in too for a little change in the texture. If you don't have this you can just substitute an equal amount of flour.

Almond Ginger Biscotti

Kristen's Food June 2008 058

1 1/4 cups whole unblanched almonds

7 Tbs. cold butter, cut into small pieces

3/4 granulated sugar

1 1/ cups all purpose flour

1 tsp. baking powder

1 1/2 tsp. grated fresh ginger

1 1/2 tsp vanilla extract

2 eggs

1 egg white , lightly beaten, for brushing

turbinado sugar

!/2 cup chocolate chips

1 Tbs. heavy cream to thin chocolate if needed

1. Preheat the oven to 300 degrees F. Spread the almonds onto a baking sheet and toast for about 10 minutes, stirring as necessary, until fragrant. Remove from the oven and spread almonds onto a plate to cool. Adjust oven temperature to 350 and line the baking sheet with parchment paper.

2. Place the remaining ingredients into the bowl of a mixer fitted with the paddle attachment. Mix ingredients until a soft dough forms. Place dough onto a lightly floured surface and shape into 3 pieces. Place in the refrigerator for to chill for about 30 minutes or until no longer sticky. Taking one piece at a time, roll the dough into thin ropes. They should be as long as the baking sheet and only about 1/2 inch thick (they will spread considerably). Bake only 2 at a time as they spread. Brush with the egg white and sprinkle with the sugar. Bake for about 22-27 minutes or until golden brown.

3. Remove parchment paper from pan and while still warm, slice the biscotti on the diagonal with a serrated knife. Do not use a sawing motion as this will cause the biscotti to crumble, instead cut straight down. The biscotti will harden as they cool but if you would like them crisper lower oven to 300 degrees and bake for another 10 minutes. repeat with the remaining piece of dough, or store in the freezer for up to 2 weeks.

4. Melt the chocolate in the microwave stirring every 10 seconds, until melted. Add the cream to thin out if desired. Place the chocolate into a Ziploc bag and snip off the corners. Drizzle over the cooled biscotti and let sit until chocolate is set.

Thursday, June 5, 2008

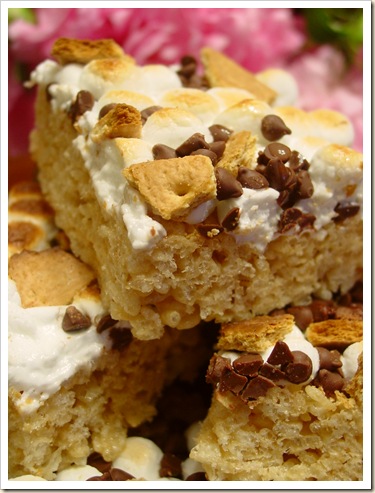
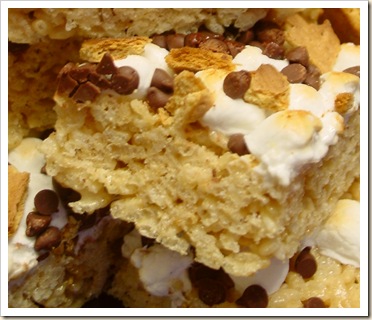
Rice Crispy Treats Meets Smores

Kristen's Food June 2008 027

Well, it's been another busy day. I always think that I'll have time to get things done and then all of a sudden the day is over. I had plans to make some mint chocolate brownies that I saw on Martha Stewart this weekend but never made it to the store, so those will have to wait for later this week.

I am in charge of some of the youth at my church and for an activity tonight we went letterboxing. If you have never heard of this you should check it out. Basically people all over the country have hidden boxes and they leave clues online at the above website. Usually the boxes contain a stamp, sometimes homemade, and a little book. When you find the box you stamp their stamp into your journal or book and then stamp your stamp into their little book. It's a fun family activity and it is free.

So I needed a quick treat for the activity with what I had on hand. I have had a lot of camping on my mind as I am also in charge of the camp for the youth in a couple of weeks so I guess that's why I thought of smores. I needed a smore that was portable though and what a better way to eat it than on top of a rice crispy treat! These are so quick and easy, I made them in less than 15 minutes, so if you're short on time and need a dressed up snack, give these a try.

Rice Crispy Treat Smores

Kristen's Food June 2008 028 #2

3/4 cup butter (1 1/2 sticks)

2 bags (16 oz. each) miniature marshmallows ( half of a bag reserved for topping)

1 tsp vanilla

about 20 cups of rice crispies ( I never actually measured)

8 oz. chocolate chips ( I used miniature chocolate chips)

4 Graham Crackers, broken into bite size pieces

1. Preheat the broiler. Spray a cookie sheet with nonstick cooking spray and set aside.

2. Melt butter and marshmallows and vanilla in a large pot over medium heat, stirring constantly. Turn off the heat and add enough of the rice crispies to coat them evenly and lightly with the marshmallows. Spread on to the cookies sheet. (If you wet your hands then you can press the rice crispy treat into the pan evenly without them sticking to your hands).

3. Cover the treats evenly with the reserved marshmallows and then sprinkle evenly with the chocolate chips. Place the pan under the broiler for 1-2 minutes or until the marshmallows are nice and toasty. Watch carefully as they go from toasted to burnt in a matter of seconds. Remove from the oven and sprinkle evenly with the graham cracker crumbs. Set aside and let them cool for about 2 hours. This allows the marshmallows to set back up and makes them easier to cut. Cut the rice crispy treats into squares using a slightly damp knife as this will keep the marshmallows from sticking. Dampen slightly between each cut.

Wednesday, June 4, 2008

Delicious Baked Doughnuts

Kristen's Food June 2008 016

I know that I have been gone for awhile; I just haven't had much time in the kitchen lately. I always think that once the kids are out of school for the summer that I'll have more time, on the contrary I have been busier than ever. We had a good weekend and accomplished a lot. On Saturday we planted 25 bushes/plants and 2 trees, I was even sore that night. Then on Sunday I was sicker than a dog. I spent most of the day sleeping. I don't think I have slept that much since I had kids. Luckily enough it was a weekend and my husband was able to take care of the kids so that I could just rest. Then on Monday we had two unplanned on guests for dinner so I was busy preparing that. Today was the first day that I felt like I could do something that I wanted to do.

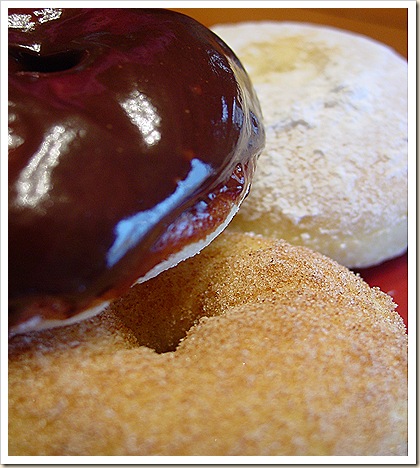
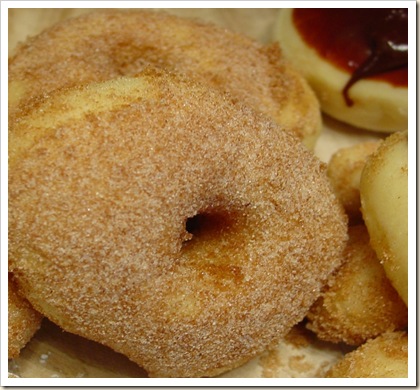
I actually have a list of things that I want to make and every once in awhile I'll look at it and actually make one of them. Today was one of those days. I have been eyeing this recipe for quite sometime and have kept telling myself that I needed to find a reason to make it. But really, who needs a reason to make doughnuts, and baked ones at that?! These were so simple that I can't wait to make them again. It's just as easy as making rolls but a lot more delicious. Once these little gems came out of the oven and were covered with their sugary coating they were consumed still piping hot. They almost melted in your mouth.

Kristen's Food June 2008 004

I chose to make three different toppings for the doughnuts; sugar and cinnamon, powdered sugar (my favorite), and chocolate ganache with and without sprinkles. I have to tell you that I found the chocolate ones to be a little dry as I didn't coat them with the butter first. If I was to make those ones again, I would coat them with some butter and let them sit a minute or two for it to absorb and then coat with the chocolate. I'm not sure how well these will keep as we consumed the whole batch while still hot, but I am sure that you could store them in an airtight container and then heat for a few seconds in the microwave.

Baked Doughnuts Recipe

This recipe comes from one of my all time favorite food blogs 101 Cookbooks. Whenever I search Heidi's blog, I am inspired to go and cook and usually it's something delicious and healthy. You have got to go and check her out, she takes gorgeous photos and makes amazing food.

Kristen's Food June 2008 009 #2

Don't over bake these, if anything, under bake them a bit - they will continue baking outside the oven for a few minutes. You want an interior that is moist and tender - not dry. Also, be sure to cut big enough holes in the center of your doughnuts - too small and they will bake entirely shut. Remember they rise, and they rise even more when they are baking. These really need to be made-to-order, but you can make and shape the dough the night before if you want to serve them for brunch. Instructions: after shaping, place doughnuts on baking sheet, cover and place in the refrigerator overnight. Pull them out an hour before baking, and let rise in a warm place before baking.

1 1/3 cups warm milk, 95 to 105 degrees (divided)
1 packet active dry yeast (2 1/4 teaspoons)
2 tablespoons butter
2/3 cup sugar
2 eggs
5 cups all-purpose flour
A pinch or two of nutmeg, freshly grated(I used a few shakes of pumpkin pie spice)
1 teaspoon fine grain sea salt

1/2 cup unsalted butter, melted
1 1/2 cups sugar
1 tablespoon cinnamon

Place 1/3 cup of the warm milk in the bowl of an electric mixer. Stir in the yeast and set aside for five minutes or so. Be sure your milk isn't too hot or it will kill the yeast. Stir the butter and sugar into the remaining cup of warm milk and add it to the yeast mixture. With a fork, stir in the eggs, flour, nutmeg, and salt - just until the flour is incorporated. With the dough hook attachment of your mixer beat the dough for a few minutes at medium speed. This is where you are going to need to make adjustments - if your dough is overly sticky, add flour a few tablespoons at a time. Too dry? Add more milk a bit at a time. You want the dough to pull away from the sides of the mixing bowl and eventually become supple and smooth. Turn it out onto a floured counter-top, knead a few times (the dough should be barely sticky), and shape into a ball.

Transfer the dough to a buttered (or oiled) bowl, cover, put in a warm place (I turn on the oven at this point and set the bowl on top), and let rise for an hour or until the dough has roughly doubled in size.

Punch down the dough and roll it out 1/2-inch thick on your floured countertop. Most people (like myself) don't have a doughnut cutter, instead I use a 2-3 inch cookie cutter to stamp out circles. Transfer the circles to a parchment-lined baking sheet and stamp out the smaller inner circles using a smaller cutter. If you cut the inner holes out any earlier, they become distorted when you attempt to move them. Cover with a clean cloth and let rise for another 45 minutes.

Bake in a 375 degree oven until the bottoms are just golden, 8 to 10 minutes - start checking around 8. While the doughnuts are baking, place the butter in a medium bowl. Place the sugar and cinnamon in a separate bowl.

Remove the doughnuts from the oven and let cool for just a minute or two. Dip each one in the melted butter and a quick toss in the sugar bowl. Eat immediately if not sooner.

Makes 1 1/2 - 2 dozen medium doughnuts.