Wednesday, May 28, 2008

The Daring Bakers go to the Opera

Kristens Food May 2008 058

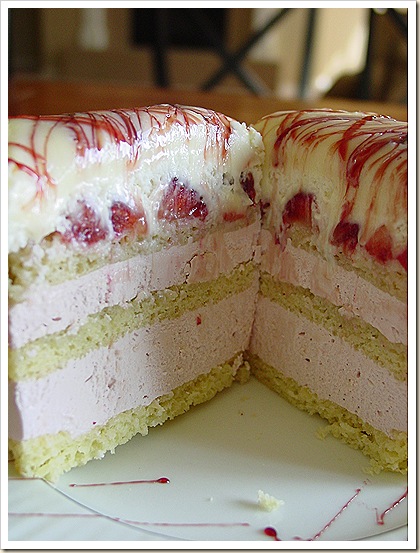
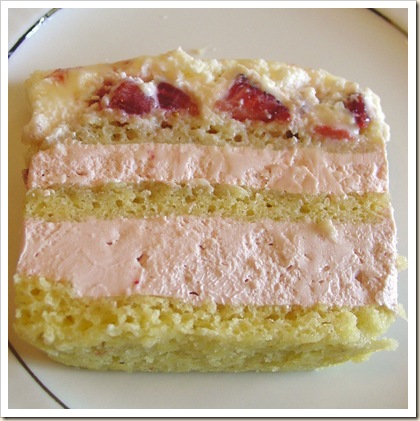
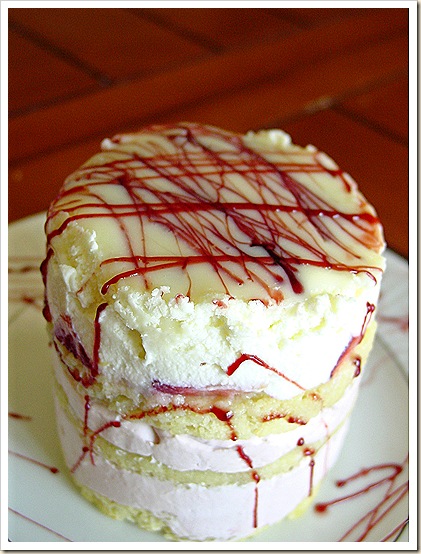
Well, it's the end of the month and time yet again for another Daring Bakers challenge. This months recipe was hosted by four lovely ladies, Ivonne of Cream Puffs in Venice, Lis of La Mia Cucina, Fran from Apples Peaches Pumpkin Pie and Shea from Whiskful. The challenge this month was to make Opera Cake. Now, I had never heard of opera cake before this challenge but I learned quickly all about it. Basically it's an almond sponge cake called, joconde ,brushed with a flavored simple syrup. Then it is layered with buttercream and then a chocolate mousse and then a gannache glaze. (Whew, how did I fit that all into one sentence!) Traditionally, Opera cakes are made with dark chocolate or coffee flavors. For this challenge were were asked to use only light colors and white chocolate. I have to tell you that I really don't like white chocolate. It is always way too sweet for me and I just can't stand it. I used it in this recipe as directed and to my dismay, I still didn't like it, it was just too darn sweet. I ended up with 7 miniature Opera Cakes that I couldn't eat and didn't really want to pass out to people. I brought them over to my mother-in-laws where there are always tons of people in hopes that they would get eaten up and luckily they did.

I left the cake the same and brushed it with an almond flavored simple syrup. I flavored the buttercream with a pomegranate reduction. This was by far my favorite part. The pomegranate helped a little with the sweetness and just tasted amazing. In fact, I had some of the pomegranate reduction left so I added it to some softened butter to make a pomegranate butter, let me just say, delicious. I kept searching for more things to put it on. It was great on waffles and toast and I have a few more things I'd like try it on. I also was able to make a pomegranate poppy seed salad dressing which was delicious. Anyhoo, back to the opera cake. I made the mousse just as it was written in the recipe with the white chocolate and the heavy cream. I added a layer of strawberries before adding the mousse. Then on to the glaze. I also made it per the recipe only drizzling it with the pomegranate reduction so that the two could set and firm up together. All in all the cake was a success, but I just wasn't happy with the white chocolate with it's cloyingly sweet taste. I think that I would have liked one made with bittersweet chocolate and maybe a salted caramel buttercream. So, maybe I'll try it again with that combo if I get bored one day...
Kristens Food May 2008 061 #2

Check out all over the other Daring Baker's creations to see some amazing Opera Cakes. Kristens Food May 2008 054 #2
For the joconde
(Note: The joconde can be made up to 1 day in advance and kept wrapped at room temperate)
What you’ll need:
•2 12½ x 15½-inch (31 x 39-cm) jelly-roll pans (Note: If you do not have jelly-roll pans this size, do not fear! You can use different-sized jelly-roll pans like 10 x 15-inches.)
•a few tablespoons of melted butter (in addition to what’s called for in the ingredients’ list) and a brush (to grease the pans)
•parchment paper
•a whisk and a paddle attachment for a stand mixer or for a handheld mixer
•two mixing bowls (you can make do with one but it’s preferable to have two)
Ingredients:
6 large egg whites, at room temperature
2 tbsp. (30 grams) granulated sugar
2 cups (225 grams) ground blanched almonds (Note: If you do not want to use almond meal, you can use another nut meal like hazelnut. You can buy almond meal in bulk food stores or health food stores, or you can make it at home by grinding almonds in the food processor with a tablespoon or two of the flour that you would use in the cake. The reason you need the flour is to prevent the almonds from turning oily or pasty in the processor. You will need about 2 cups of blanched almonds to create enough almond meal for this cake.)
2 cups icing sugar, sifted
6 large eggs
½ cup (70 grams) all-purpose flour
3 tbsp. (1½ ounces; 45 grams) unsalted butter, melted and cooled
1.Divide the oven into thirds by positioning a rack in the upper third of the oven and the lower third of the oven.
2.Preheat the oven to 425◦F. (220◦C).
3.Line two 12½ x 15½- inch (31 x 39-cm) jelly-roll pans with parchment paper and brush with melted butter.
4.In the bowl of a stand mixer fitted with the whisk attachment (or using a handheld mixer), beat the egg whites until they form soft peaks. Add the granulated sugar and beat until the peaks are stiff and glossy. If you do not have another mixer bowl, gently scrape the meringue into another bowl and set aside.
5.If you only have one bowl, wash it after removing the egg whites or if you have a second bowl, use that one. Attach the paddle attachment to the stand mixer (or using a handheld mixer again) and beat the almonds, icing sugar and eggs on medium speed until light and voluminous, about 3 minutes.
6.Add the flour and beat on low speed until the flour is just combined (be very careful not to overmix here!!!).
7.Using a rubber spatula, gently fold the meringue into the almond mixture and then fold in the melted butter. Divide the batter between the pans and spread it evenly to cover the entire surface of each pan.
8.Bake the cake layers until they are lightly browned and just springy to the touch. This could take anywhere from 5 to 9 minutes depending on your oven. Place one jelly-roll pan in the middle of the oven and the second jelly-roll pan in the bottom third of the oven.
9.Put the pans on a heatproof counter and run a sharp knife along the edges of the cake to loosen it from the pan. Cover each with a sheet of parchment or wax paper, turn the pans over, and unmold.
10.Carefully peel away the parchment, then turn the parchment over and use it to cover the cakes. Let the cakes cool to room temperature.
For the syrup
(Note: The syrup can be made up to 1 week in advance and kept covered in the refrigerator.)
What you’ll need:
•a small saucepan
Ingredients:
½ cup (125 grams) water
⅓ cup (65 grams) granulated sugar
1 to 2 tbsp. of the flavouring of your choice (i.e., vanilla extract, almond extract, cognac, limoncello, coconut cream, honey etc.)
1.Stir all the syrup ingredients together in the saucepan and bring to a boil.
2.Remove from the heat and let cool to room temperature.
For the buttercream
(Note: The buttercream can be made up to 1 month in advance and packed in an airtight container. If made way in advance, you can freeze the buttercream. Alternatively you can refrigerate it for up to 4 days after making it. To use the buttercream simply bring it to room temperature and then beat it briefly to restore its consistency.)
(Update Note: The recipe for the buttercream that is listed below was originally based on the original but we had some typos. It's all very confusing (we're good at confusing ourselves) but here is the short of it: When testing the buttercream, we tested a modified version (we're crazy like that!!!) that had 2 cups sugar, ½ cup water and 1¾ cups butter. Yes. That's right. 1¾ cups of butter. The eggs remained the same. We ended up with a very creamy buttercream. VERY. CREAMY. But we don’t want anyone to be afraid of our modified version so you have the option of using the original version listed below or the quantities we’ve listed here in this note. If you are still confused and want to cry, then please e-mail us and we will comfort you!!! We promise!!!)
What you’ll need:
•a small saucepan
•a candy or instant-read thermometer
•a stand mixer or handheld mixer
•a bowl and a whisk attachment
•rubber spatula
Ingredients:
1 cup (100 grams) granulated sugar
¼ cup (60 grams) water
seeds of one vanilla bean (split a vanilla bean down the middle and scrape out the seeds) or 1 tbsp. pure vanilla extract (Note: If you are flavouring your buttercream and do not want to use the vanilla, you do not have to. Vanilla will often enhance other flavours but if you want an intense, one-flavoured buttercream, then by all means leave it out!)
1 large egg
1 large egg yolk
1¾ sticks (7 ounces; 200 grams) unsalted butter, at room temperature
flavouring of your choice (a tablespoon of an extract, a few tablespoons of melted white chocolate, citrus zest, etc.)
1.Combine the sugar, water and vanilla bean seeds or extract in a small saucepan and warm over medium heat just until the sugar dissolves.
2.Continue to cook, without stirring, until the syrup reaches 225◦F (107◦C) [*Note: Original recipe indicates a temperature of 255◦F (124◦C), however, when testing the recipe I found that this was too high so we heated to 225◦F and it worked fine] on a candy or instant-read thermometer. Once it reaches that temperature, remove the syrup from the heat.
3.While the syrup is heating, begin whisking the egg and egg yolk at high speed in the bowl of your mixer using the whisk attachment. Whisk them until they are pale and foamy.
4.When the sugar syrup reaches the correct temperature and you remove it from the heat, reduce the mixer speed to low speed and begin slowly (very slowly) pouring the syrup down the side of the bowl being very careful not to splatter the syrup into the path of the whisk attachment. Some of the syrup will spin onto the sides of the bowl but don’t worry about this and don’t try to stir it into the mixture as it will harden!
5.Raise the speed to medium-high and continue beating until the eggs are thick and satiny and the mixture is cool to the touch (about 5 minutes or so).
6.While the egg mixture is beating, place the softened butter in a bowl and mash it with a spatula until you have a soft creamy mass.
7.With the mixer on medium speed, begin adding in two-tablespoon chunks. When all the butter has been incorporated, raise the mixer speed to high and beat until the buttercream is thick and shiny.
8.At this point add in your flavouring and beat for an additional minute or so.
9.Refrigerate the buttercream, stirring it often, until it’s set enough (firm enough) to spread when topped with a layer of cake (about 20 minutes).
For the white chocolate ganache/mousse

(Note: The mousse can be made ahead and refrigerated until you’re ready to use it.)
What you’ll need:
•a small saucepan
•a mixer or handheld mixer
Ingredients:
7 ounces white chocolate
1 cup plus 3 tbsp. heavy cream (35% cream)
1 tbsp. liquer of your choice (Bailey’s, Amaretto, etc.)
1.Melt the white chocolate and the 3 tbsp. of heavy cream in a small saucepan.
2.Stir to ensure that it’s smooth and that the chocolate is melted. Add the tablespoon of liqueur to the chocolate and stir. Set aside to cool completely.
3.In the bowl of a stand mixer, whip the remaining 1 cup of heavy cream until soft peaks form.
4.Gently fold the whipped cream into the cooled chocolate to form a mousse.
5.If it’s too thin, refrigerate it for a bit until it’s spreadable.
6.If you’re not going to use it right away, refrigerate until you’re ready to use.
For the glaze
(Note: It’s best to make the glaze right when you’re ready to finish the cake.)
What you’ll need:
•a small saucepan or double boiler
Ingredients:
14 ounces white chocolate, coarsely chopped
½ cup heavy cream (35% cream)
1.Melt the white chocolate with the heavy cream. Whisk the mixture gently until smooth.
2.Let cool for 10 minutes and then pour over the chilled cake. Using a long metal cake spatula, smooth out into an even layer.
3.Place the cake into the refrigerator for 30 minutes to set.
Assembling the Opéra Cake
(Note: The finished cake should be served slightly chilled. It can be kept in the refrigerator for up to 1 day).
Line a baking sheet with parchment or wax paper.
Working with one sheet of cake at a time, cut and trim each sheet so that you have two pieces (from each cake so you’ll have four pieces in total): one 10-inch (25-cm) square and one 10 x 5-inch (25 x 12½-cm) rectangle.
Step A (if using buttercream only and not making the ganache/mousse):
Place one square of cake on the baking sheet and moisten it gently with the flavoured syrup.
Spread about one-third of the buttercream over this layer.
Top with the two rectangular pieces of cake, placing them side by side to form a square. Moisten these pieces with the flavoured syrup.
Spread another third of the buttercream on the cake and then top with the third square of joconde. Use the remaining syrup to wet the joconde. Spread the remaining buttercream on top of the final layer of joconde and then refrigerate until very firm (at least half an hour).
Make the glaze and after it has cooled, pour/spread it over the top of the chilled cake. Refrigerate the cake again to set the glaze.
Serve the cake slightly chilled. This recipe will yield approximately 20 servings.
Step B (if making the ganache/mousse):
Place one square of cake on the baking sheet and moisten it gently with the flavoured syrup.
Spread about three-quarters of the buttercream over this layer.
Top with the two rectangular pieces of cake, placing them side by side to form a square. Moisten these pieces with the flavoured syrup.
Spread the remaining buttercream on the cake and then top with the third square of joconde. Use the remaining syrup to wet the joconde and then refrigerate until very firm (at least half an hour).
Prepare the ganache/mousse (if you haven’t already) and then spread it on the top of the last layer of the joconde. Refrigerate for at least two to three hours to give the ganache/mousse the opportunity to firm up.
Make the glaze and after it has cooled, pour/spread it over the top of the chilled cake. Refrigerate the cake again to set the glaze.
Serve the cake slightly chilled. This recipe will yield approximately 20 servings.

del.icio.us Tags:

Monday, May 19, 2008

Lemon Cream Cake

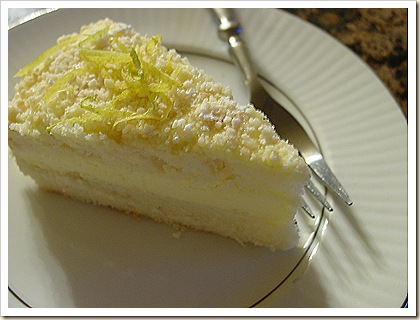
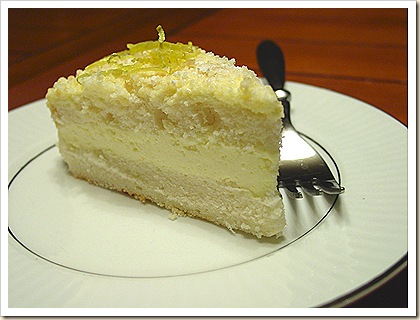
Kristens Food May 2008 037 #2 When Helen of Tartlette announced that she was hosting this months Sugar High Friday and that the theme was citrus, I knew I was in. I love desserts that are light and citrusy but what to make? I have a few lemon standbys that I always go for but this time I wanted to try something a little different. My mother-in-law has been talking about Olive Garden's Lemon Cream Cake a lot lately, so this post is dedicated to her and my attempt to recreate it. I think it turned out pretty darn close and boy was it delicious.

I decided to use the cake form Dorie Greenspan's party cake recipe since it had a nice crumb and was light. The filling I just kind of improvised as I went along, it's kind of a lemon and cream cheese mousse. The topping is just a crumb topping with powdered sugar, flour, butter and vanilla. Altogether delicious!

Lemon Cream CakeKristens Food May 2008 038 #3

Cake

2 1/4 cups cake flour
1 tablespoon baking powder
½ teaspoon salt
1 ¼ cups buttermilk
4 large egg whites (save the yolks for the lemon curd)
1 ½ cups sugar
2 teaspoons grated lemon zest
1 stick (8 tablespoons) unsalted butter, at room temperature
1 tsp. vanilla

To Make the Cake
Sift together the flour, baking powder and salt.
Whisk together the milk and egg whites in a medium bowl.
Put the sugar and lemon zest in a mixer bowl or another large bowl and rub them together with your fingers until the sugar is moist and fragrant.
Add the butter and working with the paddle or whisk attachment, or with a hand mixer, beat at medium speed for a full 3 minutes, until the butter and sugar are very light.
Beat in the extract, then add one third of the flour mixture, still beating on medium speed.
Beat in half of the milk-egg mixture, then beat in half of the remaining dry ingredients until incorporated.
Add the rest of the milk and eggs beating until the batter is homogeneous, then add the last of the dry ingredients.
Finally, give the batter a good 2- minute beating to ensure that it is thoroughly mixed and well aerated.
Divide the batter between the two pans and smooth the tops with a rubber spatula.
Bake for 30-35 minutes, or until the cakes are well risen and springy to the touch – a thin knife inserted into the centers should come out clean
Transfer the cakes to cooling racks and cool for about 5 minutes, then run a knife around the sides of the cakes, unfold them and peel off the paper liners.
Invert and cool to room temperature, right side up (the cooled cake layers can be wrapped airtight and stored at room temperature overnight or frozen for up to two months).

Filling

1/3 cup simple syrup (you will need more simple syrup to brush on the cake)
1 package unflavored powdered gelatin
1 batch of lemon curd (recipe follows)
1 pkg. (8oz) cream cheese, softened
3/4 cup whipping cream

1. Bloom the gelatin in a few Tbs. of water for about 5 minutes. Heat the simple syrup over medium heat and add the gelatin, bring the mixture to a simmer, stirring constantly, until the gelatin is completely dissolved. Set aside to cool.

2. In a chilled mixing bowl, beat the whipping cream until it forms stiff peaks. Transfer to another bowl and set aside.

3. In the mixing bowl, beat the cream cheese and the lemon curd until it is well mixed. Slowly drizzle in the cooled simple syrup, scraping down sides as needed. Add the whipping cream and beat with the whisk attachment until incorporated.

4. Chill the mixture until slightly thickened.

Lemon Curd

2 large lemons
4 large egg yolks
2/3 cup sugar
4 tablespoons butter, cold

1. Zest the lemons and set aside. Juice the zested lemons and strain the juice. In a small mixing bowl, whisk the egg yolks and sugar until smooth. Stir in the zest and lemon juice.

2. Pour the mixture into a non-reactive saucepan. Over medium heat, bring to a simmer. Reduce the heat to low and continue to cook, stirring constantly with a wooden spoon, until the mixture thickens and coats the back of a spoon. Remove from the heat and pour through a strainer into a glass bowl. Stir in the butter, 1 tablespoon at a time. Cool to room temperature then press a piece of plastic wrap onto the surface and chill in the fridge until completely chilled and set.

Vanilla Crumb Topping

1/2 cup flour

1/2 cup plus 2 Tbs. powdered sugar

5 Tbs. chilled butter cut into small pieces

1 tsp. vanilla

1. In a bowl mix the flour and powdered sugar. Cut in the chilled butter until small pea sized balls form. Drizzle the vanilla over and mix to combine. Chill the mixture until needed.

Assembling the cake.

When the cake cooled, slice in half horizontally. Brush the cut sides of the cake with the remaining simple syrup. Spread 2/3 of the filling on the bottom half of the cake. Top with the other layer of cake. Frost the top and the outside of the cake with the remaining filling and then press the crumb mixture onto the sides and top of the cake. Dust with powdered sugar. Chill for several hours or freeze to firm up the filling. Dust extra with powdered sugar before serving.

del.icio.us Tags: ,,

Friday, May 16, 2008

Easy Chocolate Oreo Truffles

Kristens Food May 2008 002 32

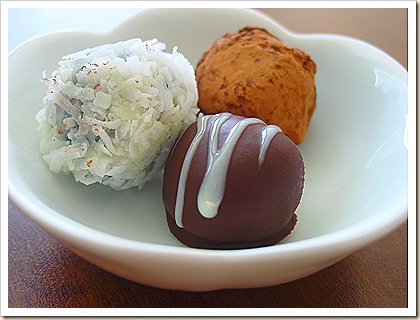
I know that I have been gone for awhile but I have a good reason. There are two things that I absolutely love doing one of course being cooking/baking the other is reading. The new Stephenie Meyer book called The Host came out last week and I couldn't put it down. So, as you can see, my cooking/baking passion took the back burner for a week. Now that I am done though, I plan on redeeming myself with several things this week. The first being super easy chocolate Oreo truffles. I can't take credit for this idea as I saw them on Bakearella's blog last year and have had them in my mind ever since. As promised, they were easy and delicious.

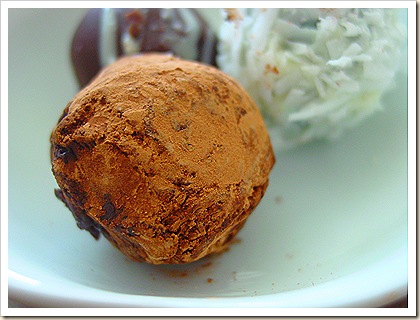
The inside is a combination of Oreos and cream cheese, then a coating of white or dark chocolate and an assortment of toppings, yumm...! I used dark chocolate with cocoa powder, white chocolate with coconut and then just plain dark chocolate with a drizzle of white chocolate.

Kristens Food May 2008 006Kristens Food May 2008 007 #2

Chocolate Oreo Truffles

Kristens Food May 2008 015 #2

1 package of Oreos

1 pkg. (8 0z) cream cheese, softened

dark chocolate

white chocolate

heavy cream (optional)

assorted toppings (nuts, coconut, cocoa powder, etc..)

1. In a food processor, grind the Oreos into crumb.

2. Mix the Oreo crumbs and the softened cream cheese together either by hand or in a food processor.

3. Scoop the mixture into balls and freeze or refrigerate until firm.

4. Melt the chocolate and add a little heavy cream to thin out if desired. Dip the truffles in the chocolate and roll in desired toppings. Chill until the chocolate is set.

del.icio.us Tags: ,

Thursday, May 8, 2008

Mini Berry Clafoutis Muffins

Strawberry clafoutis 082

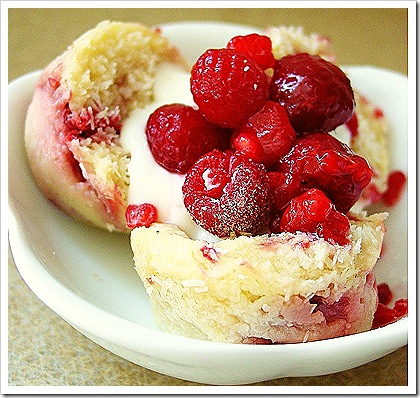
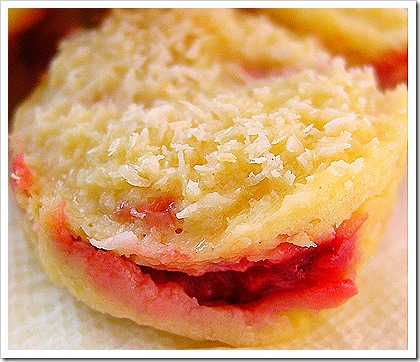
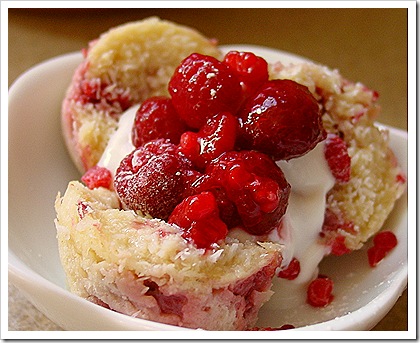
What, you’ve never heard of clafoutis (pronounced kla-foo-TEE)? If only you grew up in France where many a household have their own family recipe for the delicious breakfast and/or dessert. Clafoutis is a custard-like baked French dessert or breakfast that is typically made by baking fresh fruit, (traditionally cherries,) and a sweet batter similar to a crepe or German pancake batter. It is so delicious that I could eat it every day. In fact, I made it twice yesterday and had to forgo eating lunch to make up for all the delicious clafoutis that I ate. As I am writing this I am wondering why I haven’t made any today?! I’ll be right back…

Really, you have to try this, it is so easy and delicious you’ll wonder why you have never had it before. (Curse me and my typical American upbringing of processed boxed foods!) I mean, all we ever had in my house for breakfast growing up was boxed cereal, and not even the sweet sugar kind either. I can’t believe that this passes as a breakfast. I guess it does contain fresh fruit, eggs and milk so it can’t be too bad right? My problem is that I eat the whole thing, I can’t stop at one bite or a few little muffins.

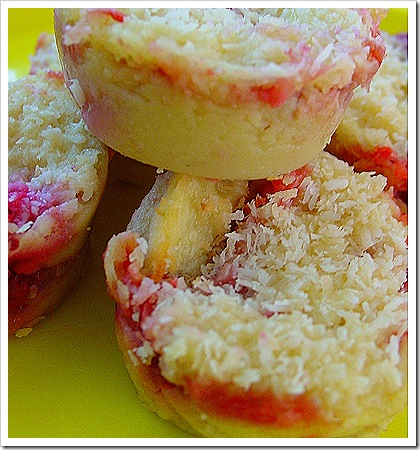
I tried several recipes and I really liked the one that my food blog idol Helen had on her blog. I made a few changes, and baked them in a mini muffin tin for an easy finger food and voilà, they are delicious. I know that the typical clafoutis recipe doesn’t contain cream cheese, but I just love cream cheese and berries so I had to throw some in there. Although I call these muffins, don’t be expecting what you and I would call a muffin, clafoutis has a custard like texture that is creamy and soft but it sets up enough when cool that you can remove them from the muffin tins and they hold their shape. This recipe can also be doubled and baked in several individual gratin dishes or one 8 or 9 inch round pan.

Mini Berry Clafoutis Muffins

Strawberry clafoutis 091

Strawberry clafoutis 086

Strawberry clafoutis 063

1 cup diced fruit, I used a mixture of strawberries and raspberries

1 ½ oz. flour, about 1/3 cup plus 2 tsp.

½ oz cornstarch, about 2 Tbs.

1 oz. brown sugar, about 3 Tbs. packed

1 oz. granulated sugar, about 2 heaping Tbs.

¾ cup milk

1 egg

½ oz. butter melted (1 TBS.)

1 oz cream cheese softened

1 tsp. vanilla

Coconut for the top, I use unsweetened


1. Preheat the oven to 350 degrees. Grease a mini muffin pan and divide the fruit between 20-21 of the spaces.

2. In a bowl, mix together the flour, cornstarch and sugars. Set aside.

3. In a blender, mix together the milk, egg, butter, cream cheese and vanilla. Blend for a few seconds until well mixed. Add the dry ingredients and mix until combined and no lumps remain. Do not mix too long.

4. Pour the mixture over the berries and top with the shredded coconut. Bake for about 24 minutes or until puffed and set. The clafoutis will puff up in the oven but will sink back down once cooled.

5. Let them cool in the pan to firm up and make removal easier. They are delicious hot, at room temperature and even cold right out of the fridge. If you remove them too soon form the pans they will fall apart but will still taste delicious. (I always eat a few while they are still piping hot because they are so good and I am so impatient!)

del.icio.us Tags: ,,

Monday, May 5, 2008

Cinco de Mayo at home

Cinco de Mayo 007

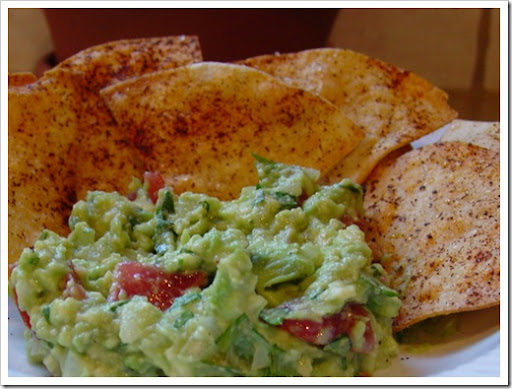
Happy Cinco de Mayo! If you haven’t noticed already, I really love Mexican food, so I had to celebrate this American-played-up holiday. I say this because I really think that it is a bigger deal here in the United States than it is in Mexico. Contrary to popular belief, Cinco de Mayo is not Mexico’s Independence Day. It is actually a celebration of the victory over the French in the battle of Puebla. So to celebrate I decided to make some guacamole and homemade baked tortilla chips. I also thought that I would try my hand at recreating one of my favorite Mexican-American restaurants dishes. I think that I came so close that if it wasn’t for their fresh tortillas it would be awhile before I went back.

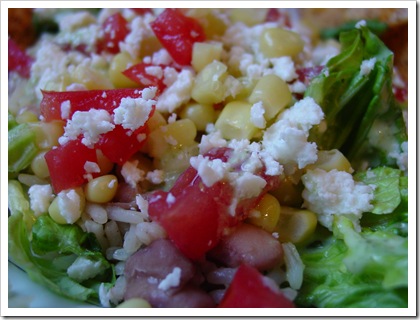
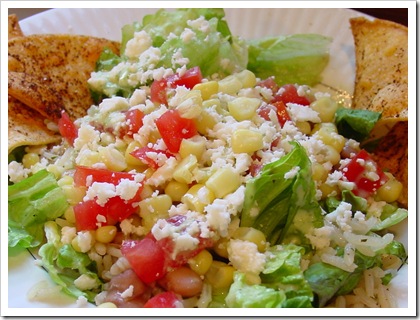
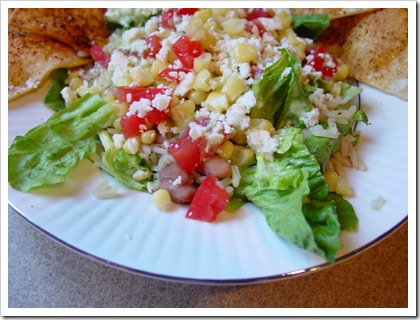
If you live anywhere near a Costa Vida, you must go. I am completely addicted to their food. It is fresh and absolutely mouth watering. I almost always order their taco salads which they serve in a hot homemade tortilla. They fill it up with romaine lettuce, cilantro lime rice, beans, pico de gallo, guacamole, sour cream, crispy tortilla strips, cotija cheese and here is the kicker, a delicious tomatillo ranch dressing. I was able to come close to their cilantro lime rice and their tomatillo ranch dressing.

The recipes may look like a lot of work for a single meal, but I actually made them yesterday when I had some time and then reheated them and made a quick yummy dinner tonight. To make the ultimate salad layer romaine lettuce, cilantro-lime rice, pinto beans, fresh corn, tomatoes, cotija cheese, and tomatillo ranch dressing. Serve with tortilla chips.

Cinco de Mayo 015

Quick and Easy Guacamole

2 avocados

2 roma tomatoes, seeded and chopped

½ white or red onion, chopped

2 Tbs. cilantro

1 jalapeno seeded and finely diced, optional

Juice of 1-2 limes

Salt to taste

Scoop out avocado and mash with a fork. Add the remaining ingredients and mix to combine. Taste for seasoning and add more salt or lime juice as needed.

Homemade Baked Tortilla Chips

6 corn tortillas

Cooking spray

Course salt

Chile powder

Preheat oven to 450 degrees. Spray 2 cooking sheets with cooking spray. Cut tortillas into wedges and arrange in single layer on the baking sheets. Spray with cooking spray and sprinkle with salt and chile powder. Bake for 8-10 minutes or until crispy. They will crisp up a little more once they cool off. Watch them carefully because they will go from crispy to burned very quickly.

Cinco de Mayo 019

Cilantro Lime Rice

2-3 Tbs. vegetable oil

1 ¼ cups jasmine rice

Zest of ½ a lime

Juice of 2-3 limes plus more for serving

1 cup vegetable or chicken broth

1 ¼ cups water

1/3 cup chopped fresh cilantro

Salt to taste

Heat the oil in a large skillet over medium heat. Add the rice and sauté stirring occasionally until translucent and fragrant. Add the lime zest and juice, the broth and the water. Stir and bring up to a simmer. Turn heat to low and simmer covered for 20 minutes. Fluff with a fork and add the cilantro, more lime juice and salt to taste.

* if you are making this ahead and want to refrigerate it, spray a large baking pan with cooking spray and spread the hot rice out on it to cool. This will help it cool faster and prevent it from sticking together as it cools. Once cooled it can be transferred to an airtight container and refrigerated.

Cinco de Mayo 006

Tomatillo Ranch Salad Dressing

2-3 tomatillos, husked and rinsed clean and roughly chopped

2-3 cloves of garlic

2 jalapenos, seeded and roughly chopped

1/3 cup chopped fresh cilantro (about ½ a bunch)

1 cup mayo, (I use the reduced fat)

1 cup buttermilk

Juice of 1-2 limes

1 packet Hidden Valley ranch seasoning

Salt to taste

Put all ingredients in the blender and blend until smooth. Flavors develop more as it sits in the refrigerator.

Easy Homemade Pinto Beans

1 pound of pinto beans

Water to cover

1 Tbs. salt

2 bay leaves

Red pepper flakes, optional

Rinse the beans and sort through them to remove any debris that may have been left behind. Place the beans into a crock pot and cover with water 2 inches above the beans. Add the remaining ingredients. Cover and set to high for 6 hours or low for 8-10. The beans should be soft with a creamy texture when cooked all the way through. To make the beans a little thicker, remove 1-2 cups of the beans with some of the cooking liquid and puree in a blender. Pour the mixture back into the rest of the beans. This will thicken them up, especially when they cool down. Taste and add salt if needed.

del.icio.us Tags: ,,

Friday, May 2, 2008

Brownies for breakfast?

 Kristen's Food April 2008 100

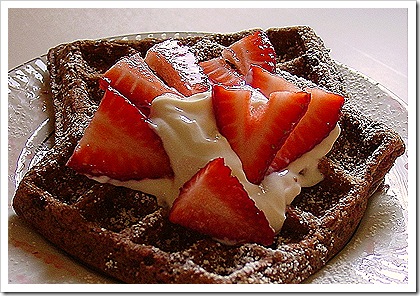
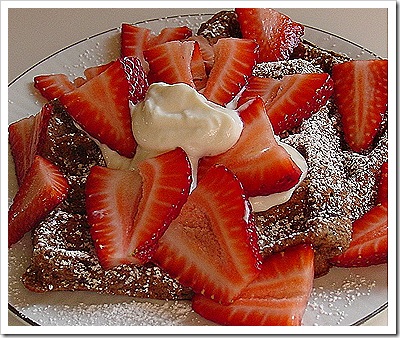
Ok, Ok, we really didn't have brownies for breakfast, what kind of mom do you think I am?  We did have chocolate chocolate chip waffles though and as I was eating them and receiving praise from all three of my kids I realized that I was feeding my family glorified brownies for breakfast.  At least it got me the title of "best cook ever" and "best mom ever".  I think that feeding my kids something that probably isn't that nutritious for breakfast once in while so that I can receive such praise is worth it.

It has been said that necessity is the mother of all invention and that is what it has felt like in my kitchen lately.  Every time I try to make a recipe lately I seem to be out of some key ingredient.  I set out to follow a recipe for Chocolate Waffles from Alton Brown and realized that I was an ounce short of cocoa powder, which is kind of an important ingredient in chocolate waffles.  I quickly looked through my pantry for a suitable substitution.  I found some unsweetened Baker's chocolate and decided that it would be a suitable substitution but that I would need something to counter balance the extra liquid and lack of dry ingredients.  I added a little cornstarch and some extra four and the waffles came out perfectly.  Now I can't vouch for how close they are to the original but these were definitely delicious.  I also served these waffles with a sweetened sour cream.  I  love to dip my strawberries in sweetened sour cream and so I thought that it would be suitable to put on top of the waffles with the strawberries to balance out the waffles.  It was delicious!

Kristen's Food April 2008 108

Here is the link to Alton's recipe, which I am sure is delicious!

Sweetened Sour Cream

1/4 Cup Sour Cream

1-2 Tbs. powdered sugar

1/4 tsp. vanilla

Mix all ingredients together, adding more or less sugar to taste.  Use to dip strawberries or top the waffles.

del.icio.us Tags: ,